I strongly encourage non-destructive editing where possible. Check out https://resources.waverleycameraclub.org/non-destructive-editing/ for some of the reasons why. Rather than changing your original image, try to do the edits on separate layers over the top of the original. That way you can always go back and refine your edits if you want to. Once you change the original, it is very hard to undo.
Lightroom – spot healing/healing brush tool
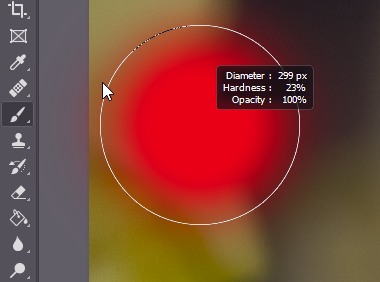
This is a powerful tool. You can set the brush size and feathering. Choose either Clone mode or Heal mode. Then spot or paint over the area you want to repair. LR will (non destructively) find an area and use this as a source to repair the area you clicked/brushed. LR shows the source area as an outline. If LR chooses the wrong area, drag the source area to a more appropriate region. In Clone mode, the repair will duplicate the source area and in Heal mode LR will interpolate textures and blend. If the repair with one mode doesn’t look quite right, try clicking on the other mode to see the effect.
The clone stamp tool is very powerful. In photoshop the tool has many options. It is well worth while exploring each one and finding out what they do and when to use them.
I recommend creating a new layer over the layer you are repairing. Set the clone stamp tool to sample “Current and Below” and make your edits. The cloned areas will appear on the new layer overlying the source layer. If you make a mistake you can erase it from this layer without affecting the original.
Transformations can allow you to correct converging verticals, adjust aspect ratios, correct lens distortions or to distort the image in multitudes of ways. Most editing programs give you rotate and crop. Some allow you to correct perspective (eg converging verticals). Some give you endless control to twist, distort, shape and texturise your images. I will start with some generic comments and then discuss some of the capabilities of Photoshop and Lightroom. If you use other programs, you may well find they have similar tools and once you know what you might want to achieve and what to look for, you should be able to find specific instructions for the software you use. The notes below outline some options for transformation and distortion but they are far from comprehensive.
Rotation and Scale
Rotation and scale are probably the most frequently used transformations. Handy for fixing sloping horizons or tilted buildings, but also for more creative use. For example if you are making composites you are almost certain to need to adjust the relative sizes of images as you composite them together get all the elements together in appropriate scales.
Perspective
Perspective comes from the fundamental physics that things further away look smaller (ie occupy a smaller part of your eye’s retina or your camera’s sensor. It provides a sense of depth to images, but in some circumstances it can be a distraction. Consider the images below. The left panel shows converging verticals – the lens was pointed upwards and the roof is further away from the camera than the floor so the perspective lines converge. Using perspective controls one can straighten this out. Note the bits of white at the bottom corners. The top has been stretched horizontally to correct the vertical convergence, making the bottom (relatively) narrower. The white is where the original frame is extended. You can use tools like Content Aware Fill in photoshop to fix this.
Aspect Ratio
Aspect ration refers to the relative dimensions in the vertical and horizontal directions. You may want to adjust this to correct for distortions after perspective adjustments, or just to make something look taller and narrower, or shorter and wider for creative effect (or just because it looks better)
Warp
The perspective controls make linear changes – ie things are adjusted along straight lines. Warp introduces curved adjustments. This may be valuable to correct for curvatures caused by lens distortion (especially with wide angle lenses) such as barrel or pincushion distortion. Note that many recent processing packages such as Lightroom and Adobe Camera Raw have the ability to automatically correct these sorts of lens distortions. In the images below I used warp transformations to make a fish-eye lens image more rectilinear.
Puppet warp
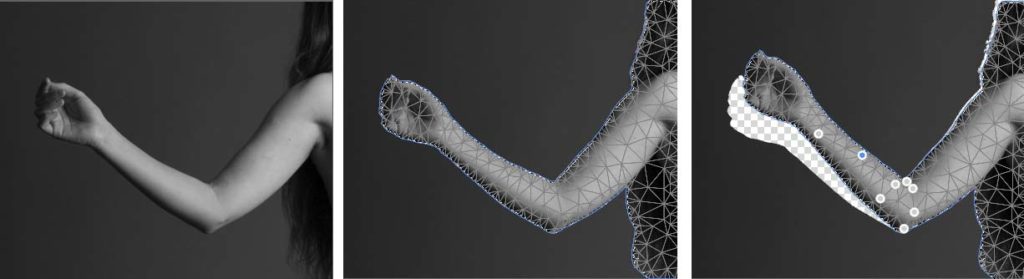
Puppet warp (a feature in photoshop and some other software) allows you to move parts of an image about relative to other parts. In the example below I have used Photoshop to reposition an arm. I selected the model’s arm. Puppet-warp places a network of nodes over the selected area. I then clicked on several nodes around the elbow to lock their position (I should also have locked the nodes further up the arm and shoulder to stop them moving). I then dragged some nodes on the forearm to change the angle of the arm. All the pixels in the forearm get dragged and repositioned in concert. Once in position, accept the warp and the arm is now fixed in the new position. The area where the arm used to be needs to be repaired, but usually a content aware fill or a bit of work with a clone stamp will do the trick.
You can use Puppet warp to re-shape things easily. Give your male model bigger muscles and square up his jaw, perhaps? Give it a try and see what you can do.
Liquefy
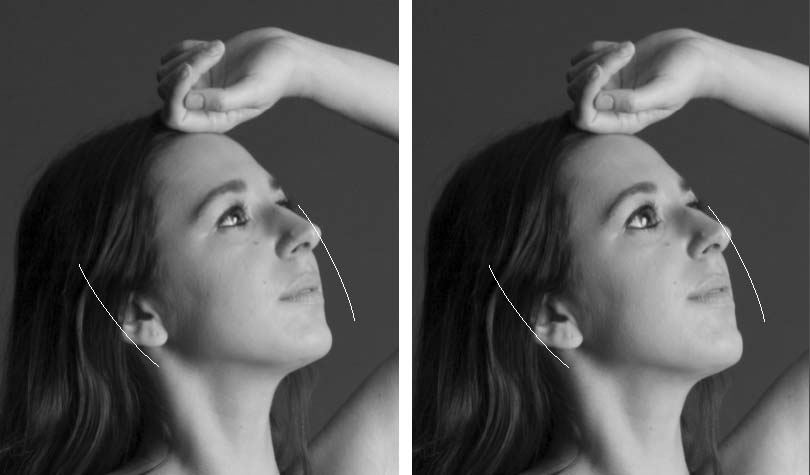
The liquefy filter in Photoshop (PS) allows you to push parts of an image about as though the image was made of rubber or perhaps as if it were wet paint on a canvas. You can push and pull, enlarge and shrink and otherwise manipulate. The tool in recent photoshop versions has face-sensitive controls that allow you to easily retouch portraits – adjust eyes, noses, mouths, chins etc. In the example below I have used the face controls in PS liquefy to slightly lengthen the face, change the mouth (smile), nose (smaller), eyes (much larger), cheek (higher) etc (the arcs to the right and left of the face are from the liquefy preview, indicating the face being edited). All this is done with previews as you go, with a couple of dozen sliders.
These filters allow you to make overall adjustments to an image. One popular use is in the Little-world images, where a panorama is transformed to polar coordinates.
Filters that add ripples, raindrops on water effects and so on are easy to find, as are filters that apply local distortions to get painterly effects (eg check out Photoshop’s Filter Gallery – make sure your image is set to RGB 8-bit mode or it will be greyed out). There are too many options to list here. Have a look on the internet for further information.
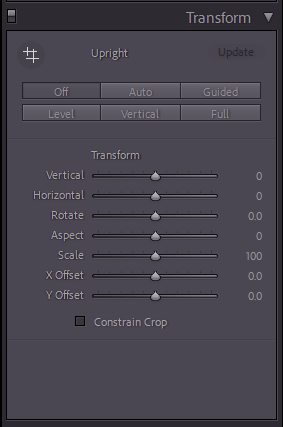
Transform in Lightroom CC
Lightroom does not have the power of Photoshop but has a lot of transformation tools. Lens distortions can be automatically adjusted, or you can take manual control.
Lightroom also has extensive tools for rotation in the develop module. Using the Crop tool allows you to rotate (click and hold your mouse button outside the crop box and drag up or down. Release the button to fix the new rotation).
The Transform Panel gives a range of additional tools including Auto modes, adjustment for horizons (these auto modes often do what you need, so give them a click, and if they fail, undo the edit and try the manual controls. I find the Guided mode gives me a great deal of control, sometimes coupled with the Aspect slider, since sometimes perspective adjustments lead to some horizontal or vertical squashing or stretching. The links below give more detailed information.
Using keyboard shortcuts can speed your work compared to hunting through the menu system. And the keyboard shortcut system is flexible. You can change the default settings to suit your needs. To customise, use the Alt+Shift+Control+K (Mac users use the command key not control key for these shortcuts).
For a full list of the default keyboard shortcuts go to https://helpx.adobe.com/au/photoshop/using/default-keyboard-shortcuts.html. The first section on this page gives some of the more popular shortcuts. Note that you can switch between tools by pressing the relevant key (shown on the toolbar context menu). For example, B brings up the brush tool (last type of that brush – in the figure to the right, the default brush selected is the ordinary brush tool, but if you , for example, selected the pencil tool, then B would bring up the pencil tool. Some common usages are listed below.
V
MoVe tool
M
Marquee tool
W
Wand tool
C
Crop tool
H
Healing Brush tool (H and B were already taken, but J was free)
B
Brush tool
E
Eraser tool
G
Gradient / Paint bucket tool
H
Hand tool
X
eXchange foreground and background colours
Some of the most common keyboard shortcuts that I use are:
Ctrl-0
Zoom image to fit full windows (note: zero not O). Also double click the hand tool for the same effect.
Ctrl-1
Zoom image to 1:1
Ctrl-+
Zoom in
Ctrl–
Zoom out
Ctrl-T
Free transform selected layer
Shift-click
when selecting – start adding to selection
Alt-click
when selecting – start subtracting from selection
Ctrl-J
new layer by copying current layer (just the selection if a selection is active)
Escape
Close modal dialogs
Ctrl-Z
toggles the last edit off or on (I usually customise this, to
spacebar
Switch to hand tool (when not editing text)
I customise my shortcuts to make Ctrl-Z be Undo not Toggle Last State so Ctrl-Z in PS behaves like all my other Windows Applications.
Alt-Right Click-Drag to adjust brush size and feather.
Another shortcut I use often is changing brush size and feathering. With a brush selected, hold down Alt, and right-click. Drag left and right and left to adjust size, and drag up or down to adjust the feather.
General principles about selections are covered here. A common problem is making a selection that involves hair. Those hundreds of fine whispy strands provide challenges for selection. Here are some tutorials on various strategies. Most are based on Photoshop, but the same general principles apply if you use other software. They also apply to, say, selecting the sky from leaves and branches of a tree. Essentially the same problem – selecting lots of fiddly bits. Remember that the process of selection is easier if the hair is clearly distinguished from the background by colour or luminance, or focus. If there is no clear distinction between the hair and the background, making an automated selection is near impossible for the software. Don’t expect miracles. Here are some suggestions (if you have control of the shooting setup):
Use a green-screen (or blue-screen) background
Use a dark background and backlight the hair to make a distinct luminance contrast. Or with black hair, have a lighter toned background.
Use a suitable depth of field, so the background is very soft and the hair is very sharp (you can then use approaches based on finding edges to select the hairs)
If just part of the outline is difficult, cut it out and use a clone tool to paint some whispy hair bits from elsewhere around the head
The video linked below shows an approach using GIMP, but the approach is equally applicable to making difficult selections in Photoshop. Note in this video the presenter uses differences in brightness to build the mask. you could equally use colour channels if there is a colour contrast between the background and the hair.
This video shows an approach using GIMP, but the method could equally be used in Photoshop.
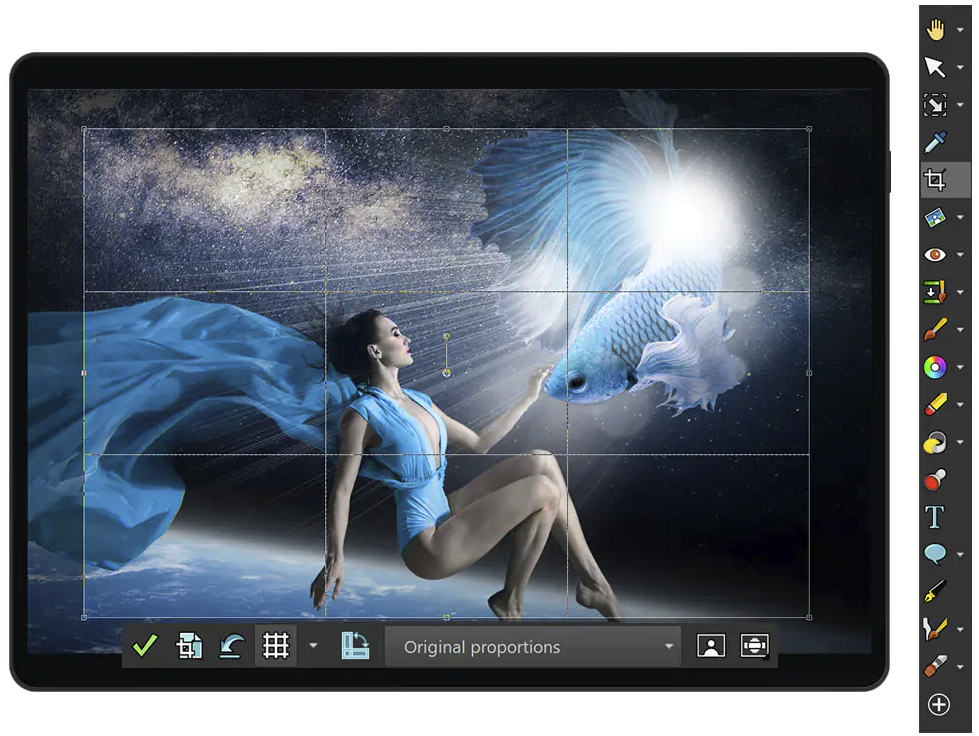
Your camera has a fixed sensor size and aspect ratio. Very often your image will capture things that you might want to crop out. Maybe you have shot some scenery with a wide angle lens to capture the broad horizon and want to crop out the foreground and background to make a panoramic image. Perhaps you shot a portrait, but now realise that the composition would have been better if you had missed out all the distractions in the background. Cropping is a simple but powerful tool.
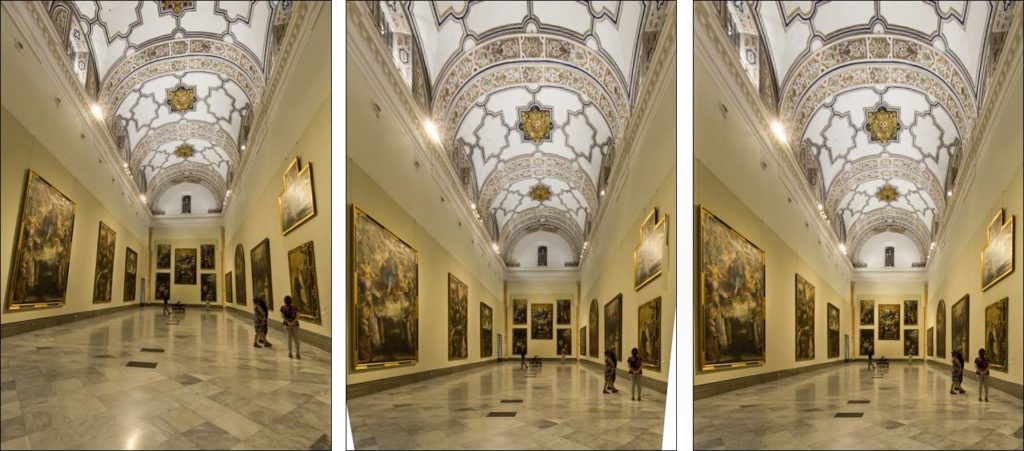
Consider the images below. The left panel is uncropped. Verticals are slightly off vertical (note the lamposts tilted relative to the side edges of the image) and there is a lot of space on the left and foreground that adds nothing to the image. Straightening and cropping gives a stronger image.
Sometimes a very severe crop is needed. Today’s cameras have so many pixels you can throw most away and still get a good result. On the example below, the original frame captured was lack-lustre. Cropping tightly down on the feet of the horses and the polo ball makes a far more interesting image.
Cropping can help you improve your compositions by cutting out distractions, balancing compositions by moving elements relative to the frame, focusing on key details, and generally giving you a tool to make more eye-catching images.
Some general principles
Straighten horizons (in general). We are used to horizons being horizontal and tilted horizons can be unsettling to the viewer. Crop tools usually have rotation functions to facilitate this. On the other hand, you might want to creatively tilt an image for dramatic effect. A strong diagonal element in a composition can add a dynamic component.
Crop off parts of the image that do not assist with the “story” of the image or contribute to the compositional balance.
You can use cropping to remove distractions from the edges of your image
Consider converging verticals – sometimes images are improved if you correct the verticals (see Transformations and distortions)
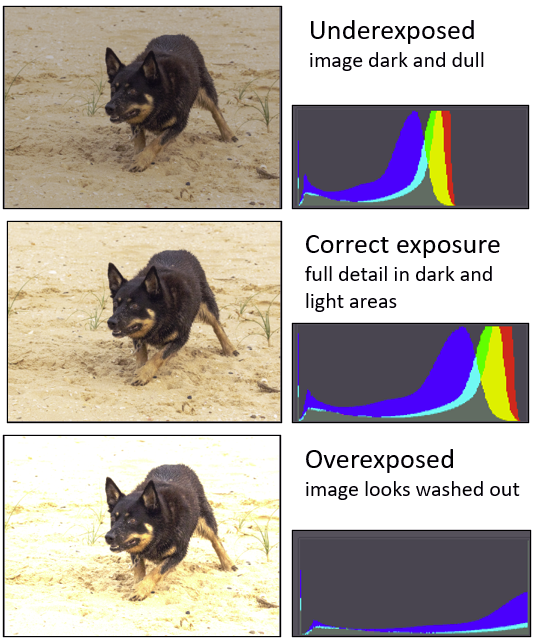
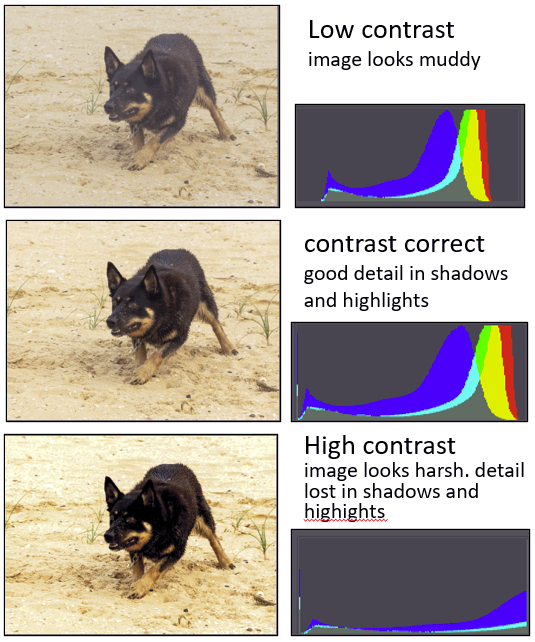
Images are made up of 3 channels of red, green and blue pixels, each with its own brightness level. Brightness of 0 in all channels gives black; Brightness of 255 in all channels gives white. In post processing, simplistically, we can adjust the pixel values across the image to make the image brighter (increased exposure) or darker (decreased exposure) or adjust the balance between dark and light pixels (contrast).
Lets look at an example. In the image below the left column shows the image. On the right are histograms showing the distribution of dark (to the left) and bright (to the right) pixels. In the middle row you can see from the histogram that the brightness levels are spread all the way from black to white. There is a hump towards the right because there is a large area of fairly bright sand in the image. With underexposure (top row), the histogram is skewed to the left, detail is lost in the shadows, and the image looks dull. Overexposure (bottom row) shifts the histogram to the right. The image looks washed out; detail is lost in the highlights, and the dark fur looks grey rather than black.
Contrast relates to how broadly the pixels are distributed in the histogram. If the contrast is too low the image will look muddy and there will be few if any pixels at the extremes of brightness and darkness. If contrast is too high the image will look harsh, with loss of detail in the highlights and shadows and most of the pixels are distributed to the extremes of lightness or darkness.
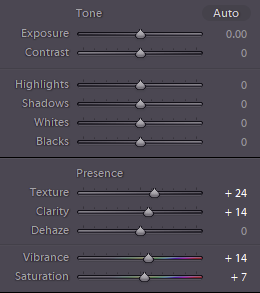
Fortunately, image processing software allows you to easily adjust the exposure and contrast. The basic edit controls from the Lightroom develop module show the Exposure and Contrast sliders along with several other sliders that give you a great deal of fine control. Most software has similar controls available. What do they all do? The best idea is to take an image and play with the sliders to see what the effects are.
Exposure: adjusts the overall brightness
Contrast: spreads out (slide to right) or centralises (slide to left) the tones in your image.
Highlights: adjusts only the brightest areas. Use this to bring back lost detail in bright areas
Shadows: adjusts the darker areas and can bring back detail in the shadows
Whites: adjusts the white point of the image. Moving this slider to the right makes white tones brighter. This control affects the whole image though the effect is most obvious in the light areas.
Blacks: adjusts the black point. Moving this slider to the left can move the dark areas further towards black. This control affects the whole image but the effect is most pronounced in the dark areas.
Presence: the controls in this section work in various ways to bring out detail (slide to the right) or reduce detail (slide to the left). They can make your images pop. Experiment to find what they do.
Luminar 4 – essential edits
To the right is one of the editing panels from Luminar to show that the same sorts of basic controls are present – colour balance, exposure, contrast, highlights, shadows, whites and blacks. Other panels cover a suite of other adjustments. Topaz and Affinity have similar basic edit panels.
Further Resources
Here are some links to resources that explain more fully the editing controls and strategies to adjust your image. Some of the links also cover colour balance, cropping etc.
There are lots of packages available, some expensive/subscription, some free. All have pros and cons in terms of features and ease of use.
Tim Keane has made a brief comparison of Photoshop, Photoshop Elements, Lightroom and the free MS Photo.
Another good resource, that John Morter has pointed me to, is the “Life after Photoshop” website. It seems to have a good selection of reviews, and lots of tips and tutorials on various software packages. Some of the reviews (eg this one) provide side-by-side comparisons of the performance of the various packages with a range of sometimes challenging images. A caveat with reviews is that the developers are constantly improving the software, so it is important to check the dates on the reviews or that the reviews are for the current software versions. The Life after Photoshop site seems to be actively developed, and many of the pages are up-to-date.
Besides these, other software commonly used by photographers for image manipulation includes (among others see HERE for a range of other software) DxO Photolab, Topaz Studio, Affinity Photo, Luminar, Paintshop Pro, Exposure X6 and open source and free applications like GIMP, Dark Table, Raw Therapee, Krita and Photopea. Many of the paid software makers offer free trials so you can spend some time assessing and comparing the packages. Some packages have particular strengths or functionality that is not present in the other software. There is no need to restrict yourself to just one. Many of them also provide plug in functionality that allows, say a Lightroom user to directly send an image to, say, Luminar or Topaz or Affinity Photo, and place the edited file back in the LR catalog after your edits in the other program are done. Alternatively you can edit in one package, and save to a TIFF that you can open and edit in a different package to take advantage of the differing tools and functions of the various programs.
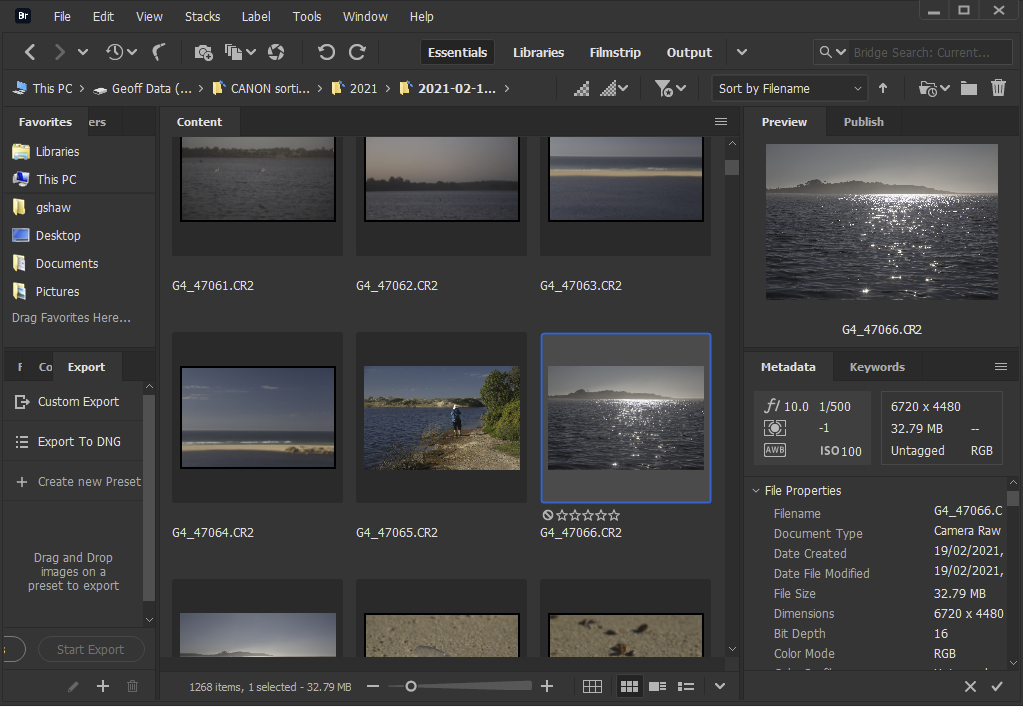
Some of these programs provide file management (also referred to as digital asset management or DAM) as well as image editing. File management can be a great boon allowing you to find images down the track. If your selected editing software does not provide this function I recommend you explore a file management package to complement it. Adobe Bridge (free) has some powerful functions, allows you to preview, rate, add keywords, manipulate file metadata, and open files with editor programs. There are many other packages to consider – https://en.wikipedia.org/wiki/Image_organizer gives a good overview, as does the digiKam documentation at https://docs.kde.org/trunk5/en/digikam-doc/digikam/using-dam.html.
No matter what software you use, take some time to read the documentation and learn how to use the software. If the software includes file management, then it is sensible to use these functions if you want to reorganise your files, especially for packages like Lightroom, where the catalog contains information about where files are stored. If you move files using your operating system file management, Lightroom will no longer be able to find your files until you tell it where they have gone.
As Lightroom and Photoshop are the most commonly used software for image editing, these feature in the examples in this website. However usually the general principles will apply to other software packages, though with different user interfaces.
Note that RAW image processors work in a non-destructive editing paradigm, saving the editing steps in a database or sidecar file so when you open the RAW file, your software uses the editing steps to recreate the final edited image. This does not mean these editing steps are compatible between software packages. Different programs use different underlying maths to make the edits and may have different editing filters, so you cannot make a non-destructive switch of edits from one package to another.
I have outlined some of the available packages below. These are very brief outlines of these applications as I experienced them. These are not detailed reviews. For most, I have a second page focusing in more detail on a single application, You can also search the internet for up-to-date detailed reviews (but beware, some reviews can be biased because some web authors get paid to be nice to some vendors).
Lightroom incorporates extensive file management capability with excellent image editing and a non-destructive workflow.
Available together in the Adobe CC Photography plan for a monthly/yearly subscription, this is the most commonly used photo management and editing software and has a wealth of online resources. It has amazing tools and a good user interface. For many users Lightroom alone gives them powerful image management and editing workflows with an effective user interface. Photoshop adds huge creative power to image manipulation (at the expense of complexity and a lot of learning how to use it). It is easy to flip images from Lightroom to Photoshop for more complex edits, then return the edited image to Lightroom for further editing or file management. I will assume the use of the desktop versions of these applications rather than the mobile or cloud based variants in my descriptions of how to use the programs in this website.
Photoshop goes beyond Lightroom’s image editing potential with extensive processing filters, layers and masks and ability to easily combine and blend different images
Many people dislike the subscription payment model. Adobe CC photography plan (includes Lightroom+Photoshop) is currently (2021) about AU$14.25 per month. However, compared to the typical investment in cameras, lenses, filters, lighting, bags and other accessories, SD/CF card media, computers, monitors, printers, backup drives, insurance … the annual subscription cost of the Adobe software (which provides continuous access to all the updates) isn’t overwhelming. Nevertheless, there are many viable alternatives out there for free or reasonable one-off cost for a perpetual license.
You can download Adobe’s flagship desktop media browser and digital asset manager for free, and it works fine as a standalone application. You can use it to browse and organise your image library. You can add keywords, rate images etc etc. Whilst it had no built in image editing capabilities, you can open image files in the editor of your choice (default is Photoshop, of course). You can download from Adobe at https://www.adobe.com/au/products/bridge.html. There are guides on its use at https://helpx.adobe.com/au/support/bridge.html.
Adobe Camera Raw (ACR)
Surprisingly, Adobe make ACR free to download as part of the Adobe Bridge package. It is the same engine used for RAW processing in Lightroom and Photoshop, and has a wealth of capabilities in processing RAW files that you can then save as PSD, TIFF, JPEG etc.
Free and powerful/ Windows. OSX, Linux. Similar to Photoshop in what it can do. Huge numbers of add-ons to add filters etc. User interface not as sleek, and needs an added (Free) package (eg RawTherapee, UFRaw or DarkTable) to open Raw files. However if you can spend a little time to install GIMP and learn the ropes, you will have a very powerful, very flexible and very extensible image editor for an unbeatable price. I have made a page with more details; or go to the GIMP home page https://www.gimp.org/
Another free and powerful application for Windows. OSX, Linux. Raw Therapee is to Lightroom what GIMP is to Photoshop. It provides outstanding raw file editing but, at present, no local adjustments. File management includes sorting and filtering based on metadata, rating and colour labels, though the digital assets management functionality is much less than LR provides. More HERE.
Darktable is another free, open source application available for Windows, OSX and Linux. It has file management with filtering and sorting, keyword tagging and metadata editing, a powerful non-destructive image editing workflow (for both RAW and non-raw formats) with a comprehensive array of adjustments available. It also has local editing /masking. See HERE for some more information.
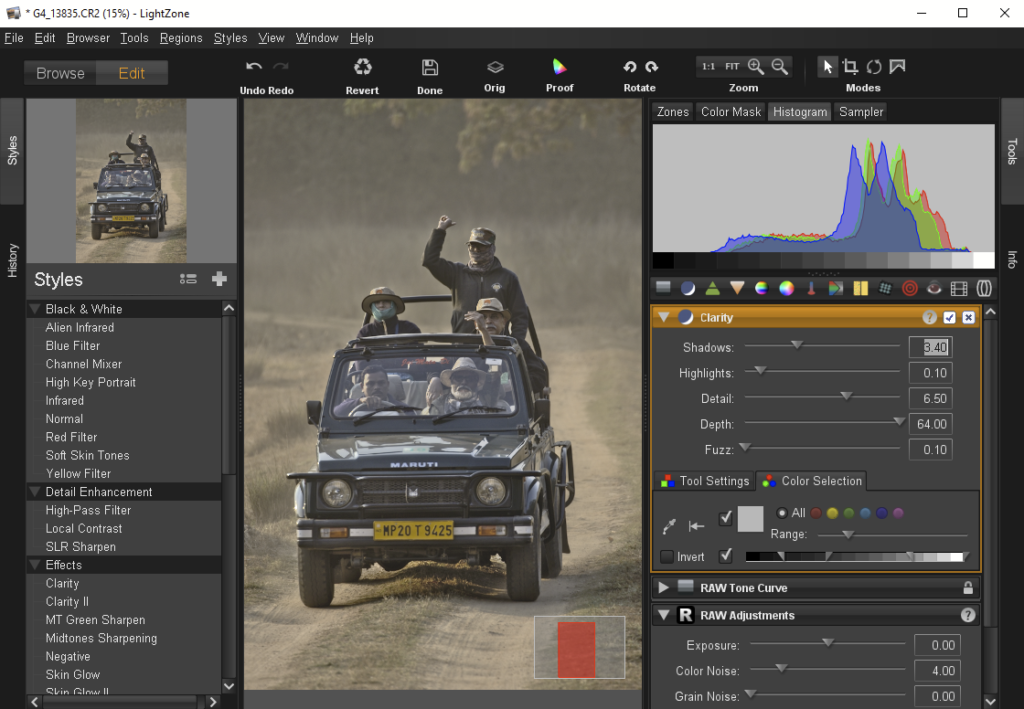
LightZone is a free open-source photo editor with an emphasis on workflow. It provides a non-destructive editing of a variety of RAW formats (it can also handle non-RAW formats like TIFF and JPEG). In many ways it is similar to Lightroom (but free). Versions are available for Windows, MacOS and Linux.
It has a similar workflow paradigm to Lightroom. It has file management functions, and metadata editing (limited; no keywording supported) as well as editing adjustments, masking etc.
You can get a good idea of the User Interface by browsing the LightZone screenshots.
Lightzone Editing screen. Note the extensive list of “styles” on the left – these add filters with sliders to modify the effect into the processing sequence on the lower right below the histogram.
This is a community based project, so don’t expect as complete a level of documentation as you might with some other software, but the community is available online to provide answers to all your questions.
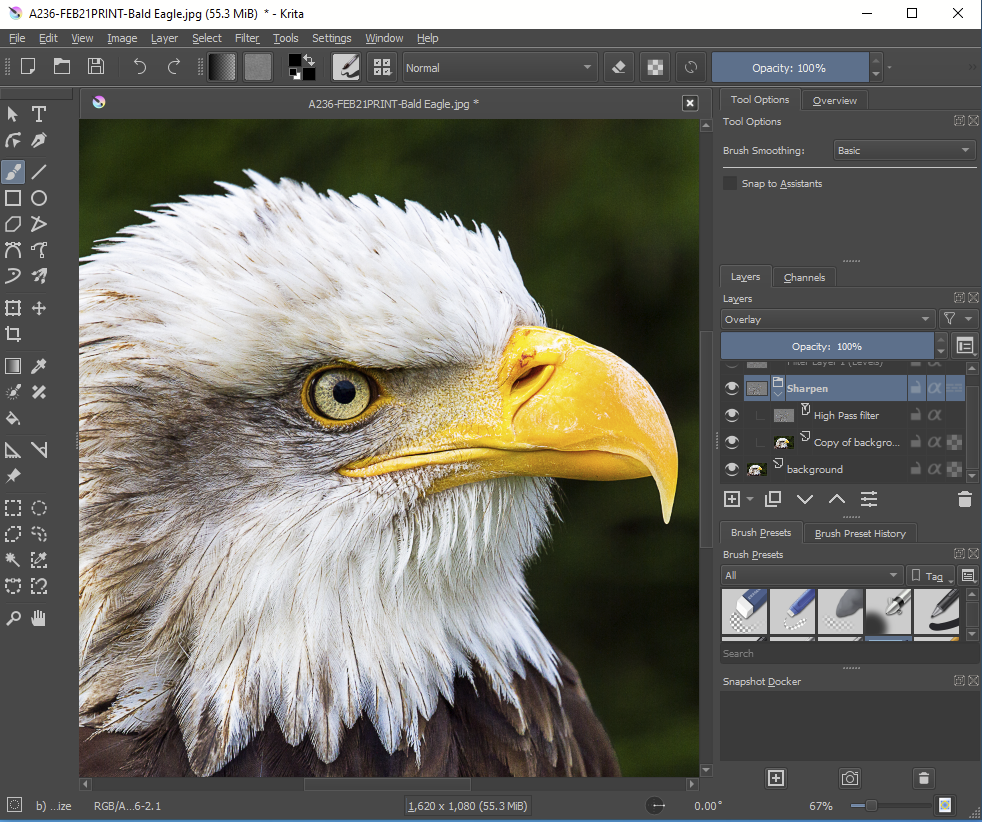
Krita is a free and open source graphics editor for Windows, Mac OS and Linux. It is designed primarily for graphic artists for digital painting and 2D animation, but it is also a competent editor for photos.
It supports layers (including non-destructive filter layers), layer blending modes and effects, masks and so on. See HERE for a bit more detail.
Powerful filters, layers, masks. Presets for easy automated global changes. Unique AI based tools. can add textures with blending modes, and composite different images. Automated sky replacement. File management including Albums. One-off purchase (unless you upgrade to a newer version). Luminar (https://skylum.com/). Plugins to allow it to be used with some other software. Extensive training resources and online manual. Luminar 4 has a full layering system. Luminar AI uses sophisticated AI approaches in its adjustments. It does not have explicit layers, but there is flexible masking for applied adjustments. More detail HERE.
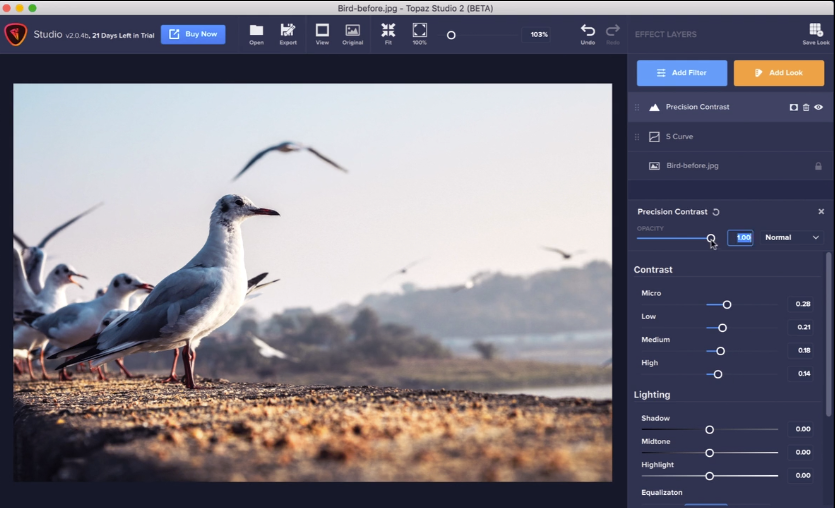
Powerful filters including some unique AI based tools, layers, masks. One-off purchase (unless you upgrade to a newer version). https://topazlabs.com/ Standalone or plugin. A more detailed post is HERE.
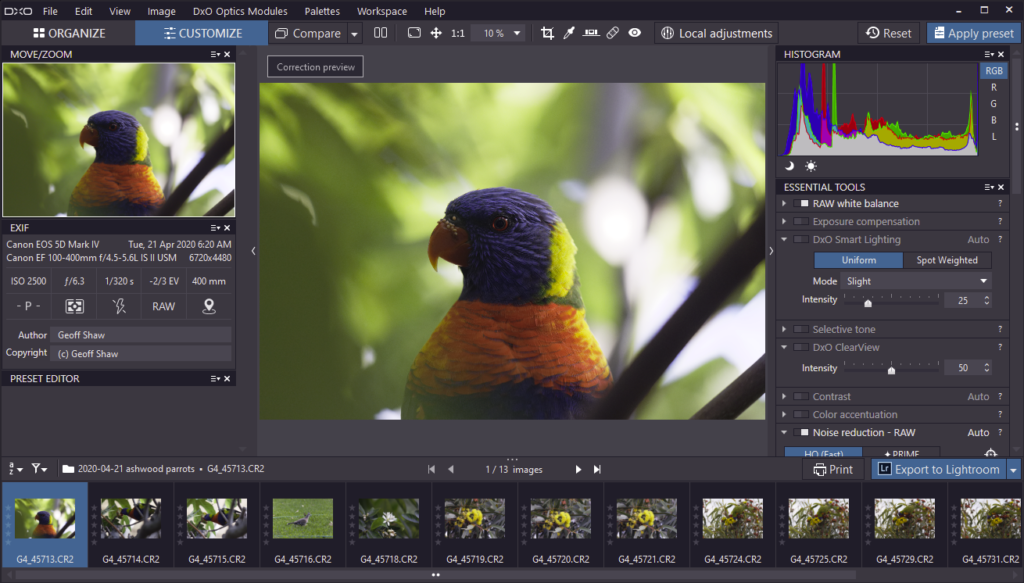
Basic file browser with indexing of photos; virtual image copies; images can be organised by Projects; star rating; no support for keyword management and other digital asset management functions. Powerful filters, layers, masks. Collections of preset edits to quickly try and modify. One-off purchase (unless you upgrade to a newer version). https://www.dxo.com/dxo-photolab/ Standalone or plugin. A post with more information is HERE.
Powerful filters, layers, masks. Compositing, Powerful Raw file editing; PSD editing and smart object support. Retouching tools; content aware in-painting brush; HDR and focus stacking; It lacks digital asset management, and doesn’t appear to allow a non-destructive raw workflow (it does not save the edits in a sidecar file or database – you edit and save an output file, so if you want to re-edit the raw file, you start again from scratch – I think some edits may be saved in layers in an output PSD or TIFF file) – One-off purchase (unless you upgrade to a newer version). affinity. https://affinity.serif.com/en-gb/photo/.
Capture One started life as software to support Phase One’s high-end digital cameras, in particular in tethered image capture situations, but is now available for most makes. It is a superb professional Raw image processor. It is feature rich, with a layered image processing model. It has image management/cataloging functions, though not as good as Lightroom’s.
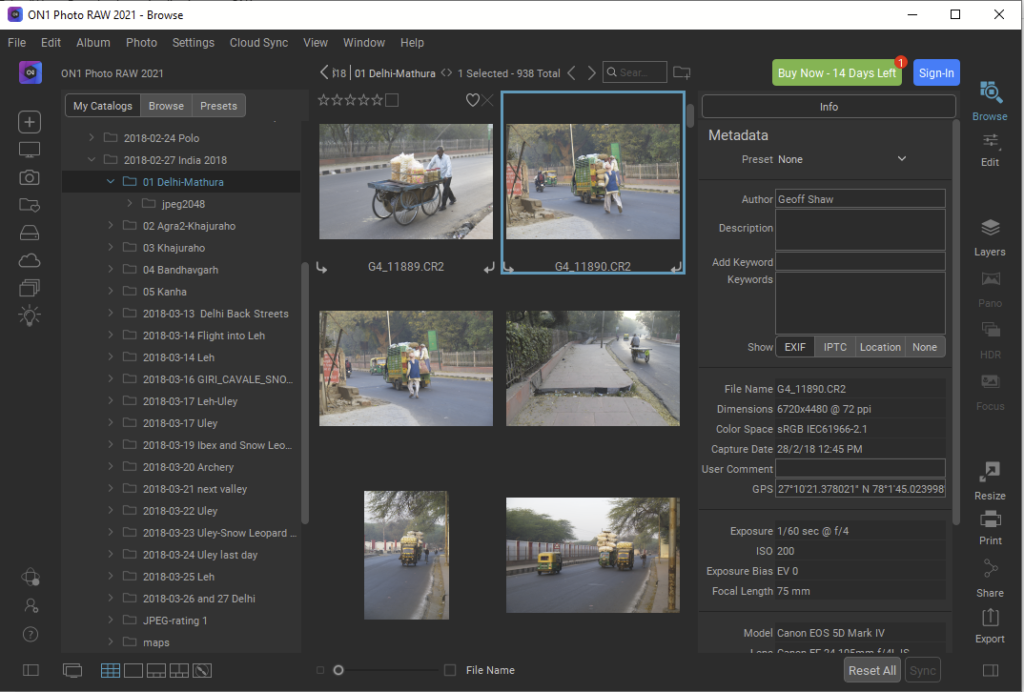
Another up and coming contender is On1 Photo RAW. It has a well featured package with digital asset management (DAM: photo organisation, cataloguing, rating etc) as well as extensive image editing capability. Some more information on a more detailed post HERE.
A powerful Photoshop-like photo editor that lives in your browser. Photopea is a powerful photo editor that’s a progressive web app. You can make edits to photos, enhance them, and use both vector and raster tools all without having to download a thing. I’ve written more info HERE.
I haven’t used Exposure hands-on but I have made some notes on a post HERE.
It has some Digital Asset Management functions allowing you to effectvely browse and catalogue your images. It has a flexible layer/masking system for filters/effects, but lacks image layers so it isn’t so good for compositing.
Originally developed by Jasc Software and purchased by Corel in 2004, PaintShop Pro is a full-featured image editor for Windows (not MacOS version . I have not used it, so the following notes are based on the documentation on the PaintShop website.
It reads a wide variety of RAW file formats. It has: file management functions; a clear and customisable workspace; tools for a wide range of image adjustments; local adjustments; layers and masks and compositing; sophisticated selection tools; HDR merging; Photoshop Plugin compatibility (ie you can use PS plugins; and you can use it as a plugin in PS); and lots more. Like most modern packages there is a lot of AI built in to the processing filters.
Another package I have not tried hands on, but the blurb on their page tells that it has digital asset management, support for a wide range of RAW formats and comprehensive RAW editing tools, sophisticated processing filters, layered editing, colour/tone adjustment tools, HDR and focus stacking, retouching tools and more. There seems to be a lot of tutorials, online and downloadable user documentation (PDF or online), and other support materials on their site. They have a comparison table that is perhaps a little biassed (eg they claim LR costs $79.49 per month, not $15, and forget the tools in Photoshop that come with the LR/PS photography bundle; they claim PaintShop Pro lacks Spot/Dust removal – it does (but they call them content aware editing tools) –so take their comparisons with a large grain of salt). They offer a free trial, so you can have a play to see if it suits your needs.
OTHER
Please let me know if you would like me to add/review any extra software for this list
If you have two monitors, images will look similar on both
if you share an image with someone else, they are likely to see something similar to what you see on your monitor (assuming they have calibrated their monitor)
If you print to a calibrated printer the prints will look as similar as possible to what you see on screen
The best way to calibrate a monitor is to use specialised calibration hardware from Datacolor or X-rite or others, but you can do a fairly good job using facilities built into Window 10. Tim Keane has made a brief guide to this process HERE.
A triptych is a work of art divided into 3 sections. This approach allows the creator to tell a story that would be difficult with just a single panel. Below is a fine example: The three panels of the triptych tell a powerful story of a free selector, a farmer who has chosen some land to clear and farm, and his family. You can apply the same approach to story telling using your photographic images. You might want to show a story through time (as below) or place, or the development of an artistic image using 3 different variations … the options are endless so use your imagination.
Tim Keane has made a basic introduction to creating a Triptych that you can download HERE. This guide is based on Photoshop/Photoshop Elements but the general principles apply whichever software you use (so long as the software allows combining multiple images into one). I have made some alternative instructions HERE based on Lightroom (easy) and on Photoshop (a bit more challenging). If you use other software, you may need to adapt these approaches, or seek alternative resources online.
Using Photoshop or equivalent is the most powerful way to make a Triptych, but if you don’t have access to suitable software, you can even use presentation software such as Libre Office Impress (free) or Microsoft Powerpoint (part of the MS Office suite). These packages give you a great deal of flexibility in placing, shaping and aligning images. Afterwards, you can export to JPEG at high resolution. Since these programs are based on units of pages, you will probably need to open their output in a photo editing program and crop the unused parts of the page layout to get the final output.
If you use Lightroom, you can use the PRINT module to generate your layout. In the Gallery module select 3 images (you can set up a collection to contain your images so they are all in one place). Then switch to the PRINT module. Set the page size appropriate for your needs (menu: File >> Page Setup). You can choose from a range of pre-defined page sizes, or choose a PDF custom page size, that you can define in the PDF print setup dialog. Then, in the Layout Style (right hand column) choose Single Image/Contact Sheet. In Layout choose page grid 1 row, 3 columns. Adjust the cell size to suit (unclick the Keep Square box if it is ticked), or drag the guides on the central page layout panel. If you want the separate panels to be outlined, say in black, check the Stroke Border setting in the Image Settings panel. Check the PrintJob panel (bottom on right) says Print to: JPEG File. Then choose File >> Print to output the JPEG file. You may need to resize this, depending on the settings and sizes on the layout. If you set File Resolution to a high number you will have plenty of pixels so you don’t lose quality in a later resize. If you want to make a layout with unequal sized panels for you images, you will have to use the Custom Package in the Layout Style, and then add and resize the components individually. You can save your layout as a template. In the Template Browser, click the PLUS sign to add a new template with your current settings.
With Photoshop you can easily create triptych layouts with the images in layers, and using masks and layout guides (menu: View >> New Guide Layout) to assist with layouts. There are many instructional guides on the web. Here are a few: