
Layers are a workhorse of post processing and are worth a little effort. They will save you much stress and wasted time as part of a non-destructive workflow. I give a basic introduction to layers and masks below. I go into more detail on these pages: layers, masks, and there are links at the bottom of this and my other pages to further tutorials.
What are Layers?
Think of layers like a set of acetate sheets on top of your base (background) image. These layers can adjust the image (exposure, contrast, curves etc), or overlay new image components Below is an example. The background layer contains the milky way. On top of that I have some adjustment layers to adjust the tonal range and to reduce image noise. On top of that I have added a spaceman (actually a photo of a sculpture outside the space museum in Leicester). Further layers contain the spanners, nuts and bolts that I have strewn across the starfield. Each layer adds a new component to build up the final composition.

I could have done all these edits on the one background layer, selecting and pasting the spaceman directly onto the starfield layer, but if later in my processing I decided I wanted to move the spaceman (or a spanner) I would have to start again from scratch since I would have replaced part of the starfield background with the newly added objects. Since the different image parts are in layers I just need to move the image in the relevant layer. The starfield layer is intact so when I move an overlying layer, the starfield under the spaceman reappears as I move them. Likewise I can adjust exposure, curves etc on each layer individually to ensure all parts match up in lighting and tonality.
You might notice that for some layers, to the right of the layer thumbnail is another thumbnail filled with black and white shapes. These represent layer masks. A mask, as the name suggests, hides things. About 3 layers down in the example, you see a layer labelled Black Spaceman, with a layer mask. The mask is masking (hiding) some bushes and buildings and the pedestal that were parts of the original image of the statue that I don’t want to appear in my composite image. Not only can masks blank out part of an image layer, they can be used to mask adjustments. For example with a landscape photo, you might want to darken the sky. You could apply an adjustment to darken the sky, but this will also darken the ground. However if you apply a mask to the layer you can limit the darkening just to the sky. And if you are clever you might use a gradient from black to white in your mask. Black masks (turns off) the adjustment, white gives the full adjustment, and levels of grey give partial effect of the adjustment depending on the greyness.
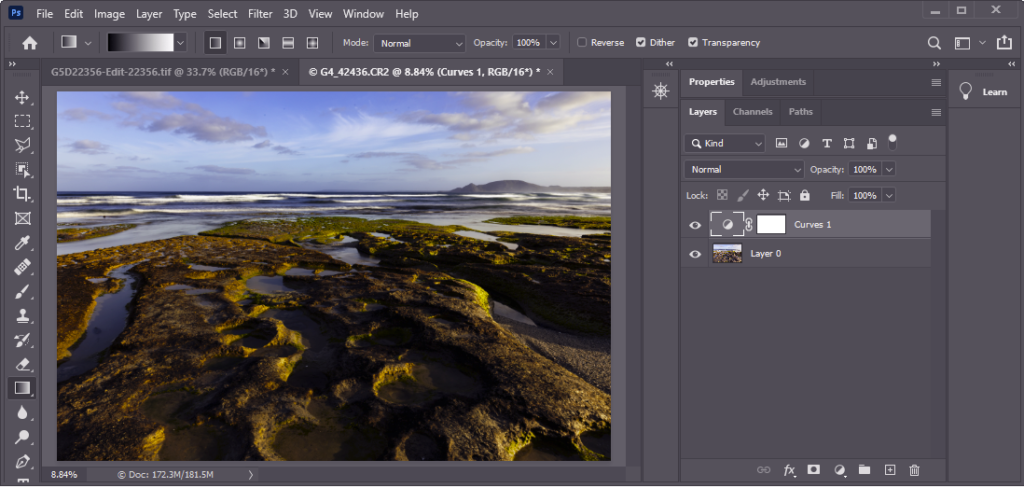
Consider the landscape below. To me the sky looks a little washed out.

So let’s apply a curves layer to tweak the sky. Now the sky looks better, but the foreground is now too dark.
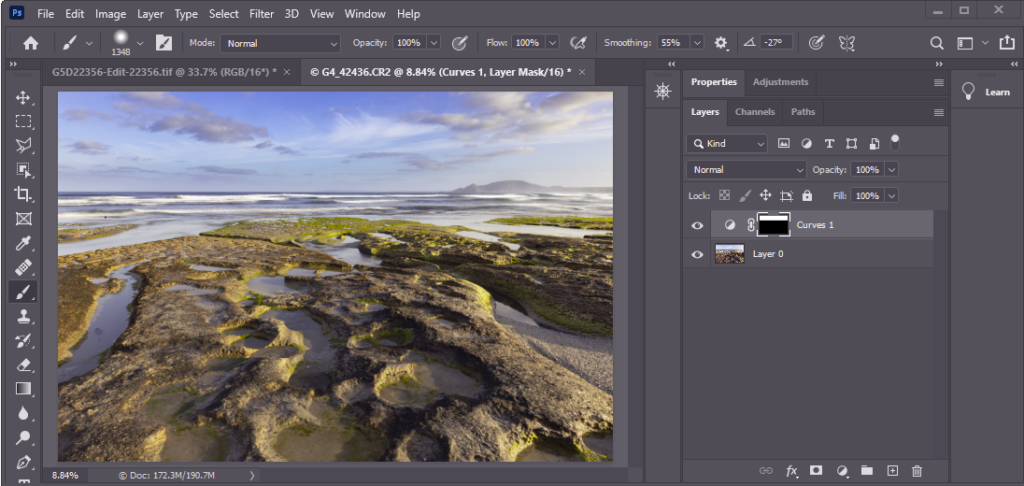
So, click on the adjustment layer mask and draw a black to white gradient going up a little from the horizon. I also painted black on the mask in the area over the hills above the horizon so they weren’t darkened. Compare this image with the image appearance we started with. Hopefully you will agree that it is improved. Still not happy – just tweak the curves further, or add a new adjustment layer to add to the adjustments. Want to compare before and after? click on the eyeball to the left of the layer to turn the layer off and see the image without that layer. Click the eyeball again to turn the layer on again.
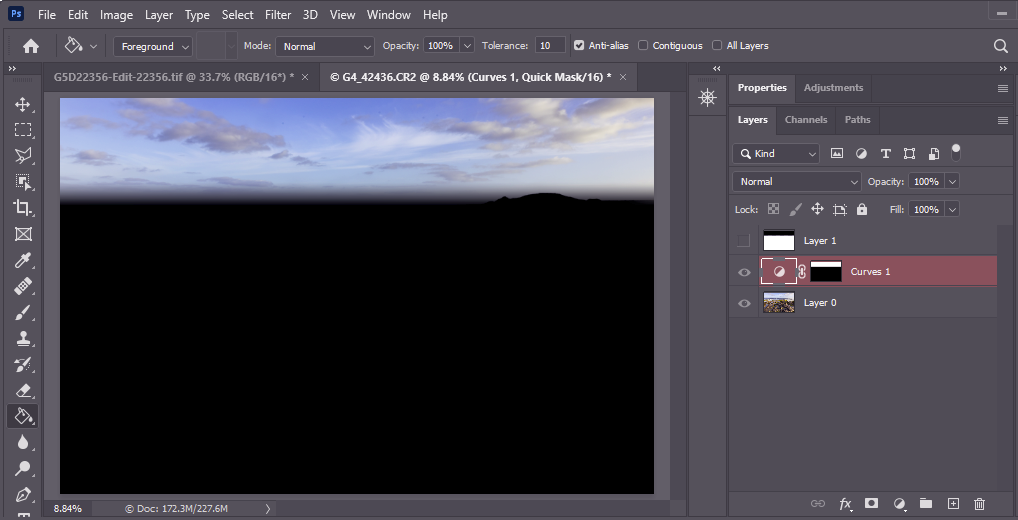
You can see the mask on the curves adjustment layer thumbnail, but this doesn’t show the mask very clearly. Here is what the mask looks at full frame like in quick mask mode (Q) with the quick mask options set for opaque black to really highlight the boundaries of the mask. Normally the quick mask gives a red mask with 50% transparency so you can see the image underneath, but in this example I wanted to show the mask more clearly.
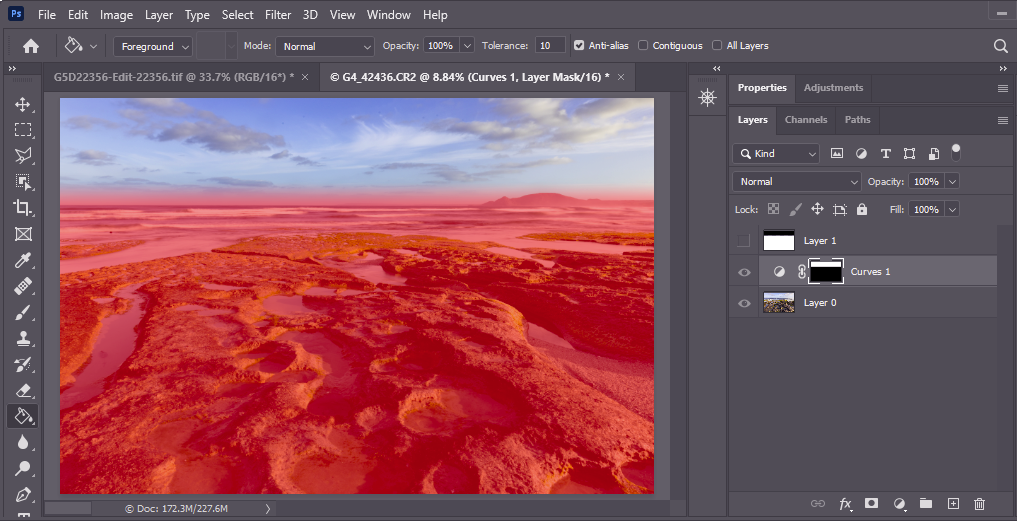
Below the same image with the normal quick mask settings. You can see all the image through the quick mask, but the details at the edges (eg the masking of the hills on the horizon) are not so clear,
Hopefully I have convinced you that layers and masks are an essential part of your processing workflow. Check out the Resources section below for more detail on how to use them.
Note: in PS layers called Background have special properties. PS limits some edits on them to preserve your original image. You can duplicate the image (Ctrl-J) or menu Layer > Duplicate layer, to make a normal layer with the image copied in, or double click on the background layer name and rename it so it is no longer limited as the background layer (an image does not need a background layer).
If you want to come back to your image later and change the exposure, you can adjust the settings on that exposure layer. You aren’t changing the original image so you can come back as often as you like and tweak things with no accumulating image degradation. Want to go back to the original image? turn off or delete the adjustment layers. These sorts of edits are called non-destructive edits.
If you aren’t using PS, you may still be using layers and masks. When editing your images in Lightroom, layers are used, but LR simplifies life for you by hiding the layers. When you apply a global change, say in exposure, LR creates an invisible (to you) layer with the exposure adjustment over the top of the original image layer. The local edit tools (linear gradient, radial gradient, brush tool) you are effectively creating adjustment layers with masks. If you want to see the mask, click the check box Show selected mask overlay underneath the image, and a translucent red mask will show you where the effect is active.
Luminar, Affinity Photo, Topaz Photo Studio all (I think) allow you to add adjustments on layers. they also allow you to add image layers for a texture overlay, replace backgrounds or to add new elements to the image. They work in similar ways to what I have described above, but consult the application documentation to discover the nitty-gritty for those applications. Lightroom and DxO Photo lab don’t have layers, as such, but allows detailed local adjustments to be applied – effectively adjustment layers with masks; however the equivalent of image layers are not available in these applications (at present) .
Resources
- https://helpx.adobe.com/photoshop/using/layer-basics.html
- https://helpx.adobe.com/photoshop/how-to/layer-mask.html
- https://www.photoshopessentials.com/basics/understanding-photoshop-layer-masks/
- https://photoshopcafe.com/tutorials/layers/intro.htm
- https://graphicexpertsindia.com/add-image-to-existing-layer-in-photoshop/
- https://manual.skylum.com/4/en/topic/working-with-layers
- https://affinity.serif.com/en-us/tutorials/photo/desktop/video/311178905/