
Filters (aka adjustments) are the workhorses of Photoshop and other image processing software. They handle simple adjustments like exposure, contrast, colour balance, and more complex processes like sharpening, blurring, removing noise, dust and scratches, not to mention adding “artistic” effects such as the painterly transforms.
In Lightroom you have access to a range of filters/adjustments in the develop module. These are basically the same as in the Camera Raw filter (see below). These adjustments can be applied over the whole image, or you can use the selective tools to apply them as a linear or radial gradient, or using the brush tool to apply them in specific places.
In Photoshop, some filters are accessible in the Image > Adjustments menu. However these overwrite the pixels in the layer you are working on. In the interests of a non-destructive workflow it is better to apply the filters as adjustment layers. Using adjustments on Smart Layers is often a good idea if you want to tweak the settings in later edits.
Camera Raw filter
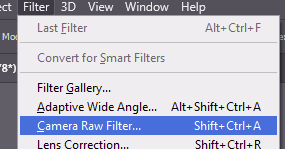
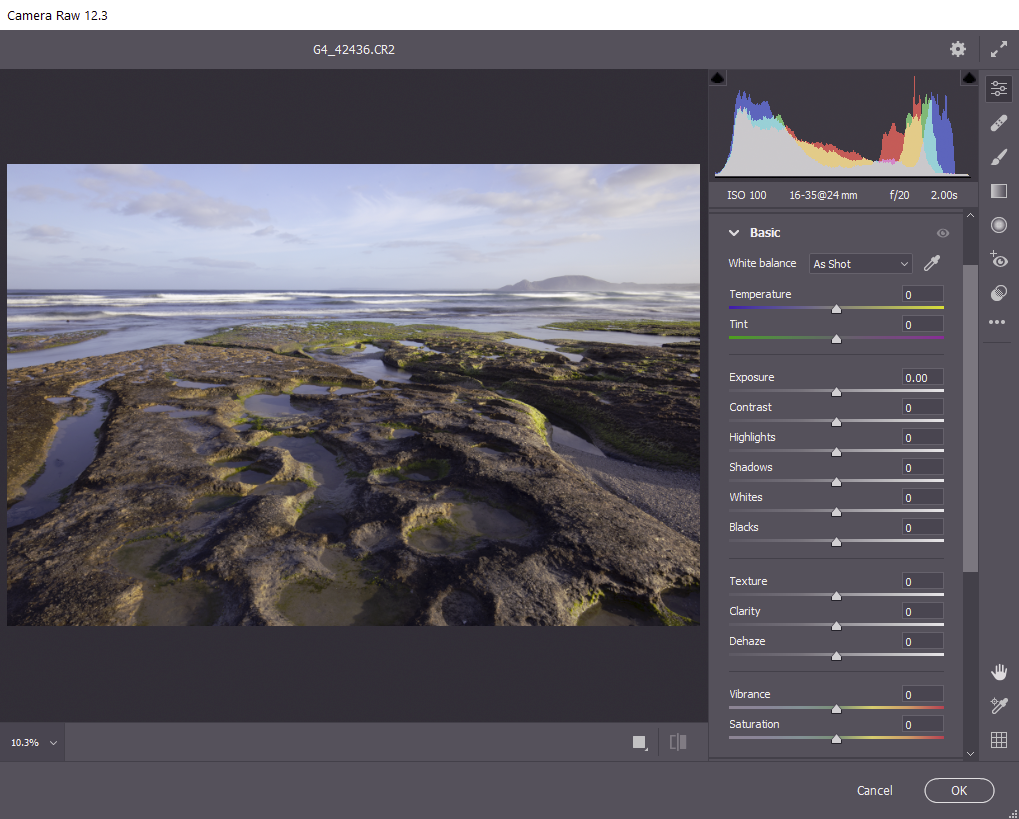
This filter brings the power of Adobe Camera Raw to photoshop layers. It gives all the image adjustment controls you get in Lightroom, including Basic, Curve, Detail, Color mixer, Split Toning, Optics, Effects, and Calibration. Rather than reading about it, find an image, and apply a camera raw filter. Look at the options on the menu; have a play with them all to see what they do.
If you use a Smart Object layer (see Layers), then the camera raw filter will be re-editable, making it easy to tweak the settings as your development of the image progresses. This is also true of other adjustment filters.
Adjustment Filters
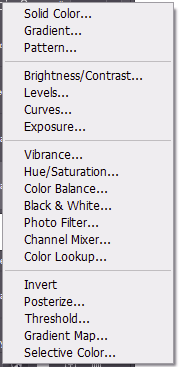
Photoshop and similar applications provide a wealth of adjustment filters. These include basic exposure adjustments, colour adjustments and inversion. A screen grab of the basic adjustment filter menu of Photoshop is shown here (from the adjustment layer tool). Other applications have a similar range of functionality. Some have various filters that include AI based software which can work well for some images. These can adjust tonality and colour balance including conversion to monochrome.
In some cases there may be an AUTO setting which might make a suite of adjustments to various tone or colour controls to optimise the image based on rules set in the original programming. It’s no harm to try this out. You can always undo the change and revert to manual edits, or accept the auto adjustments as a starting point to tweak to suit your own aesthetics.
Sharpen and Blur Filters
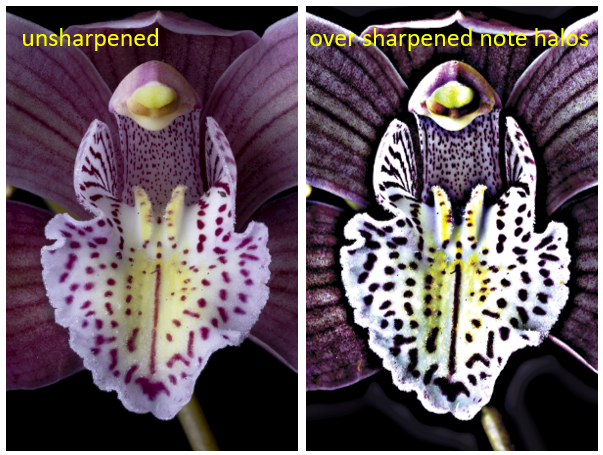
Sharpening filters generally work by finding edges and enhancing contrast from one side to the other. This can be very effective if used carefully, but overdoing it usually produces an unnatural look, with stark contrasts and halos (see example below). Some of the sharpening filters are generic, others are optimised for different types of blurring, such as motion blur, or focus blur.
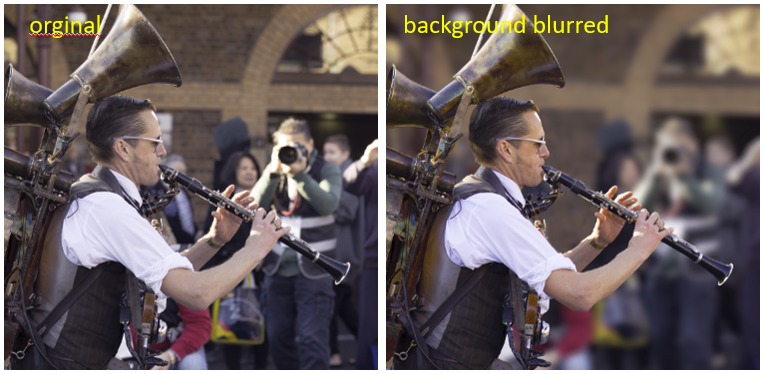
Though we often strive for pin-sharp images, blurring filters are also valuable tools. You might, for example, want to visually separate the subject from a busy background – blurring the background is a good way to achieve this.
Blur filters have a multitude of other uses. For some examples look HERE.
In addition, blur filters are often used to adjust local contrast (for example see HERE)
Adobe has some notes here: https://helpx.adobe.com/photoshop/using/adjusting-image-sharpness-blur.html
Artistic filters
Photoshop has a gallery of filters that give painterly and other effects to images. You can experiment with these filters with your own images. There are many resources on the web. some tutorials
- https://helpx.adobe.com/in/photoshop/how-to/turn-photo-into-painting.html
- https://www.creativebloq.com/features/the-ultimate-guide-to-photoshop-filters
- https://helpx.adobe.com/au/photoshop/using/filter-basics.html
SO MANY… MORE TO COME