PAGE IN PROGRESS
Stuff on brushes and custom brushes. Include discussion of what is allowable – user made content vs bought content for comps etc.
Brushes – the standard brushes
Brushes are a common feature in image editing software. However, they have hidden depths, and the full range of brush settings huge. I will provide only a brief introduction and leave the reader to follow up with further reading (list at bottom). Another caveat: simple round brushes aren’t contentious in use for masking, dodging, burning, erasing etc. However using brushes to paint on a photograph starts to transform the image into a work of graphic art. For competition use, images should be essentially made using your own photographic imagery. A small amount of drawing on an image may be permissible, say for fixing a defect. But how much can you do before it ceases to be photographic? As you will see below, brushes aren’t necessarily simple round shapes, but can include images – think for example of those images of a violin, with musical notes scattering across the sky from it. Are those notes based on photographs you have taken and made into a brush (OK) or are they drawn using graphic art tools (???) or are they someone else’s images made into a brush (probably not OK).
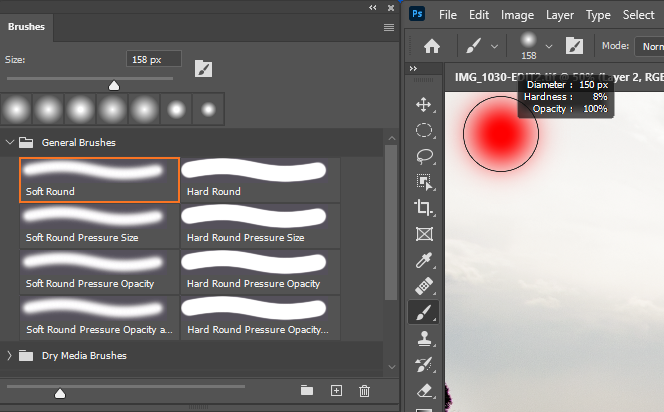
The commonest brush you will use is a round brush of variable size and hardness that you use in photo post-processing is to paint masks over layers. This is the standard brush in Photoshop, and also what you get as a brush tool in other applications, like Lightroom, Luminar, Topaz Studio etc.

If you have a pressure sensitive drawing tablet, you can adjust brush size dynamically using stylus pressure. Otherwise, in Photoshop, you can use the brushes panel, or right click on the image to bring up the brush dialog, or you can hold down Alt whilst click and hold the right mouse button. Then you can change the size by dragging left-right, and change the feathering by dragging up/down. In Lightroom you can quickly adjust size and feather using the scroll wheel or shift-scroll wheel.
Other brush options include Opacity, flow and smoothing. Opacity limits the density of the stroke. If you have set colour to black and opacity 50% (with 100% flow) you will get a mid-grey brush stroke. Flow controls how fast the colour flows from the brush to the image. If you set a low flow, each stroke will add a small amount and by making multiple brush strokes you can build up density in a very controlled way.

Other Standard Brushes
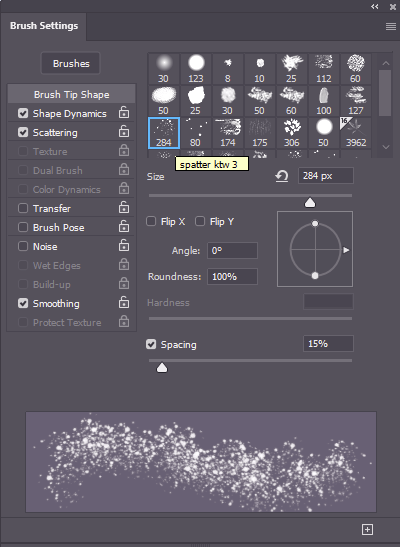
Besides the simple round brushes, Photoshop comes with some brushes that to some extent mimic the effects you might get with different sorts of paintbrushes, or using different media to paint with. These are listed on the brushes panel, and come with some presets, though you can customise the brush behaviour using the brush settings panel, where you also can find a selection of other brush tip shapes.
The Brush settings modify the behaviour of the brush and are extensive. They cover dynamics like variation in the size of the brush as you move it. The angle of the brush can vary. If the brush is not round, the angle can dramatically affect how the brush operates – think about what you get with a calligraphic pen. Some drawing tablets can sense the angle you hold the stylus and pass this to Photoshop. Scattering affects the level of randomness about where the brush tip is stamped onto the image as you move the brush. and so on… there are lots of options, and it is best to play and see what these controls do, particularly as their effects vary depending on the pattern of the brush tip.
Custom Brushes
You aren’t limited by the preset brushes in Photoshop. You can define your own. Here is an example.
… to be continued when I get time and inspiration…
