
Selection is a key process in photo editing. You might use selections to make localised adjustments to part of your image, or to cut out or replace objects to make composite images or remove blemishes. All photo editing programs provide multiple tools. I will make some general notes on selections and then discuss some specific approaches using Photoshop as an example. I will then give links to other resources.
General comments on Selections
Here are some generic issues with selection processes.
- get to know the different selection tools available in your software. Some software has superb automated selection tools that can make an amazingly quick selection (though these may need some refinement on the fiddly bits)
- you can probably (software dependent) start a selection using one tool and then add to or subtract from that selection using the same or a different tool – choose an appropriate tool for the particular edge you are focusing on at the moment, as you work your way around the whole subject you are selecting.
- learn how to save and load selections – if you are making a complex selection it may take many minutes or even hours. Save your selection as you go, so if you make a mistake and lose your selection, you can reload the selection and resume.
- learn how to combine different saved selections – you might, for example, use one tool to select a person’s head and hair, and a different tool to select the body. Combine these to get a selection of the whole person.
- Feathering a selection edge appropriately often allows a more natural effect.
- Zoom in to 1:1 or even higher to make precise selections.
- Sometimes difficult selections can be made easier by looking at the image in one of the colour channels to maximise contrast between items in and out of selection (depending on the colours you might switch to CMYK or LaB colour modes to provide channels that give the best discrimination.

Selection tools in Photoshop

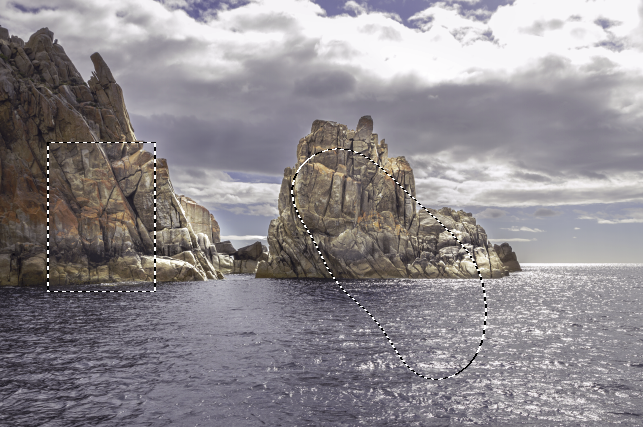
The basic selection tools include the Lasso tool, polygonal lasso tool and the Magnetic lasso tool, accessible from the tools panel. You can use these to draw round the outline of the area to be selected. Tool options allow you to adjust the feather, and to refine the selection using Select and Mask.
You can also use the pen tool to draw smooth curves and corners to make a vector path that can convert to a selection. This is an excellent tool to use if you want to select shapes with straight edges and smooth curves.
In Photoshop you can add to an existing selection (eg hold down shift whilst starting a new lasso) or subtract (hold down Alt when starting the new lasso). This shift / alt modifier key works with most (maybe all) of photoshop’s selection tools. You can start with a selection based on colour (menu Select>Color Range) then tidy up the selection using shift-lasso to add bits that were missed, or alt-lasso to remove bits that need removing from the selection.

Selections can sometimes take a long time if you have fiddly shapes to select. You can save the current selection in a named channel (menu Select>save selection) and if you already have a previously saved selection you can also replace, add to, subtract from, or intersect the new selection with the previous selection instead of saving the particular selection. Saved selections are visible in the channels window. With a complex selection job I recommend you save regularly to save tears later.
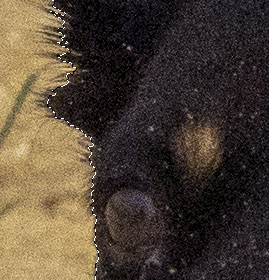
A useful thing to bear in mind is inverting selections. for example with my cat photo, I could laboriously select the cat, tracing the edge of the fur (very fiddly) or I could use the magic wand tool (with suitable tolerance) to select the black background. Then inverting the selection gives a selection of the cat (the non-black area).
The magic want is a powerful tool that will select pixels similar to an image area you click on. It has many options. Check the “contiguous” check box in the options bar to select only those areas that match the point you clicked on – this will miss out selecting anything within the cat (eg the pupils of the cat’s eyes); anti-alias to soften the selection at pixel borders. Tolerance sets how close the pixels need to be to the pixels in the clicked point. Set this too high and you will select too much, set it too low and you will probably select too little. Sample size defines how many pixels around the clicked point are averaged to get the starting colour for the matching process. Select and Mask is an option here, but this is a complex tool that will get its own post.

Explore the Select menu. There are many interesting things here. Of note are the select subject and select focus area. These can (if you are lucky) make a really good selection automatically, or at least get you started with a selection that you can tweak with other tools.

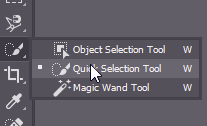
The quick selection tool can be amazingly effective. Select the tool, click and drag over your subject and see what gets picked up. Hold down shift whilst clicking to add to the existing selection. Hold down alt whilst clicking to remove from the existing selection. Experiment with it. See what happens. Search the web to find out more about this tool.
If you have a recent version of Photoshop, the object selection tool is a powerful extension to the select subject and quick selection tools. Experiment to find out what it can do for you (or look it up and read about it).
One final aspect is how you view the selection. The “marching ants” view is the usual view, but is not always the best. Selections may not have hard edges if you ‘ve used, say, a highly feathered tool. Then the quick mask tool shows the selection with a red coloured overlay where the density of colour reflects the density/transparency of the selection (Colour reflects the unselected bits; you can customise the colour if needed). Press Q to toggle between marching ants and Quick mask. In marching ants mode, Ctrl-H Hides the selection border (or toggles it on or off)

Further Resources
Here are some further resources to flesh out the concepts I have discussed here or to go beyond the basics I have covered (also look through the HowTo section for related material):