PAGE UNDER DEVELOPMENT
Transformations can allow you to correct converging verticals, adjust aspect ratios, correct lens distortions or to distort the image in multitudes of ways. Most editing programs give you rotate and crop. Some allow you to correct perspective (eg converging verticals). Some give you endless control to twist, distort, shape and texturise your images. I will start with some generic comments and then discuss some of the capabilities of Photoshop and Lightroom. If you use other programs, you may well find they have similar tools and once you know what you might want to achieve and what to look for, you should be able to find specific instructions for the software you use. The notes below outline some options for transformation and distortion but they are far from comprehensive.
Rotation and Scale
Rotation and scale are probably the most frequently used transformations. Handy for fixing sloping horizons or tilted buildings, but also for more creative use. For example if you are making composites you are almost certain to need to adjust the relative sizes of images as you composite them together get all the elements together in appropriate scales.
Perspective
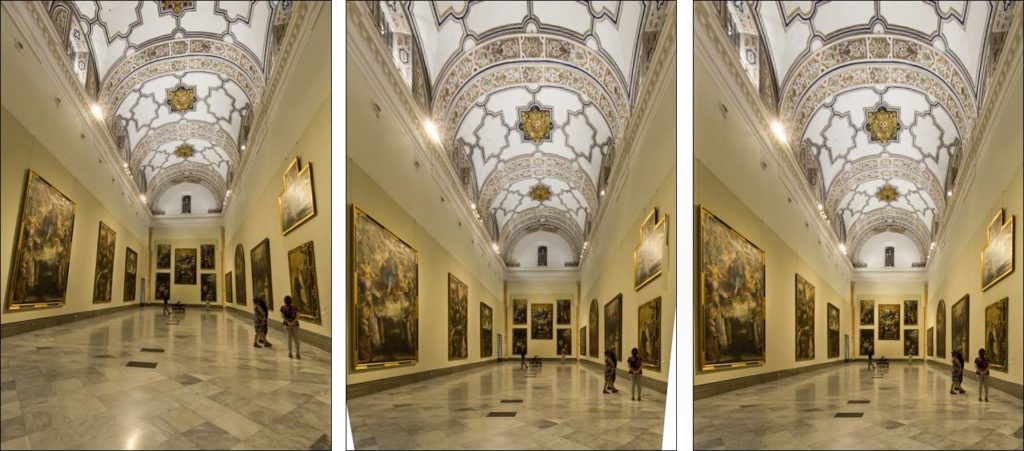
Perspective comes from the fundamental physics that things further away look smaller (ie occupy a smaller part of your eye’s retina or your camera’s sensor. It provides a sense of depth to images, but in some circumstances it can be a distraction. Consider the images below. The left panel shows converging verticals – the lens was pointed upwards and the roof is further away from the camera than the floor so the perspective lines converge. Using perspective controls one can straighten this out. Note the bits of white at the bottom corners. The top has been stretched horizontally to correct the vertical convergence, making the bottom (relatively) narrower. The white is where the original frame is extended. You can use tools like Content Aware Fill in photoshop to fix this.

Aspect Ratio
Aspect ration refers to the relative dimensions in the vertical and horizontal directions. You may want to adjust this to correct for distortions after perspective adjustments, or just to make something look taller and narrower, or shorter and wider for creative effect (or just because it looks better)
Warp
The perspective controls make linear changes – ie things are adjusted along straight lines. Warp introduces curved adjustments. This may be valuable to correct for curvatures caused by lens distortion (especially with wide angle lenses) such as barrel or pincushion distortion. Note that many recent processing packages such as Lightroom and Adobe Camera Raw have the ability to automatically correct these sorts of lens distortions. In the images below I used warp transformations to make a fish-eye lens image more rectilinear.


Puppet warp
Puppet warp (a feature in photoshop and some other software) allows you to move parts of an image about relative to other parts. In the example below I have used Photoshop to reposition an arm. I selected the model’s arm. Puppet-warp places a network of nodes over the selected area. I then clicked on several nodes around the elbow to lock their position (I should also have locked the nodes further up the arm and shoulder to stop them moving). I then dragged some nodes on the forearm to change the angle of the arm. All the pixels in the forearm get dragged and repositioned in concert. Once in position, accept the warp and the arm is now fixed in the new position. The area where the arm used to be needs to be repaired, but usually a content aware fill or a bit of work with a clone stamp will do the trick.

You can use Puppet warp to re-shape things easily. Give your male model bigger muscles and square up his jaw, perhaps? Give it a try and see what you can do.
Liquefy
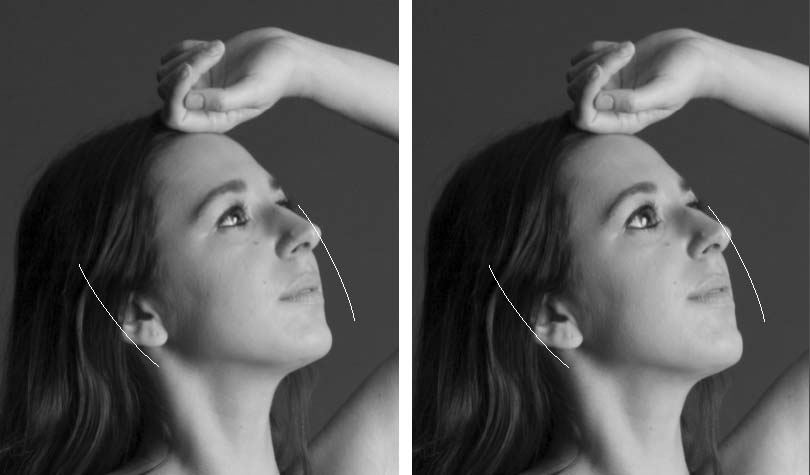
The liquefy filter in Photoshop (PS) allows you to push parts of an image about as though the image was made of rubber or perhaps as if it were wet paint on a canvas. You can push and pull, enlarge and shrink and otherwise manipulate. The tool in recent photoshop versions has face-sensitive controls that allow you to easily retouch portraits – adjust eyes, noses, mouths, chins etc. In the example below I have used the face controls in PS liquefy to slightly lengthen the face, change the mouth (smile), nose (smaller), eyes (much larger), cheek (higher) etc (the arcs to the right and left of the face are from the liquefy preview, indicating the face being edited). All this is done with previews as you go, with a couple of dozen sliders.

Transformation filters (eg twirl, shear, pinch, polar, …. )
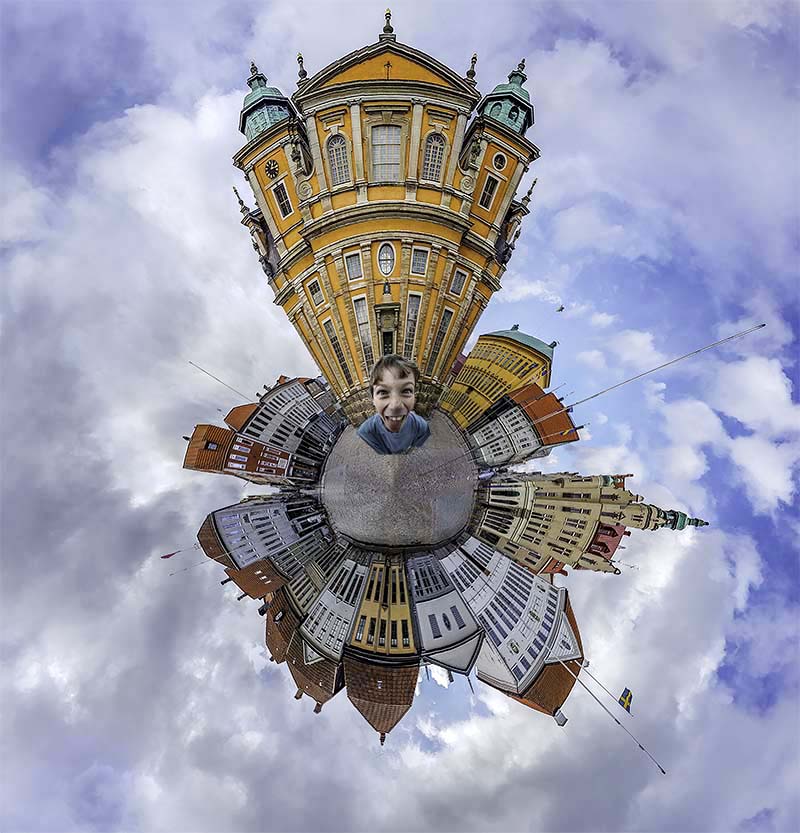
These filters allow you to make overall adjustments to an image. One popular use is in the Little-world images, where a panorama is transformed to polar coordinates.

Filters that add ripples, raindrops on water effects and so on are easy to find, as are filters that apply local distortions to get painterly effects (eg check out Photoshop’s Filter Gallery – make sure your image is set to RGB 8-bit mode or it will be greyed out). There are too many options to list here. Have a look on the internet for further information.
Transform in Lightroom CC

Lightroom does not have the power of Photoshop but has a lot of transformation tools. Lens distortions can be automatically adjusted, or you can take manual control.
Lightroom also has extensive tools for rotation in the develop module. Using the Crop tool allows you to rotate (click and hold your mouse button outside the crop box and drag up or down. Release the button to fix the new rotation).
The Transform Panel gives a range of additional tools including Auto modes, adjustment for horizons (these auto modes often do what you need, so give them a click, and if they fail, undo the edit and try the manual controls. I find the Guided mode gives me a great deal of control, sometimes coupled with the Aspect slider, since sometimes perspective adjustments lead to some horizontal or vertical squashing or stretching. The links below give more detailed information.
Further reading:
Lightroom
- https://expertphotography.com/transform-tool-lightroom-perspective-distortion/
- https://lenscraft.co.uk/photo-editing-tutorials/using-lightroom-transform-to-fix-converging-verticals/
- https://helpx.adobe.com/lightroom-classic/help/guided-upright-perspective-correction.html
