Selection Tools

Selection is a key process in photo editing. You might use selections to make localised adjustments to part of your image, or to cut out or replace objects to make composite images or remove blemishes. All photo editing programs provide multiple tools. I will make some general notes on selections and then discuss some specific approaches using Photoshop as an example. I will then give links to other resources.

General comments on Selections

Here are some generic issues with selection processes.

  • get to know the different selection tools available in your software. Some software has superb automated selection tools that can make an amazingly quick selection (though these may need some refinement on the fiddly bits)
  • you can probably (software dependent) start a selection using one tool and then add to or subtract from that selection using the same or a different tool – choose an appropriate tool for the particular edge you are focusing on at the moment, as you work your way around the whole subject you are selecting.
  • learn how to save and load selections – if you are making a complex selection it may take many minutes or even hours. Save your selection as you go, so if you make a mistake and lose your selection, you can reload the selection and resume.
  • learn how to combine different saved selections – you might, for example, use one tool to select a person’s head and hair, and a different tool to select the body. Combine these to get a selection of the whole person.
  • Feathering a selection edge appropriately often allows a more natural effect.
  • Zoom in to 1:1 or even higher to make precise selections.
  • Sometimes difficult selections can be made easier by looking at the image in one of the colour channels to maximise contrast between items in and out of selection (depending on the colours you might switch to CMYK or LaB colour modes to provide channels that give the best discrimination.
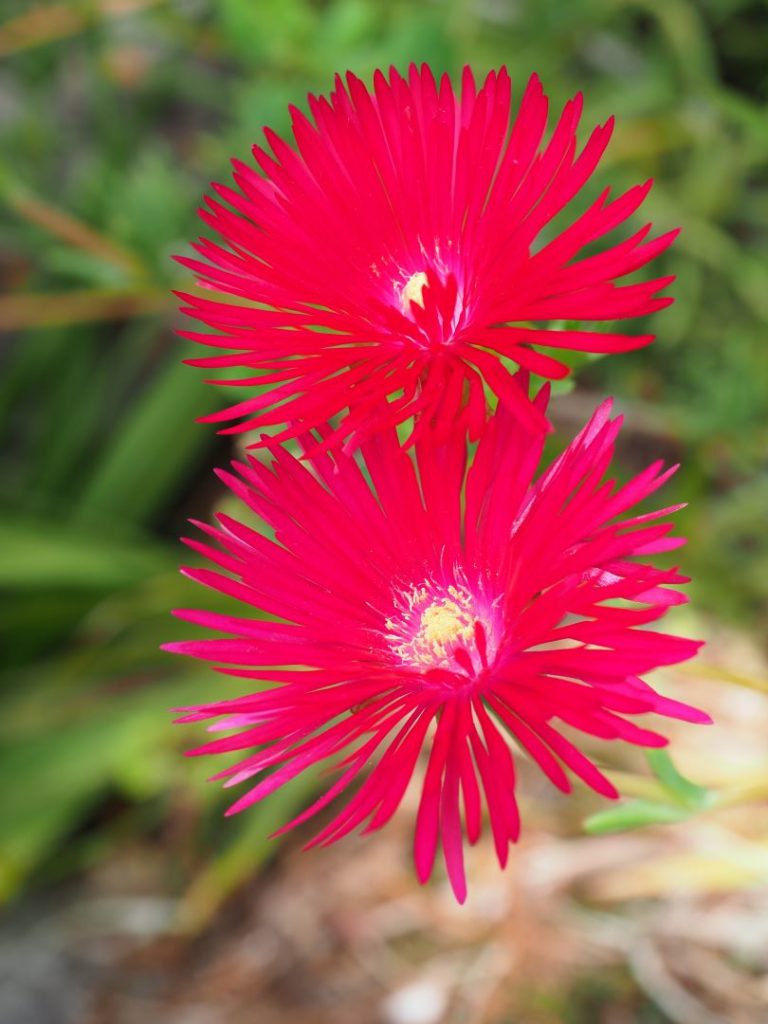
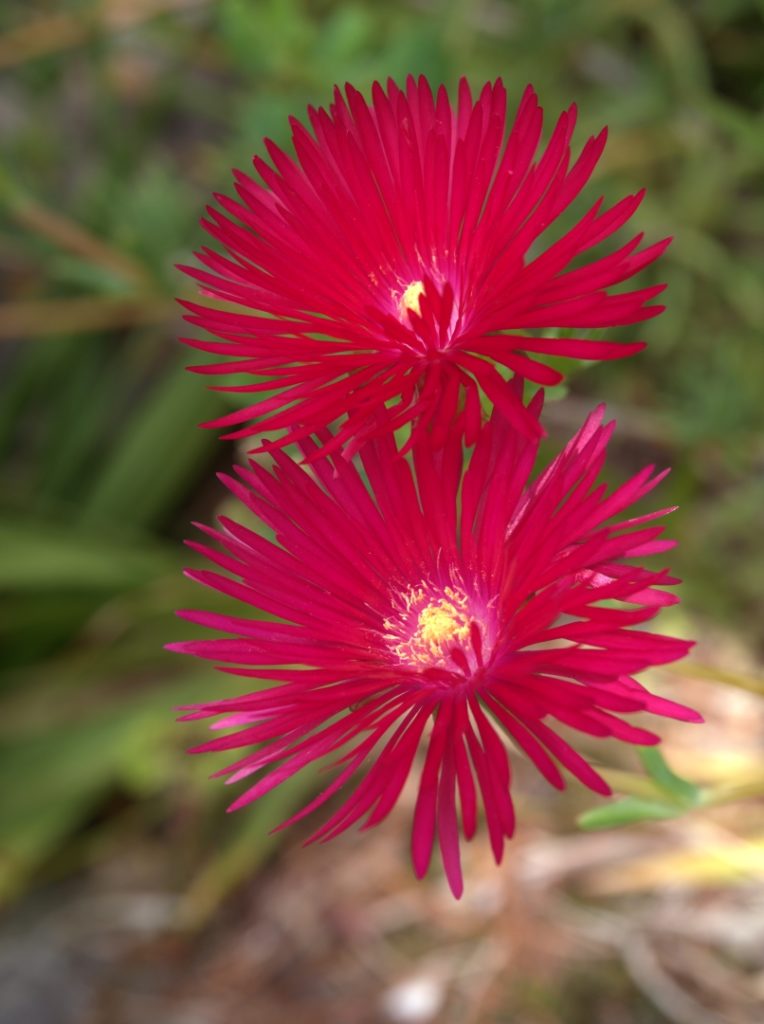
Using colour channels can sometimes make selections easier. Here I quickly isolated the flower to make a mask that I can tidy up by painting white or black over the glitches to get the perfect selection. Or I could have used Photoshop’s Select>Color range selection tool to achieve a similar result in this case.

Selection tools in Photoshop

The basic selection tools include the Lasso tool, polygonal lasso tool and the Magnetic lasso tool, accessible from the tools panel. You can use these to draw round the outline of the area to be selected. Tool options allow you to adjust the feather, and to refine the selection using Select and Mask.

You can also use the pen tool to draw smooth curves and corners to make a vector path that can convert to a selection. This is an excellent tool to use if you want to select shapes with straight edges and smooth curves.

In Photoshop you can add to an existing selection (eg hold down shift whilst starting a new lasso) or subtract (hold down Alt when starting the new lasso). This shift / alt modifier key works with most (maybe all) of photoshop’s selection tools. You can start with a selection based on colour (menu Select>Color Range) then tidy up the selection using shift-lasso to add bits that were missed, or alt-lasso to remove bits that need removing from the selection.

Selections can sometimes take a long time if you have fiddly shapes to select. You can save the current selection in a named channel (menu Select>save selection) and if you already have a previously saved selection you can also replace, add to, subtract from, or intersect the new selection with the previous selection instead of saving the particular selection. Saved selections are visible in the channels window. With a complex selection job I recommend you save regularly to save tears later.

A useful thing to bear in mind is inverting selections. for example with my cat photo, I could laboriously select the cat, tracing the edge of the fur (very fiddly) or I could use the magic wand tool (with suitable tolerance) to select the black background. Then inverting the selection gives a selection of the cat (the non-black area).

The magic want is a powerful tool that will select pixels similar to an image area you click on. It has many options. Check the “contiguous” check box in the options bar to select only those areas that match the point you clicked on – this will miss out selecting anything within the cat (eg the pupils of the cat’s eyes); anti-alias to soften the selection at pixel borders. Tolerance sets how close the pixels need to be to the pixels in the clicked point. Set this too high and you will select too much, set it too low and you will probably select too little. Sample size defines how many pixels around the clicked point are averaged to get the starting colour for the matching process. Select and Mask is an option here, but this is a complex tool that will get its own post.

Explore the Select menu. There are many interesting things here. Of note are the select subject and select focus area. These can (if you are lucky) make a really good selection automatically, or at least get you started with a selection that you can tweak with other tools.

Automatic Select Subject can save work.
The automatic selection needs refinement, but that refinement is what the Select and Mask tool is designed for.

The quick selection tool can be amazingly effective. Select the tool, click and drag over your subject and see what gets picked up. Hold down shift whilst clicking to add to the existing selection. Hold down alt whilst clicking to remove from the existing selection. Experiment with it. See what happens. Search the web to find out more about this tool.

If you have a recent version of Photoshop, the object selection tool is a powerful extension to the select subject and quick selection tools. Experiment to find out what it can do for you (or look it up and read about it).
One final aspect is how you view the selection. The “marching ants” view is the usual view, but is not always the best. Selections may not have hard edges if you ‘ve used, say, a highly feathered tool. Then the quick mask tool shows the selection with a red coloured overlay where the density of colour reflects the density/transparency of the selection (Colour reflects the unselected bits; you can customise the colour if needed). Press Q to toggle between marching ants and Quick mask. In marching ants mode, Ctrl-H Hides the selection border (or toggles it on or off)

Further Resources

Here are some further resources to flesh out the concepts I have discussed here or to go beyond the basics I have covered (also look through the HowTo section for related material):

Posted in Post-Processing | Tagged , | Leave a comment

Compositing

Compositing might be something as simple as adding a texture overlay, or adding some birds or a cloud to add interest to a bland blue sky, or making, say, a triptych. Or you might want to make a complex image in which multiple images are combined to create a more conceptual image.

Below, this composite by WCC member Rosie Hughes creates a far more memorable image than either of the two images separately. On the right, compositing has allowed muratsuyur to tell a powerful story.

This composite by WCC member Rosie Hughes creates a far more memorable image than either of the two images separately.


Just Breathe. A composite image from muratsuyur http://fav.me/dzgd2q. Compositing has allowed the photographer to tell a powerful story.

Compositing draws on techniques previously mentioned, notably including selections, layers and masking, and blending. Below are some general comments on compositing for photographic art.

Transformations

raster layer reduced severely then re-expanded to original size.

When you start to make composites you will almost certainly need to use transformations to rescale and reshape the component images so they match. If you make these transformations on a plain raster layer and shrink the layer, pixels will be lost. If you later decide to enlarge it, it will possibly become jaggy or pixelated. If you convert the layer to a smart object, the original pixels will be retained so transforms are lossless.

Lighting and colour balance

Your composite images won’t look convincing if the lighting on the compiled images does not match. If the images look like the light is coming from different directions, you can sometimes dodge and burn to shift the apparent illumination to the other side. Try to avoid situations where parts are taken in bright sunshine with sharp shadows, compiled with images taken on overcast days with flat soft lighting.

Colour balance is another thing to check: images taken during golden hour with a golden glow together with, say, a bluish midday shot, or a shot under green trees, or perhaps the model was standing next to a red brick wall and has a reddish cast from the reflected light. Try to use the colour balance tools to achieve similar colour balance. Check the colour temperature settings (raw images), Colour balance and Hue Saturation adjustments. You can also adjust colour balance finely using the Curves (and even the Levels) controls, by adjusting the Red, Green and Blue channels independently.

Photoshop has an interesting tool to help with this. Try the menu Image >> Adjust >> Match Color. In the resulting dialog you can set a source image, and there are sliders for Luminance and Color Intensity and a Neutralise checkbox, all of which control how the matching operates. Give it a try, next time you are compositing, if you have images with different colour balances.

Shadows

When you make a composite, creating realistic shadows is vital. Whilst we don’t usually consciously pay much attention to shadows, they provide context and objects without shadows, or with shadows that are not realistic can really jar in an image.

A composite image made with humorous intent. Note the shadow of the rider, and how it ties the subject to the roof of the underpass.

Go out on a sunny day and look at some shadows. The direction of the shadow is determined by the direction of the light. With a point light source (the sun is near enough to a point), shadows will look sharp. With diffuse light sources, shadows will be soft and diffuse. And shadows are sharper if they are closer to the shadowed object, and fuzzier away from the object. If the light source is close to the object, the shadow will expand noticeably as it extends away from the object. If there are multiple light sources, the shadow will be a combination of the shadow and light from each light source, and can get very complex. Fortunately for the sake of image composites, you don’t need to get photon perfect shadows, just good enough to look ok to the viewer.

Consider the examples of shadows below. The first image was taken with a diffuse light (softbox). Note the shadow is soft and diffuse. It is darker close to the marker and fades off quickly with distance along the back wall. In the middle panel I have removed the softbox leaving the naked light, a small light source. The shadow is much sharper. Note the difference in dimension of the shadow on the floor (narrow) vs the back wall (wide) because of the angle between the direction of the light and the plane of the wall. The third panel has the same lighting as the middle panel, but I have placed a coloured card to the right. Note how the light reflected from the card gives a colour cast to the adjacent areas and tints the shadow in particular, where the only light comes from reflected light.

Some Other Resources

Posted in Post-Processing | Leave a comment

Techniques

Part of Luminar 4’s Edit workplace.

There are lots of programs to post process, but they mostly use the same basic set of tools, so instructions for one application are usually transferrable to other applications (though with different menu/keyboard commands). The posts below give some guidance on what you can expect your software to be able to do for you. Many of the examples are based on Photoshop, but if you use something else, you should be able to find the equivalent functions if you browse the menu system or chase the keywords in the software manuals/web guides.

Posted in Post-Processing | Leave a comment

Lightroom and Photoshop

Overview

Lightroom and Photoshop are the most used image processing packages by our club members, so I have included some specific comments on using these programs in other sections of this website. However the general principles of post processing discussed should be applicable to other software too. Many software packages use very similar controls and paradigms to do their work. I have made some notes on the Photoshop workspace and keyboard shortcuts.

The latest update (Nov 26 2021) adds new selection tools and masks to Lightroom. These look very impressive. I will post more, when I have had a play.

Whilst PS and LR provide huge power to process individual files, LR provides the functions of a librarian as well. It allows you to browse your images, index them, search them, rate them, add searchable keywords, titles and captions etc etc. It has powerful raw editing capabilities, and ability to apply edits locally on parts of an image. PS gives even more power for editing images, and it is easy to flip images between LR to PS for editing when you need more detailed tools.

Both applications have extensive help menus. Adobe have also made an excellent text based user guides https://helpx.adobe.com/photoshop/user-guide.html and there is a wealth of video tutorials on Lightroom https://helpx.adobe.com/au/lightroom-cc/tutorials.html and Photoshop https://helpx.adobe.com/au/photoshop/tutorials.html. Both LR and PS have excellent HELP menus that either operate within the program (check out the LR Develop module tips illustrated in the two screen grabs below) or link to Adobe’s web based resources.

Check out the pages in the HELP submenus.

More Resources and Reviews

Posted in Basic Edits, File management, Post-Processing, Software, Workflow | Tagged | Leave a comment

Some resources

There are lots of resources on the WCC website https://www.waverleycameraclub.org. In particular have a look at the resources page from the top menu https://www.waverleycameraclub.org/resources/ where there are a number of documents on how to do things.

If you are planning to enter club competitions, you will find the rules and instructions on file format at https://www.waverleycameraclub.org/competitions/rules/. If you want help getting your image into the right size and file name structure, I have made a simple web program to assist: http://austvic.com/wcc/ This will resize your image to be compatible with the competition requirements and assist in getting the correct file name format.

Here is a random collection of resources – I am using this post as a dropbox for useful things that I might incorporate into future (and already made) posts.

https://en.wikipedia.org/wiki/Raw_image_format includes discussion of what RAW files are, benefits and drawbacks, software support including list of free and open source software and proprietary (usually not free) sofware.

https://en.wikipedia.org/wiki/Image_editing

Adobe: Understanding Raw Files“; background on how camera sensors treat raw files

Bob Atkins: “Raw, JPEG, and TIFF“; common file formats compared.

Comparison of raster graphics editors https://en.wikipedia.org/wiki/Comparison_of_raster_graphics_editors

https://www.cambridgeincolour.com/tutorials/digital-photo-editing-workflow.htm

lots of tutorials and basics of photoshop https://www.photoshopessentials.com/

In Photoshop or Lightroom use menu Help or press F1 to open Adobe’s website with lots of tutorials and other resources (or https://helpx.adobe.com/lightroom-classic/tutorials.html and https://helpx.adobe.com/support/photoshop.html)

Remove a fence, wires, tram wires, powerlines etc from a photo

RELEVANT RESOURCES FROM WCC main site
https://www.waverleycameraclub.org/resources/

Monday & Wednesday night training

Workshops and presentations

Tutorials & How To’s

Post Processing Group

Post Processing for Beginners

Posted in Basic Edits, File management, How-to, Post-Processing, Software, Workflow | Leave a comment

Image File Management

You may find this also referred to as digital asset management. After all, your digital images are an asset. The topic includes much more than just ‘where do I put my file’. Image files have a lot of metadata stored inside the file including camera settings, time the image was taken, GPS location, copyright data (if you have set your camera to save this in the file) and so on. You can add to this with keywords and other metadata that will later assist you to find and manage your images. In addition a digital image management system may include management structures outside of the image file, its metadata, and its physical location in disk. Lightroom, for example, allows you to organise images in virtual locations called collections, to facilitate sorting and collating. This information is stored in Lightroom’s catalog, separate from the files.

File management strategies are best resolved early on. Without good file management you will probably find it hard to locate images later on (but back in the old days, before digital images, finding images (slides) was a real nightmare). I currently have about 200,000 images, so without a consistently managed file workflow, it would be challenging to find images for next month’s camera club competition. Fortunately I have a systematic process that assists me. In the workflow below, I use Lightroom for my file management, but the same general principles apply with any image management program (eg the free Adobe Bridge).

Everyone develops their own methods, but here is an outline of my process. At the end is a list of links to other people’s web pages on this topic.

An image and its multiple keyword tags in my library.

I use Lightroom for my file management. Whatever software you use, the same general principles apply. Save your files with a consistent file structure. Add keywords to the metadata to facilitate future searching (or at the least, add keywords to the relevant folder names so you can find the folder containing the images).

  • Copy files from the card onto my hard drive.
    I keep files organised in folders. Top level folders for the year. Sub-folders for the day or the event (see image right). Each folder is named for the date and some keywords to identify the contents. (tip: use ISO date format – yyyy-mm-dd and things will sort well. Sorting of dates in file names gets difficult in other formats – eg 1 Apr 2020 comes before 30 Jan 1990 if file names are sorted alphabetically).
    Note: Lightroom can be configured to automatically transfer files from card to hard drive (including making a copy in a backup location at the same time), but I prefer to keep control of this vital step so I know exactly where my images are.
  • I drag the new folder onto my Lightroom Library window to start the import. I use “Add photos to catalog without moving them”. I have configured my import to add my copyright metadata. Sometimes I add keywords at this stage, if there are keywords that apply to all images, but usually I add keywords later.
  • In the Grid view I select groups of photos and add keywords that I expect will be useful for later searches. For example I might select all images with rainbow lorikeets, and add the keyword Rainbow lorikeet (keywords are very powerful in Lightroom. I have a heirarchical structure, with Animals > birds > parrots > rainbow lorrikeets so if I tag a photo as a rainbow lorikeet I can later find it by searching for parrot, birds or animals. I’ll get round to a page on keywords later.
Here I have selected 3 images and tagged then Rainbow lorikeet. One has a 1-star rating (press 1-5 to add star rating). The white flower was fuzzy so is marked for deletion (press X). All the photos have GPS data added by the camera, so I can find them by searching the map. If I use a camera without GPS I use the map module to add location data by dragging the image thumbnail(s) to a map location.
  • When I have used a camera without GPS I usually add location data (in the map module, select groups of images and drag them to a location on the map to add the location metadata to the file. It is best to do this soon after the photography so you don’t forget where you were.
With location data added to the images it is easy to see where you have been photographing and to find images taken around a given location on the map.
  • I do a quick review and give a rating of 1 star to any images I think are worth further processing (sometimes I come back and find gems in the ones I didn’t star the first time round). I may do some basic editing – exposure, contrast etc (or even just hit the AUTO button to get LR to do some automatic adjustments) at this stage before I rate. Images that look poor before a quick edit might look more promising once they have had basic edits done. Unusable photos are marked as rejected, and at the end of the session I use the Photo>>Delete rejected photos menu to review all the rejects (sometimes I accidentally mark OK images for deletion), fix any glitches, and delete the files from the catalog and disk (this saves disk space that would otherwise be used by never-usable images).
  • I filter the folder for the Star rated images and do a second rating session (often the next day) to tag some with 2-stars. On some of these I will do more extensive edits either using Lightroom or in Photoshop, with further changes in rating as warranted. Sometimes I leave further editing until I might want to use that particular image — why expend effort in fine edits unless you will be using the image for showing, competition, to illustrate something, for a web page etc..
  • I make sure all the images are backed up to backup drives. I use a utility that does this for me without any intervention, but I check from time to time (monthly calendar reminder) that the backups are up to date. I periodically also make a backup of my files and LR catalog onto a USB drive that I keep off-site. I have about 5 TB of images/catalog/previews, so I have not used the backup to the cloud route, but if you have smaller storage requirements, backup to one of the many cloud storage facilities might be a good option for you.

Adobe Bridge is free (at least it is at the time I write this) and has some powerful file management abilities, including editing metadata, adding keywords and ratings, and powerful organisation functions such as collections (see below). You can directly open your images from bridge in your editing program (customisable – you are not limited to photoshop).

Luminar has file management functions … I am not sure about recent versions of Topaz photo studio, DxO etc. I may get around to adding some more specific information on the various applications at a later stage. Check the index/menu/search options in whatever software you use. If your software does not have good file management functions you can always team it up with something like Bridge to give you file management and just use your software for image editing.

Part of my set of collections. The original files
are in folders by date. I can organise my
collections in whatever structure makes sense,
putting image links into multiple collections,
all without moving the original files.

Some people start to organise their images by putting them in folders based on subject. However there is a problem with this. Do you file that photo of an elephant in the African holiday folder, or the Animals folder? Should that fantastic portrait of your spouse go in the Portraits folder or the Family folder? Or perhaps the Venice Holiday folder since you took it there? I guess you could make multiple copies of each image, one in each relevant folder, but that would get confusing – which do you edit? That is one reason why adding keywords is so important. Label that elephant image with several keywords – Africa; Holiday; Safari; 2020; Animal; Elephant etc… then you can use a search function to bring up all the elephant photos, be they ones on safari or ones in the zoo.

Want to try out two different versions? make a virtual copy (Lightroom does this; they are present in DxO Optics Pro; It is slated for Luminar “soon”; not sure about Topaz Studio Affinity Photo.). Perhaps crop them differently; perhaps make one monochrome; make multiple virtual copies and try out different processing steps. Compare the results and select the best.

Some software, such as Lightroom allow you to create virtual folders that allow you to organise your photos in whatever structure you want (In Lightroom and Adobe Bridge these are called collections; in Luminar they are called albums). A photo can be in multiple virtual folders, but only one original file is stored on the disk. The entries in the virtual folders are just pointers to that one image. Thus, you might have the Elephant image in a folder on the disk called Africa Holiday; then you can add a link to the image in collections Holidays \ 2020 \ Africa, and also in Animals \ wildlife ; In the Holidays collection add 1999 in which you can make a collection for Venice. Add a link to that lovely portrait of your spouse; add the image also to your Family collection, and your Portrait collection. And now it is WCC competition time. Make a collection for WCC \ 2020\ 11 (11 = November) and drag a link to the elephant and the portrait into the folder along with a dozen other likely candidates. Browse them. Remove the ones you decide against. All you are doing is adding or deleting links to the original image. Want to edit – the edit module will apply any changes to the original file. All the links in all the different collection folders will immediately show the changes, since they are just links to the file that now has edits on it. Want to find which collections a particular image is in? right click on the thumbnail and select Go to Collection to get a clickable list of locations.

Some relevant links to file management for photography

Posted in Workflow | Tagged , , , , | Leave a comment

Capturing images in the camera: RAW vs JPEG

By default most cameras come configured to take images in JPEG format. This is very convenient if you never want to go past very basic edits and don’t want to get the utmost from your (potentially large) investment in your photographic gear. In this scenario, when you expose an image, the camera takes the data from the camera sensor, and processes it into a JPEG, dropping a lot of the original image sensor information in the process. It is very convenient, but most cameras these days allow you to save ALL of the sensor data by recording a RAW file. This file format varies from camera to camera, and you usually need specific software to view the file, so you might think it a little inconvenient. However, a straight conversion from RAW to JPEG is straightforward with the software you got with your camera (or Lightroom or other software) you can tell your camera to take both JPEG and RAW if you don’t want to miss out on the immediacy of JPEG.

Below are some links that explain in more detail the pros and cons of RAW vs JPEG. If you are serious about your photography, I hope you will be taking your photos in RAW as this gives the greatest flexibility for post processing.

Some links about RAW vs JPEG

Posted in Workflow | Tagged , , , | Leave a comment

Workflow

Workflow describes the overall processes you use between retrieving the image from your camera to your finished image. It includes:

  • camera setup and image capture (in particular whether you capture in RAW or JPEG or both
  • file management including storage strategies and the importance of backup
  • indexing and cataloging (so you can easily find your beautiful images again in your ever-growing image collection)
  • basic editing
  • advanced editing
  • display including printing and mounting, web galleries etc. (though I probably will not be going into these areas in this post-processing training site)
  • Backing up your images (OK I know I mentioned this earlier… it is important and usually neglected. You’ll only value it after your disk drive dies. Look at this post)

How you set up your workflow is a very personal thing, but if you do it right your work will be more efficient and it will save you hours and hours of time and frustration. The links below will discuss some of these aspects in greater detail.

Posted in Post-Processing, Software, Workflow | Tagged , , , , | Leave a comment

random links

https://www.youtube.com/channel/UCMrvLMUITAImCHMOhX88PYQ Piximperfect channel on youtube

https://www.exploringexposure.com/blog/post-processing/creating-micro-contrast-in-photoshop/
  • https://www.exploringexposure.com/blog/post-processing/in-defense-of-post-processing/
  • https://www.kenrockwell.com/tech/ps-contrast.htm
  • https://www.kenrockwell.com/tech.htm
  • DOI10.1016/j.conb.2007.07.01
  • https://www.photopos.com/PPP3_BS/Photo-Pos-Pro-Free-Photo-Editor.aspx
Posted in Basic Edits, File management, How-to, Post-Processing, Software, Workflow | Leave a comment