Doug Porter is a Melbourne based international and nationally awarded photographer of fine art and pictorial images. You can see his galleries of fine art images at https://frescoimages.com .
Doug gave an inspiring presentation at the Honours SIG meeting on 10th June 2020, showing his editing processes. Watch the presentation on YouTube.
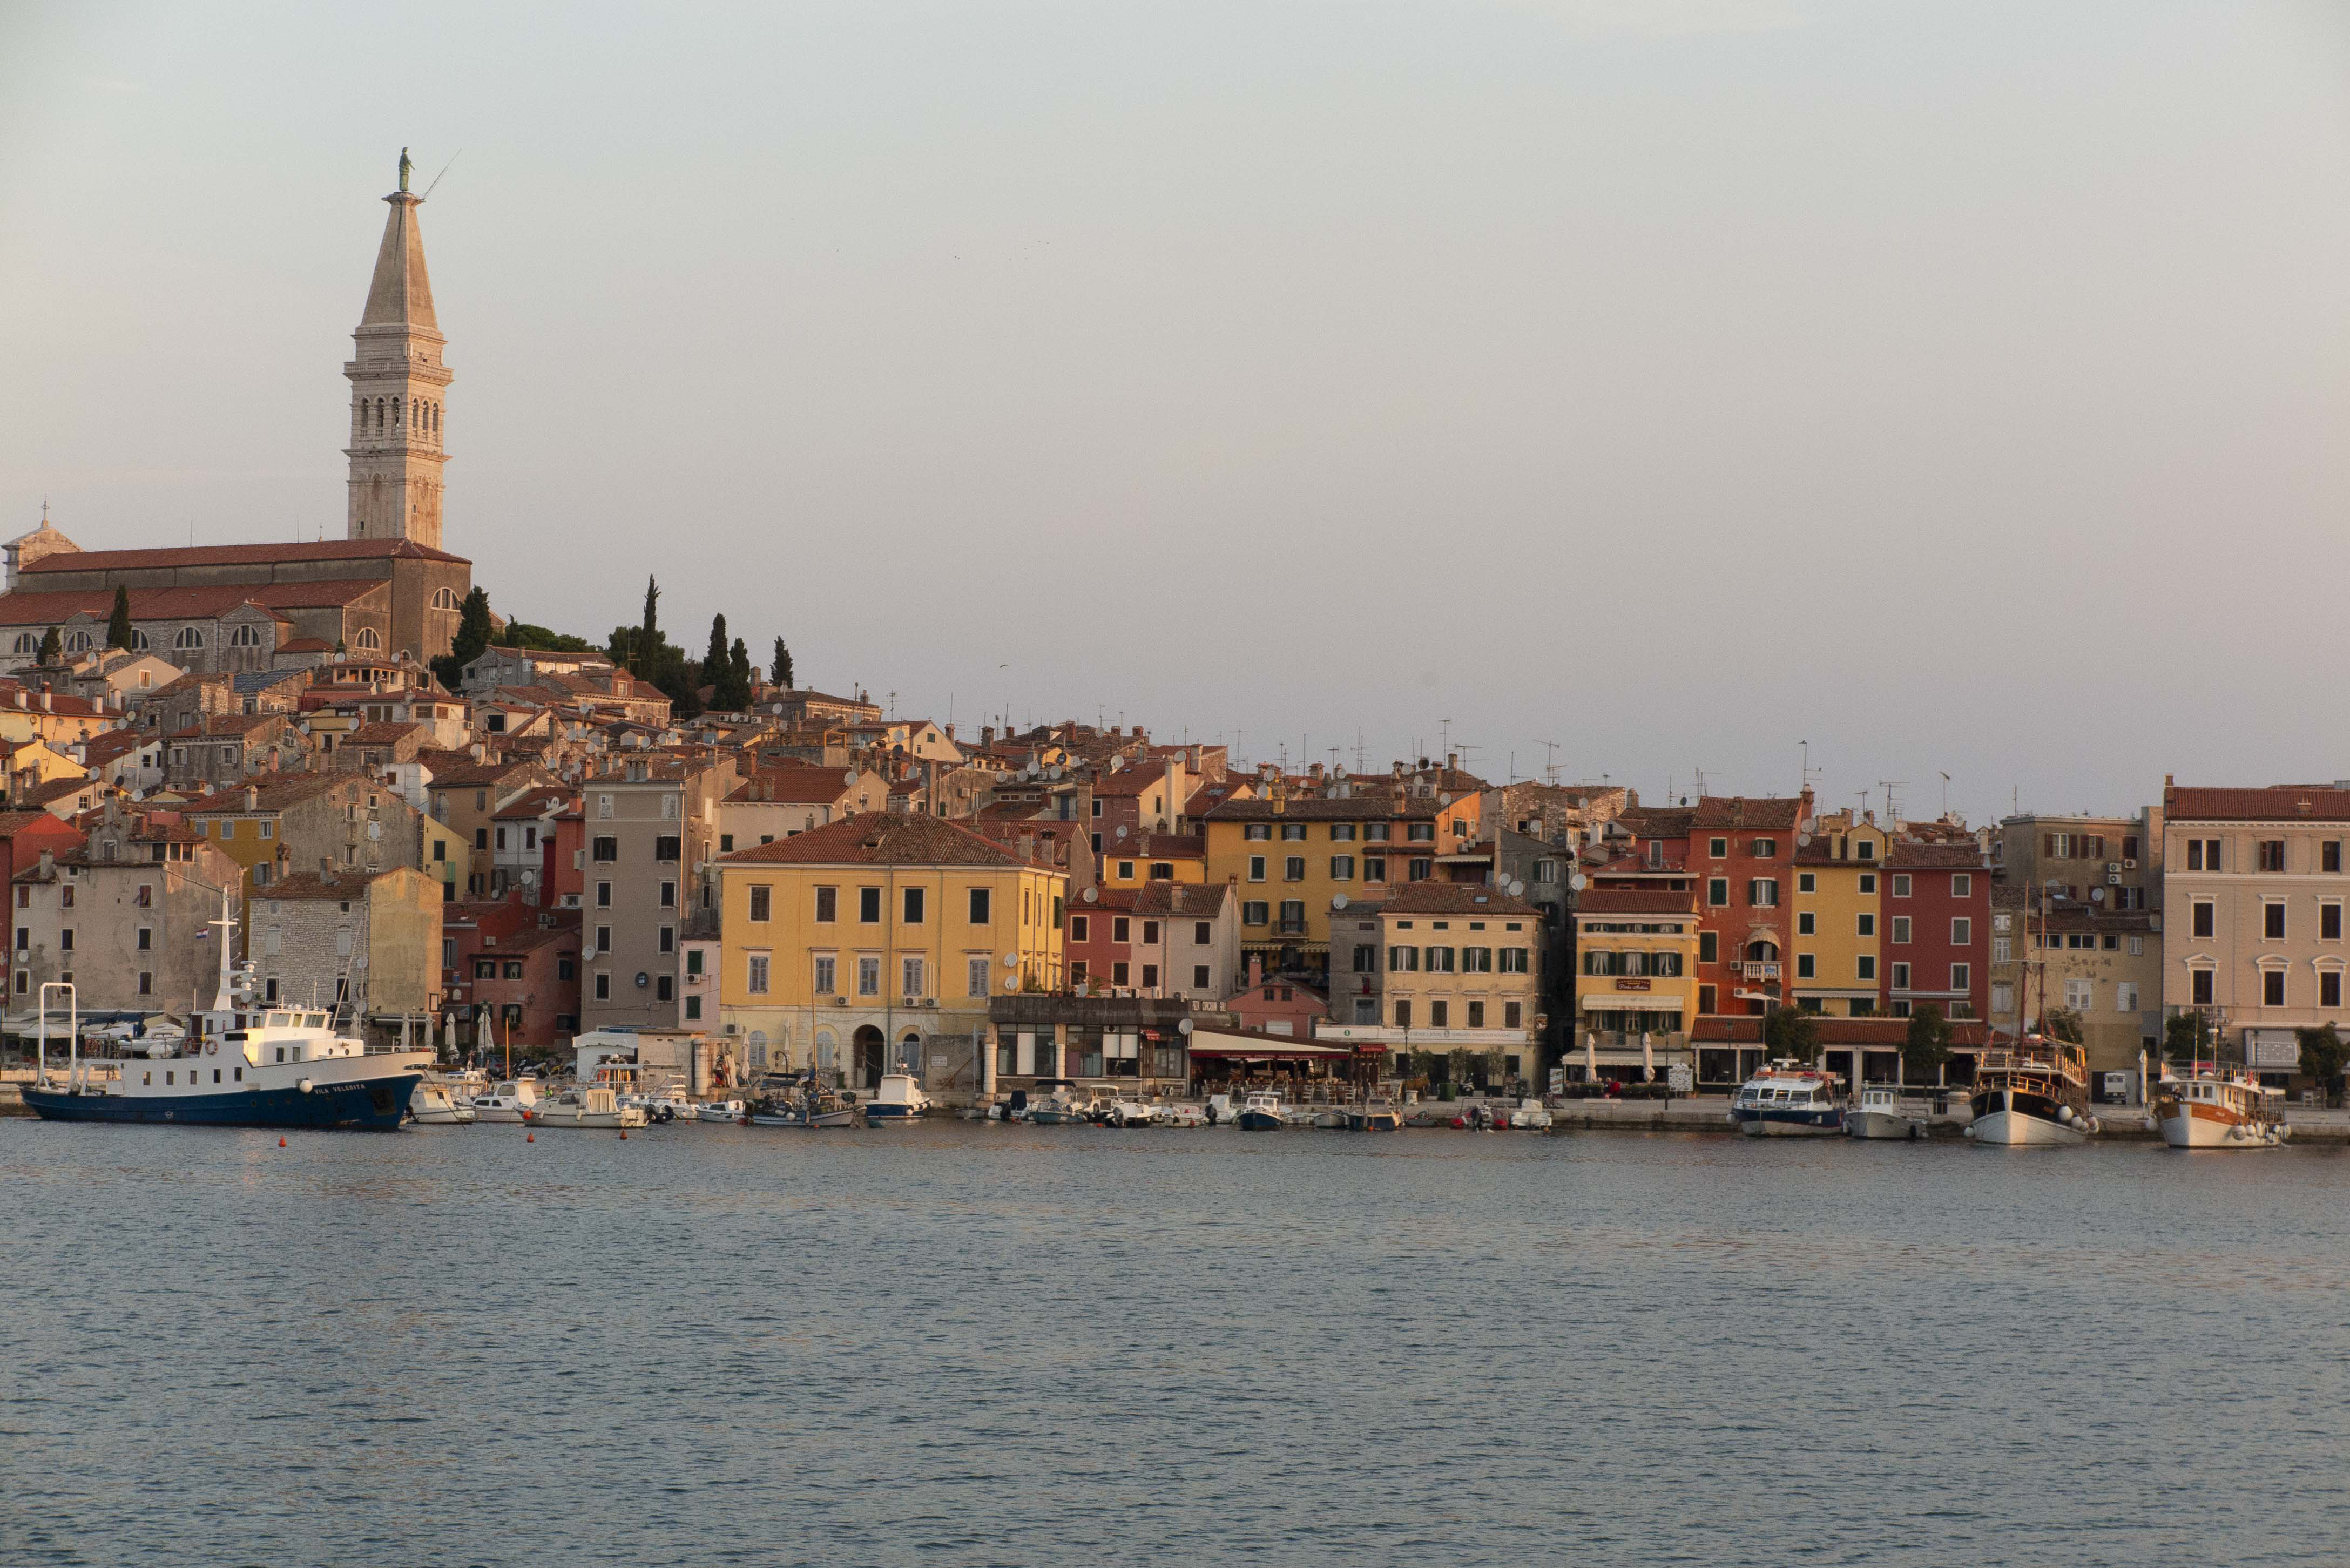
Following his presentation, Doug very generously invited members to submit images, one of which he would select and use to demonstrate his editing style. Fantastically, he did this not for one, but for all 7 images that were submitted. The images are presented below in before/after views. I am sure you will agree that the transformations are spectacular. Right-Click>>view image to see the JPEG files at full size. Doug also gave us the PSD files with the layers so you can follow his edits and see how they work by stepping through the layers. Click the links below the images to download the PSD files (beware these are all large files).
Before smart objects were introduced to Photoshop, if you edited a pixel layer, you changed the data in that layer so your edits were a one-way process. Smart objects changed that. A smart object’s base image is edited non-destructively. Any edits are added as a list of instructions embedded with the object, so you can return later and change those instructions to alter the edits. Since you are not altering original pixels, just changing the recipe for the edits, there are no losses in quality. If you scale, warp, distort you can modify these transforms later. However some operations that change the pixels, such as painting, burning or cloning, cannot be done on a smart object. For these you need to create a copy of the smart layer and rasterise it to allow these edits. For Dodging and Burning you can do this on a separate layer by painting in black or white and adjusting the transparency to adjust the intensity of the effect.
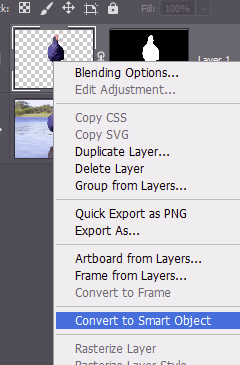
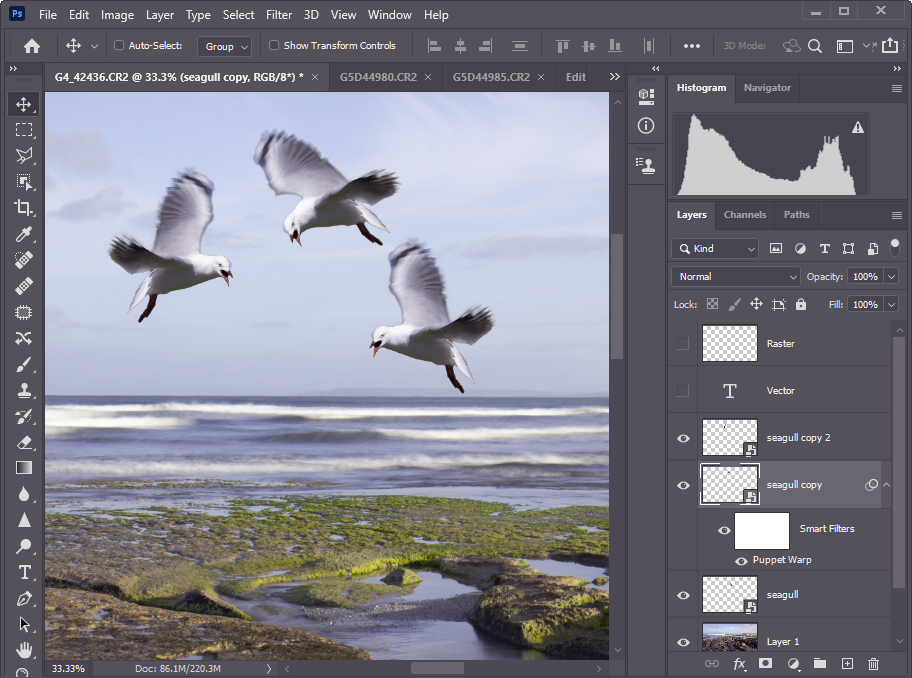
If you are compositing, you can paste in the pixels from another file and right-click the layer name and select Convert to Smart Object. Or you can insert images as linked smart objects rather than pasting in the pixels from the original file. Photoshop will find the needed pixels in the original file when it needs to show them. Your files might be much smaller since you are only adding a link to the original file, not the original file as a pixel layer. Perhaps you are not sure whether bird1 or bird2 is the image to add to your bland sky? paste Bird1 as a smart object. Resize it to suit. Then you can simply tell photoshop to link to Bird2 instead of Bird1 to see what the different image looks like. Bird2 will appear with the same transforms and edits that you set up for Bird1. Want to add several copies of Bird1? Duplicate the layer a couple of times. Move the duplicates to where you want them. Transform them as desired. Photshop only needs to store the edits for the new layers. If you decide you want to make them all a bit whiter? No worries. Adjust the colour and tone of the original layer, and the other 2 layers will change at the same time. In the image below, for example, the 3 seagulls are all the same bird, duplicated as smart layers, moved, flipped and puppet-warped to make them each distinct.
I hope this brief introduction has convinced you that Smart Objects are worth further learning. There is a lot to know about smart objects so I will refer you to more comprehensive resources.
Nik Collection is a popular set of 8 photo processing plugins for Photoshop, Lightroom, DxO Photolab, Affinity Photo and some other packages.
Color Efex Pro — Package of filters that comes with many effects for adjusting tonality and colour.
Viveza — Color control with advanced functions to change contrast and saturation
Dfine — Noise reduction
Sharpener Pro — Image sharpening
HDR Efex Pro — Specialized program for processing HDR pictures
Silver Efex Pro — Black & White conversion
Analog Efex Pro — Applies film-era camera, lens, and film simulation to digital images.
Perspective Efex — Corrects perspective and optical geometric distortions
The collection was developed originally by Nik software which was later bought by Google. Google eventually ceased development and made the program suite free (see below). DxO later acquired the software and resumed development (currently version 3).
Free version 1.2.11 circa 2016
These links may change. The software has undergone some development and improvement since this era, but for the price, this edition is good value if you don’t want to fork out for the current offering.
Currently DxO offer a free 30 day trial, and sells a lifetime license. Among its features, the Lightroom plugin offers a non-destructive workflow (via multi-layer TIFF files). The filters offer a diversity of controls for colour and tonality and a huge range of presets. The denoise and sharpener plugins are reputed to work well.
An image browser, converter and editor that supports all major graphic formats including BMP, JPEG, JPEG 2000, GIF, PNG, PCX, TIFF, WMF, ICO, TGA and camera raw files. It has a nice array of features such as image viewing, management, comparison, red-eye removal, emailing, resizing, cropping, color adjustments, musical slideshow and much
This is a fine image browser with ability to tag files, to copy and move files, and view EXIF data. It handles most image formats including most Raw formats. However it cannot be regarded as a fully fledged digital assets manager, with only basic tools in this area.
For a file viewer, Faststone Viewer has good, although basic, editing functions. It has the usual suite of adjustments for tone and colour and monochrome conversion. It can crop or rotate (only 90 degree increments), and has clone and heal tools. You can edit raw files, but you must save the edits as an editable format (jpeg / tiff) after you finish.
You can crop and resize. It has batch tools so you can crop, resize, rotate, convert between image formats, and rename groups of images at a time.
Non-destructive editing is not on the menu. If you want, save a copy of the file (at different points of your edit sequence if you like so you can resume editing from different stages).
You can add shapes, lines and text to an image, but these are functions more useful for annotating images than for photographic art.
There are no layers or masks and no capability to combine multiple images (compositing). Faststone viewer is not an alternative to a full blown image editor. (If you want a free editor with more capability try out Paint.net which has a simple interface but has powerful capabilities including layers and blend modes. If you want the full monty with a free program try GIMP)
DxO photolab works well as either a standalone program or a plugin to Lightroom and Photoshop (and perhaps other packages). It is a comprehensive non-destructive Raw image editor with a large array of adjustments/filters, and a suite of presets and colour management controls. Layers and masks allow excellent control of local adjustments. It has a powerful array of filters, strong abilities to correct for specific lens defects. It has good denoise and sharpening functions.
It has limited digital asset management in the form of a file/image browser and can use keywords to tag images, as well as the usual star and colour ratings, and EXIF data in the file can be edited.
The software comes with a one-off purchase price. DxO offer 30 day free trials on all their software so you can try before you buy.
DxO also own the Nik collection of image editing utilities that work as plugins. These are excellent and worthwhile considering in their own right to use in conjunction with other software.
Topaz labs have made a range of specialist image processing software over the years. Their focus has become AI (“artificial intelligence”) based tools. There are lots of detailed reviews on the web, so I will just do a quick overview of my thoughts on these.
Topaz makes the programs free to download to try out, so give them a go if you think they might be useful to you.
These tools all use a lot of computing power. If you have a computer with small memory and a low powered graphics processor, they can be slow. I recently upgraded my computer to 32 GB RAM and a nVidia 3080 graphics card, and now the programs run quite fast (though far from instantaneous… the programs to a lot of computing).
Topaz Sharpen can do a remarkable job, particularly with things that were in the training AI models. Faces and feathers are good examples. It has separate models that are trained for focus/lens blur and motion blur. If all you have is a tiny bit of unsharpness, it can do an excellent job of sharpening without obvious halos etc. It won’t work well for everything, and sometimes it generates some undesirable artifacts, but, overall, it is a very useful tool to have. The program can automatically detect a subject and sharpen just that, and there are manual controls to assist in subject selection.
Below is an example of a photo of a swan that I grabbed as it flew overhead (resized image in the left panel). The camera was set at 1/400 sec, so there is quite a bit of motion blur that is visible in the crop in the middle panel. After work using Topaz Sharpen, and some adjustments to the lighting in Photoshop, shown in the crop on the right, the image is dramatically improved. Click the individual images to see the original 100% crops – WordPress will likely have resized the images for your screen and interpolated the pixels in the resize.
Topaz Denoise also does a good job. It also has a number of different models to handle different levels/types of noise Here is an example, a crop of a Gang Gang Cockatoo that I took at 12,800 ISO (600mm, f6,3,1/1000sec). Click the individual images to see the original 100% crop.
Topaz Gigapixel can be useful to rescue those images where you simply couldn’t get close enough to fill the viewfinder with the subject, or if you need to make a HUGE print. Or maybe you need something for a composite and your only image is too small. Here is an example of some bathers a long long way away on a beach – the left image shows the enlarged (pixelated) original and the right is after gigapixel enlarged it 4x (original crop, no lighting adjustments, was 206 x 119 px, After gigapixel it was 824 x 476 px; below is an image compare, slide the middle divider left or right).
Note that because Gigapixel AI resizes images it does not show up as a Filter in Photoshop, whilst sharpen, denoise and photoAI do.
Topaz Photo AI combines all 3 of these into a single package with an AI autopilot mode so you can just add your photo and let it do all of the “thinking”. It seems to be quicker than the individual stand-alone tools, but I suspect it may use a cut-down subset of the AI models to speed the processing (or maybe they rewrote the code to make it faster). One reviewer who reported on a direct comparison found the stand alone apps could produce better results https://www.landscapephotographyireland.com/topaz-photo-ai-review/ but these packages are continuouly being updated, so it may be test for you to download a free trial and see how they work for you.
Topaz Labs also make several other applications including for video processing
Here is a link to a video which I thought was pretty good for the starburst effect:
I tried this out and I did not have as much success as was evident in the video – looks like the brushes are slightly different in my version of Elements (15).
Another video which goes further and shows a simple way to create your own starburst brush is here:
Colour is complex, and you can find hundreds of books on the topic and a search for “photography colour management” on a popular search engine found 121 million hits today. My notes here will be just a brief introduction. I will post more later in the Advanced Techniques section.
Think, for a moment, about the qualities of light. in the hour after sunrise or before sunset, sunlight is much warmer – yellows, oranges and gold, than in the middle of the day. The light from your old tungsten light globes (yellowish) is very different from your fluorescent tubes (greenish) or your Xenon strobe flash gun (probably “daylight” balanced). In photography we use a scale called Colour Temperature which approximates the colour of light from a heated filament at different temperatures. Think of the colours as you heat metal in a furnace – dull red at first, warming to white hot. Colour temperature in photography ranges along a yellow (cool, low temperature) to blue axis, and usually there is a tint control that adjusts colour on a magenta to green axis. Together these give a great deal of fine control.
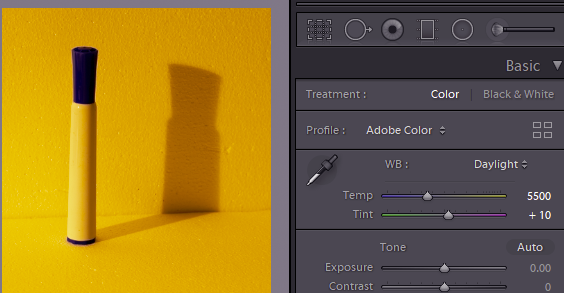
In your camera you will probably note that there is a “white balance” setting, which might be set at auto (camera will decide) or presets like “daylight”, “shade”, “tungsten” and so on. These controls do not affect what the sensor collects, but if you are taking photos in JPEG then they affect how the colours are translated from the sensor to the JPEG file. If you take RAW files, the colour balance setting is less important. All the sensor data is present in the file, and the colour balance setting just determines how these are translated into the displayed image. You can freely adjust the colour temperature (and tint) in your Raw processing software. If you took a photo in the middle of the day using, say, tungsten light setting, the image will probably look blue. Click the colour temperature setting in your software to “daylight” and the image will look more natural. The image below was taken with tungsten light. With tungsten colour balance (colour temperature 2850 Kelvin- the temperature of the filament in a tungsten lamp), the pen barrel and background look white/grey. With Daylight setting (5500 K, about the temperature of the Sun’s surface) we have a distinct colour cast. Note the eyedropper tool. Click on this and click it on the image where there is something that should be a neutral grey colour, and the software will automatically adjust the Temp and Tint over the whole image to make that area neutral grey. This is a great way to make a start on colour balance, especially where you have difficult light (assuming the image has some neutral grey objects to click on). There is also a dropdown selection of fixed presets or you can tweak the Temp and Tint sliders.
Image of a white and blue pen against a white background photographed using tungsten light, but adjusted to “daylight” colour balance in Lightroom. Note the pronounced colour cast.
No matter what software you use, you will find colour controls similar to those in Photoshop and Lightroom. Below I will explain some of the features in the Adobe programs, but if you use something else, have a look because the controls on your software probably work in a similar way. If not, consult your software vendor’s website or the internet for instructions specific for your software.
Among the Lightroom Develop controls you will also find saturation and vibrance sliders. As the name suggests dragging the saturation slider to the left will reduce the colour saturation. At the far left you are left with a monochrome image. A slight reduction in saturation suits some images. Increasing the saturation might be of value where an image is looking very flat and dull, but take care. Saturation increases the intensity of all the colours in the image. Raise it too much and you can get clipping, where the colours are blown out. Vibrance is a bit more selective. It pushes the saturation in the areas of the image where the colours are more muted, but leaves the already highly saturated parts alone. Have a play with them on your own images to see how they affect the appearance.
The next tool to discuss in Lightroom is the HSL (Hue/Saturation/Luminance) control. The colour panel gives you hue, saturation and luminance sliders for Red, Orange, Yellow, Green … which allow you to tweak these properties in the image over the corresponding colour bands. Or, you can click the small direct adjustment tool (circle at the top left) then drag over a colour on the image to tweak the hue, saturation or luminance of just that colour range. Very handy.
Split toning allows you to change hue and saturation separately for the highlights and shadows. Consider a scene illuminated by a setting sun. The highlight areas will have an orange glow, whilst the shadows will be bluish as their light comes from the blue sky above. You can tweak, say, the shadow tones to make them less blue without altering the highlight toning. Or maybe you want to create a more golden-hour look on a midday photo. Adjust the highlight colours towards orange / yellow; maybe tweak shadows towards blue. Have a play to see what you can do.
The Tone curve control also allows you to make separate tone curves for Red, Green and Blue channels which also alters colour balance. However this approach can be difficult to get right, so I’d recommend sticking to the other controls mentioned before.
Local colour adjustments are also available using the brush or gradient tools to apply the colour tweaks to specific areas of the image.
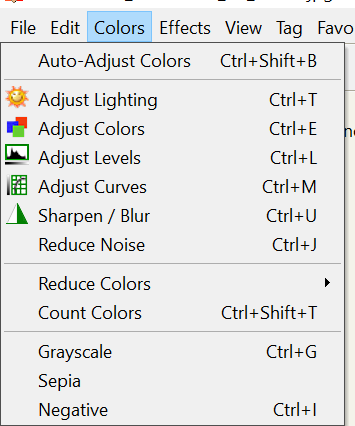
In most image editing applications there are several adjustments for colour; I have listed the main controls here from the Adobe website :
Adjust Levels Auto Quickly corrects the color balance in an image. Although its name implies an automatic adjustment, you can fine-tune how the Auto Color command behaves. See Remove a color cast using Auto Color.
Levels command Adjusts color balance by setting the pixel distribution for individual color channels. See Adjust color using Levels.
Curves command Provides up to 14 control points for highlight, midtone, and shadow adjustments for individual channels. See Curves overview. Exposure command Adjusts tonality by performing calculations in a linear color space. Exposure is primarily for use in HDR images. See Adjust Exposure for HDR images.
Hue/Saturation command Adjusts the hue, saturation, and lightness values of the entire image or of individual color components. See Adjust hue and saturation.
Match Color command Matches the color: from one photo to another photo, from one layer to another layer, and from a selection in an image to another selection in the same image or a different image. This command also adjusts the luminance and color range and neutralizes color casts in an image. See Match the color in different images.
GIMP is a cross-platform image editor available for GNU/Linux, OS X, Windows and more operating systems. It is free software. GIMP provides sophisticated image editing tools similar to those in Photoshop. There is a vast array of 3rd party plugins that can extend the functionality of GIMP.
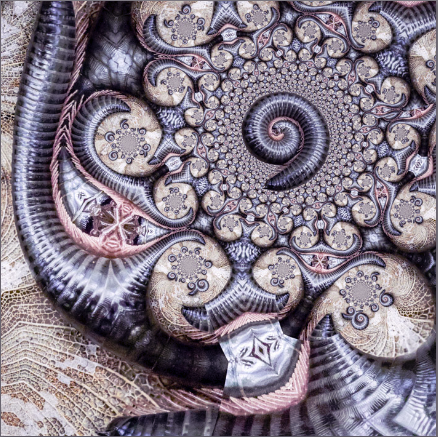
Image of a millipede on a leaf skeleton, transformed using a plugin in GIMP for a creative effect.
GIMP is extensively documented online, including a range of tutorials ranging from then basics of installing and first use, through to sophisticated techniques like luminosity masks. The built in help module is extensive.
The following list (from the Help File) is a short overview of some of the features and capabilities which GIMP offers you:
A full suite of painting tools including brushes, a pencil, an airbrush, cloning, etc.
Tile-based memory management, so image size is limited only by available disk space
Sub-pixel sampling for all paint tools for high-quality anti-aliasing
Full Alpha channel support for working with transparency
Layers and channels
A procedural database for calling internal GIMP functions from external programs, such as Script-Fu
Advanced scripting capabilities
Multiple undo/redo (limited only by disk space)
Transformation tools including rotate, scale, shear and flip
Support for a wide range of file formats, including GIF, JPEG, PNG, XPM, TIFF, TGA, MPEG, PS, PDF, PCX, BMP and many others
Selection tools, including rectangle, ellipse, free, fuzzy, bezier and intelligent scissors
Plug-ins that allow for the easy addition of new file formats and new effect filters.
Gimp handles RAW files through use of a plugin like Darktable or UFRaw. Once these are installed, Raw file handling is straightforward.
Gimp supports layers and masks, sophisticated selection tools (some built in, some obtainable as plugins), and flexible file output options. It lacks filter layers, unfortunately, but you can always duplicate a layer/layer group and apply the filter to that layer. It’s not quite as flexible as PSs filter layers, but it gets the job done.
It is not as fast, and not as refined as Photoshop, but for the price ($0 for a perpetual licence including lifetime updates) it is superb. I use it sometimes for features that Photoshop lacks.
The user interface is a little different to that of Photoshop, but it is very customisable, so you can set up keyboard shortcuts and other tweaks that give you a more PS-like look-and-feel.