
Introduction
These notes are meant to be a very brief introduction to Macro and Close-Up photography. There are many books (try your local libraries) that cover this area more comprehensively, as well as many online resources. A few are listed below – a quick web search will reveal oodles more:
- https://en.wikipedia.org/wiki/Macro_photography gives a brief overview including some history of the field as well as some technical aspects.
- https://www.adobe.com/creativecloud/photography/discover/macro-photography.html
- https://photographylife.com/macro-photography-tutorial
- https://expertphotography.com/macro-photography-tips/ (but note that this site has very very intrusive pop up advertising that you have to endure)
- https://www.photomatters.org/macro-lens gives a “live” demonstration of the effects of focal length, aperture etc on macro imaging
- http://extreme-macro.co.uk/ lots of detail in this site if you want to get into extremely high magnifications.
Why Macro?
Close-up and macro photography can open a whole new world. You will see things in a completely new way. It isn’t all about bugs and flowers. See, for example, https://fixthephoto.com/macro-photography-ideas.html for an interesting set of ideas for close-up and macro images.


What is macro/close-up
Close-up and Macro exist on a continuum. Whilst one often sees definitions that macro is 1:1 life size on the sensor, how big is your sensor? By this definition, macro with an 8×10 inch (200 x 250 mm) plate camera is very different to macro if you are using, say, a mobile phone with a sensor about 4×6 mm. And if you have, say, a full-frame sensor (~24×36 mm) do you need to fill the frame with your subject, or can you take a more expansive view, and crop out the macro bit from the middle (why not, you have lots of pixels to play with). I think any of the definitions you might see that include reference to the size of the image on the sensor are flawed.
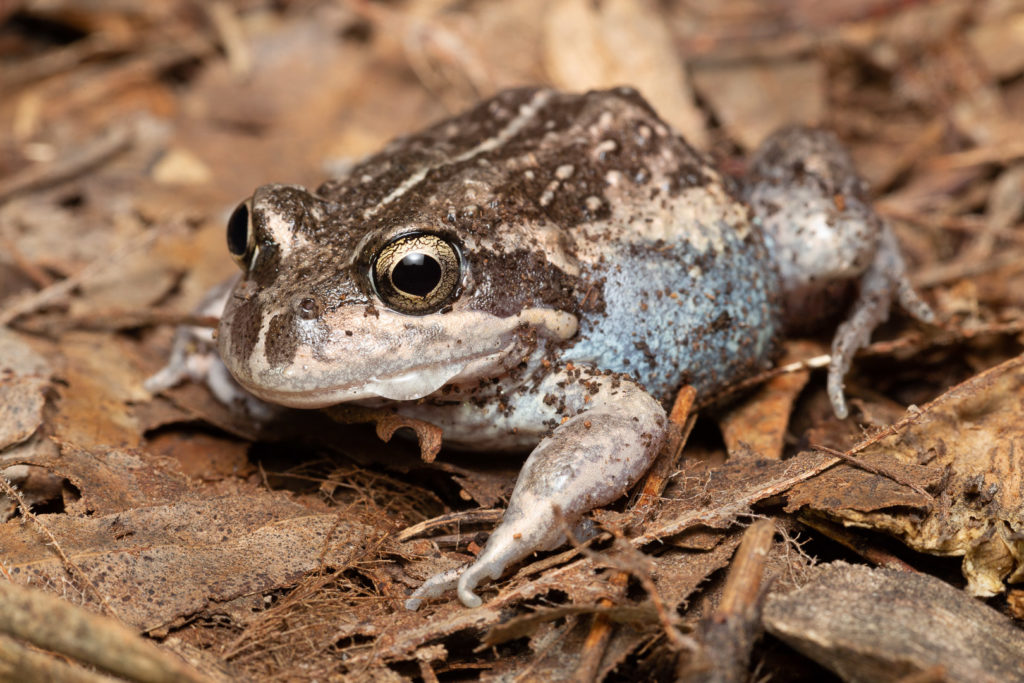
I think a better way is to think of close-up in terms of how big is the original subject that is framed in your image. If your frame encompasses, say, a field the size of your hand (or thereabouts) it would be uncontentious as a close-up; if subject is, say 20-40 mm across, it would easily class as macro.
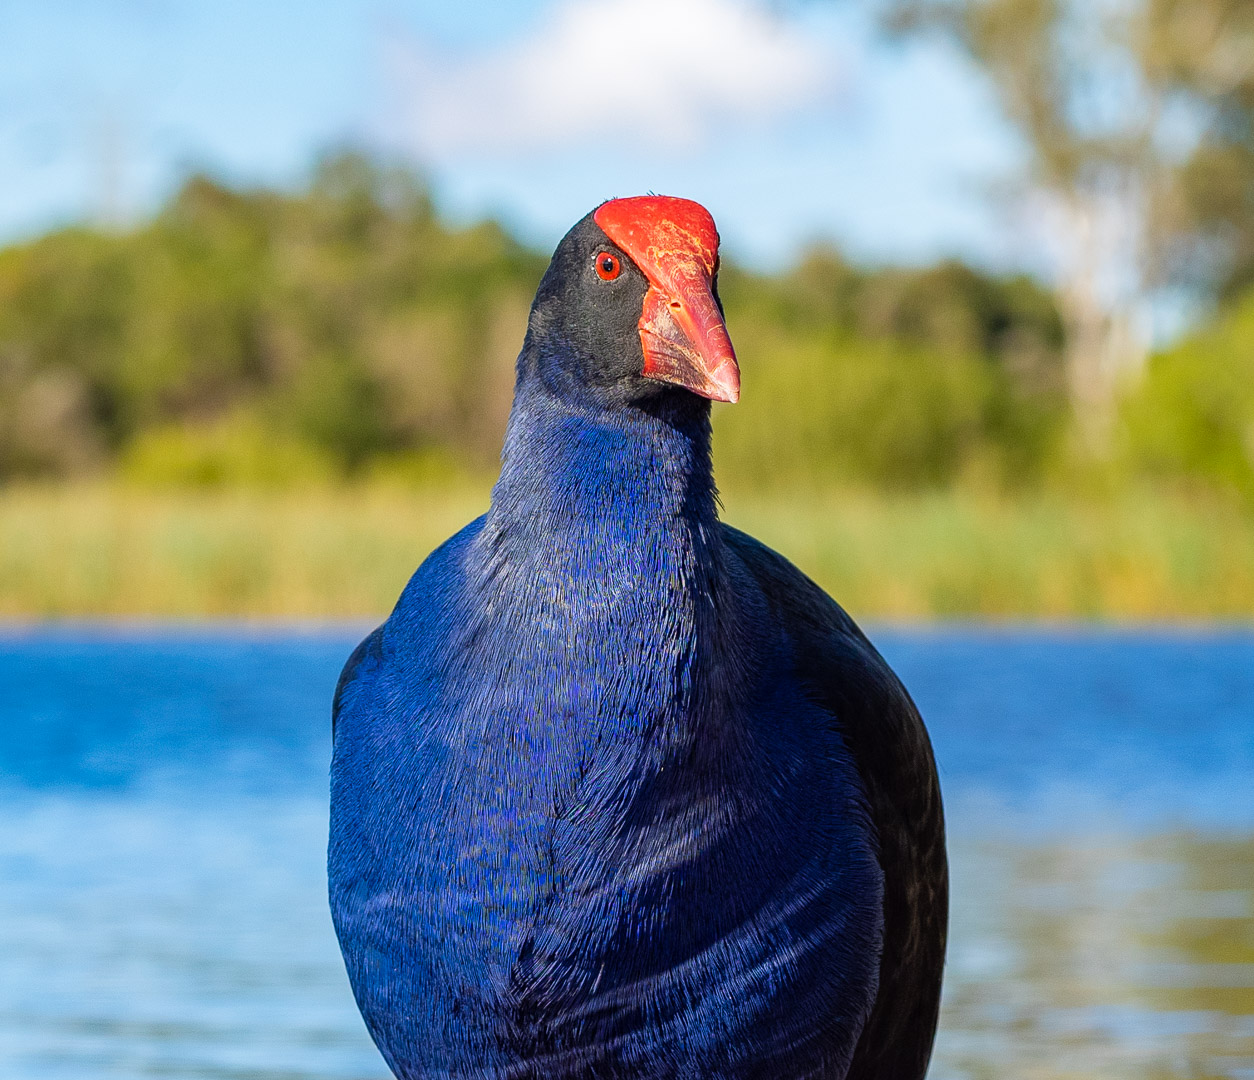
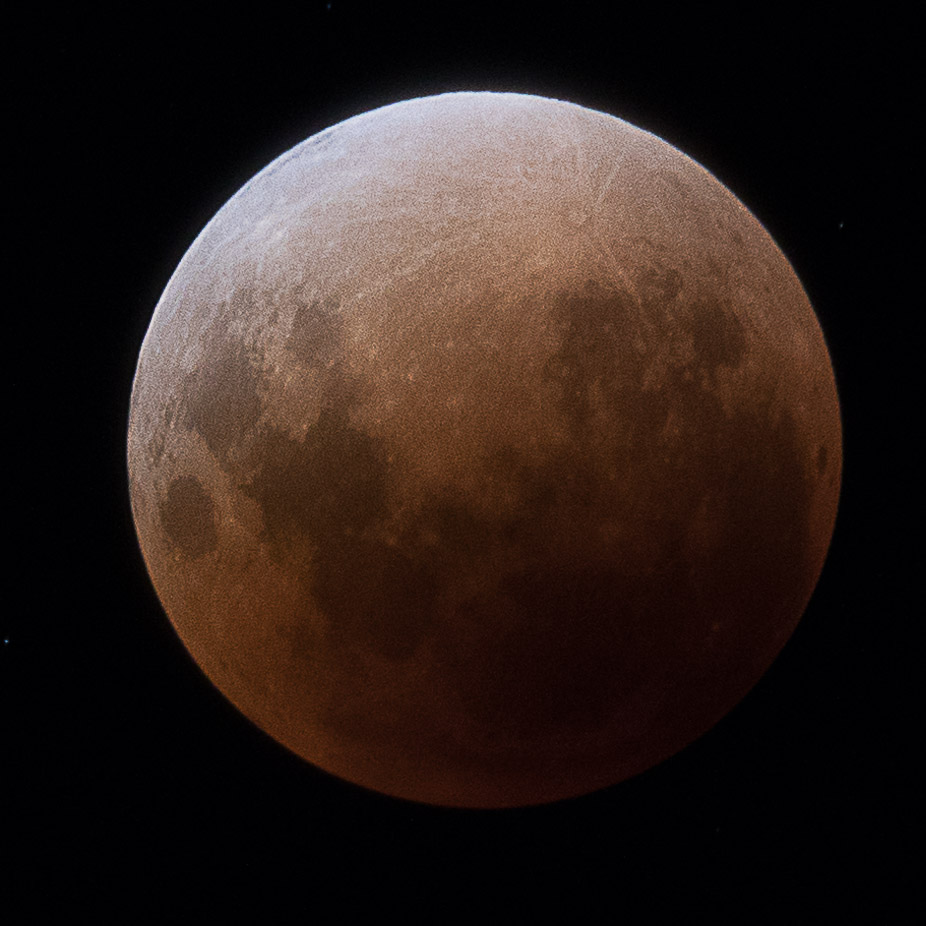
A further complication is illustrated below. I was quite close-up to the bird, but the background is far from close up. Is the moon a “close-up” shot? It is certainly much “closer” than the appearance with the naked eye, although it is about 385,000 km distant.
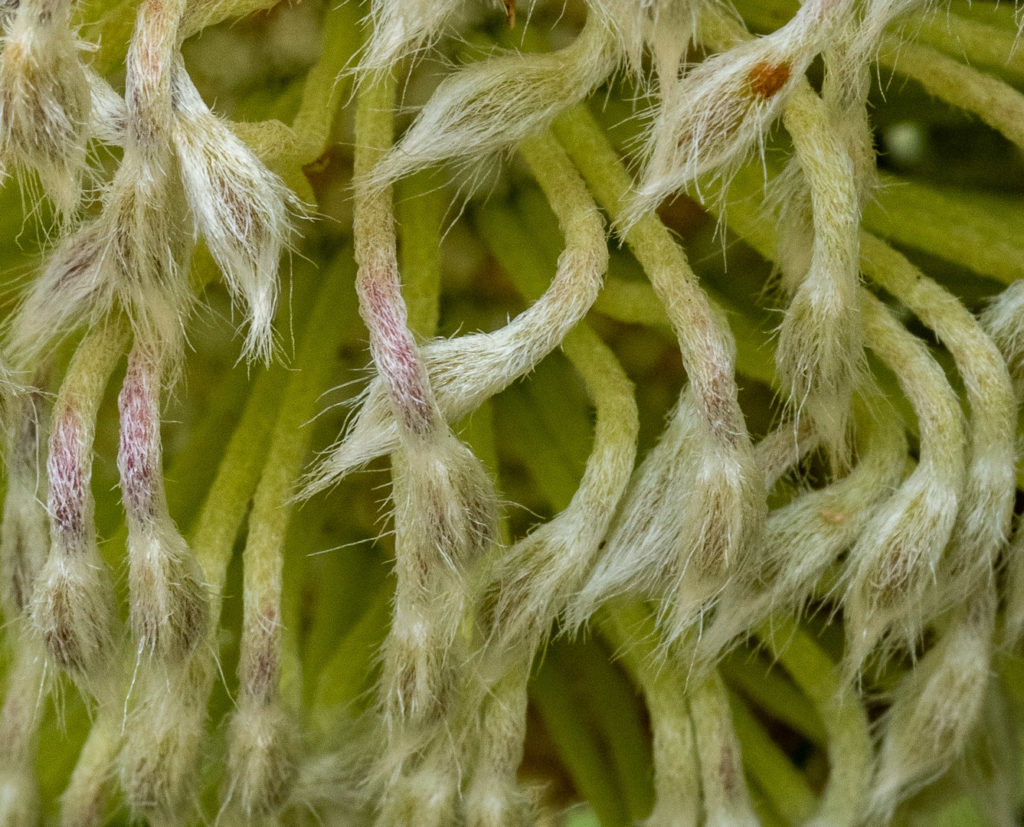
Even higher image magnifications are possible, where you start to get into the ultra-macro region and photomicroscopy. As magnifications increase you start to see a fabulous range of details that are not visible to the naked eye.
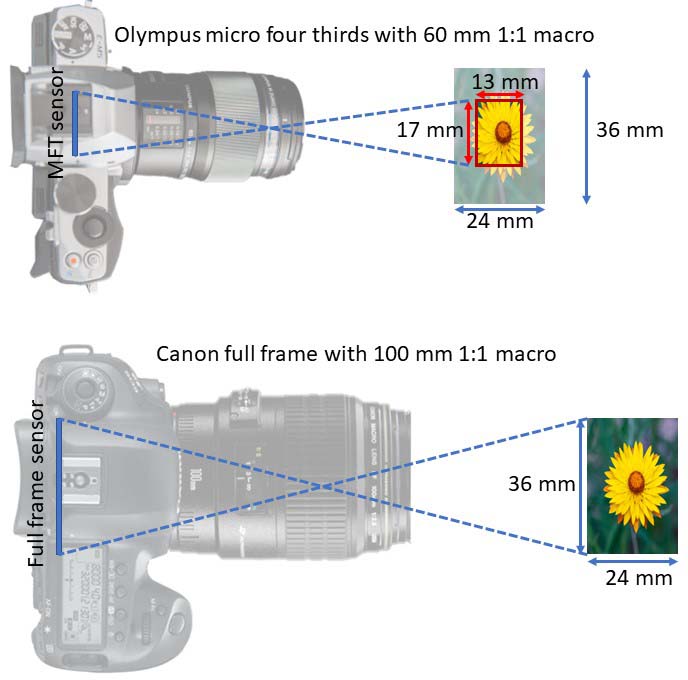
A thing to note is that often you will see reference to the highest magnification for lenses in the lens specifications. Remember this, too, is dependent on the sensor size the lens is designed for. As an example, I have a Canon Macro lens that does 1:1 on my full-frame canon camera. So I can fill the frame with a subject about 24 x 36 mm. I also have a macro lens for my Olympus micro-four-thirds camera. It also does 1:1, but the sensor is smaller, so I can fill the image field with an object about 13 x 17 mm; in terms of what is encompassed by the frame, the 1:1 Olympus macro gives twice the magnification (relative to the full image obtained) that I get with the Canon at 1:1.
Terminology (a brief glossary)
Macro lenses typically can achieve 1:1 magnification (but see my previous discussion of what this means in practice). Nikon go their own way, labeling their macro lenses “Micro-nikkor” lenses, but in general, if you see a lens setup described as micro, it generally is designed for a microscope and achieves better than 1:1 (life size) magnification. You may find various manufacturers tacking on the word “macro” to a lens that falls short of this magnification. For example Tamron has a 70-300 F4-5.6 Di LD MACRO, and this does achieve 1:2 (half life size), a greater magnification than most similar lenses (typically ~1:4), but it isn’t the full deal. Magnification is one aspect. We also expect Macro lenses to be exceptionally sharp across the whole field including the corners, have negligible distortion, and a very flat field of view. These are characteristics that are extremely important if you are copying documents, documenting specimens or artworks etc.. They may not be so important if you are taking photos of butterflies in the garden where nobody will notice if there is a bit of barrel distortion, or softness at the edge of the frame.
The working distance is the distance from the front of the lens to the focal plane where the subject you are focusing on is. This is often much shorter than the focal distance, which is the distance from the plane of the sensor within the camera body and the focal plane, as illustrated above. When looking at camera specifications for macro, bear this in mind. A small closest focus distance and a relatively long extended lens length might mean you have very little space between the front of the lens and the subject you are focusing on. This may mean your subject gets scared and disappears, or that you cannot get enough light to the subject since the lens is in the way.

Note also that Aperture generally relates to the specification when focused at infinity. As you focus closer the effective aperture changes. An f2.8 macro lens at 1:1 has an effective aperture of f5.6 in terms of exposure, and when you stop down to a nominal f11 (say) the effective aperture will be f22 (see HERE for more details). However that is generally not a great concern in practice since mostly you will be using Through the Lens (TTL) metering (or, maybe, manual lighting with lighting adjustments by trial and error).
Equipment
Whilst there are many specialist bits of kit for macro photography, you probably already have gear capable of making excellent close-up or macro images. Most modern smartphones can make a good close-up image (eg HERE). Most compact digital cameras will focus quite closely. Most digital SLR and mirrorless cameras are excellent, even with standard lenses. The standard lenses or telephoto zooms will often have a maximum magnification of around 0.2x to 0.3x. Well short of 1:1 macro (1x), but perfectly good for close-up – probably the palm of your hand size field of view. My Olympus EM5 has a sensor about 4600 x 3500 px. If I take a photo at 0.25 magnification (full frame equivalent; about 100 x 130 mm frame) and crop a 1920 x 1080 section from the centre of the image, the effective magnification is better than 0.5x (image field about 30 x 55 mm).
Besides photographic gear, there are some other items you might consider. Often, for subjects like flowers, insects and fungi, you may end up kneeling or lying on the ground. Taking a piece of plastic or a sealed-cell foam mat might make your life more comfortable. Usual outdoors items like protection from sun, biting insects, suitable shoes, long sleeved shirts and long pants, rain gear etc should be considered. Make a GPS record for your starting point if you are planning to wander around in a forest. If you lose your orientation, you can then use your phone maps to work your way back (taking care to avoid any hazards like cliffs that may lie between you and your destination). A torch is a useful item. If you lose track of time and discover you are a long way from your start point when the sun sets, you will have some light to find your way back.
Cameras
As noted above, you don’t need an expensive specialist camera. Some smartphones have cameras that do quite well at close-up and macro distances. That said, using an interchangeable lens camera with a large sensor has some advantages. As you get more and more magnification, the effective aperture of your lens decreases (ie less light will get to the sensor) so you will need to have a sensor that works well at high ISO (low sensor noise), a long exposure (not possible with moving insects, wind-blown vegetation etc), or very bright additional lights. If you have an interchangeable lens, you can use specialist macro lenses or use extension tubes or bellows (see below).
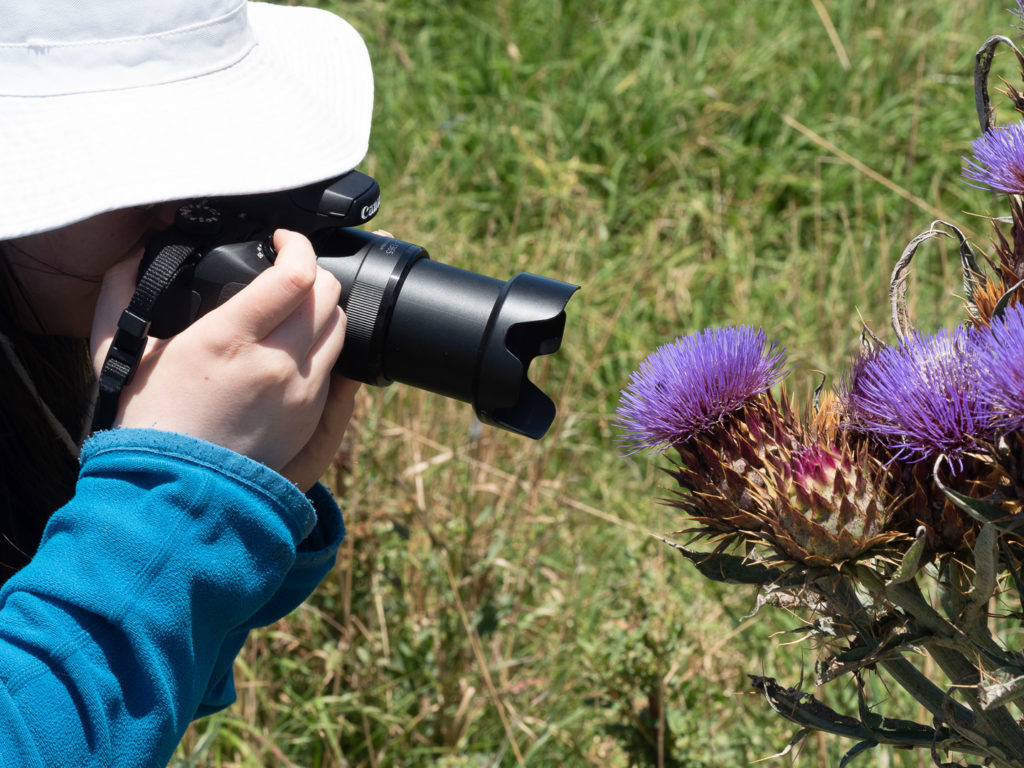
An expensive setup is not needed. Here a Canon bridge camera (a powershot SX70) is being used to get close-up/macro images of a thistle flower.
Lenses
Many standard and telephoto zooms will give good maximum magnification ratios for close-up photography (and possibly better magnifications with extras, see below). Some even have “macro” settings, though these are often more a marketing promise than a real change in the optics. These lenses are not designed specifically for high magnification/macro and often suffer from distortions and a curved field of focus. If you aren’t into scientific or forensic recording, this may not matter. A bit of softness in the corners won’t matter if the subject is a beetle’s eye in the centre of the frame, for example, and the bit of barrel distortion is of no consequence.
However if you need very high magnifications, edge to edge sharpness, and minimal distortion, then a macro lens is a worthwhile investment. Macro lenses typically will focus to 1:1 (but with the caveats I mentioned earlier), will have a very flat field of focus, virtually no distortion, and are generally capable of very high resolving power (very sharp).
Macro lenses come in a range of focal lengths, and the best length depends on what you want to photograph. If you are photographing coins, for example, a “standard” focal length (50-60 mm full frame equivalent) will work well. If you are photographing dragonflies and the like, a longer focal length will give you the same macro magnification with a greater working distance (get too close and that dragonfly or frog will almost certainly disappear before you get your photo).
Depending on your budget, you might want to consider third-party brands like Tamron and Sigma and Laowa (Venus optics; a variety of marketing names for the same lens) who make excellent macro lenses at prices generally less than say Canon, Nikon or Sony.
There are also some specialist camera lenses designed to get even higher magnifications. For example, the Canon’s EF 65mm MP-E works in the range of 1x to 5x magnification, the Laowa 25 mm 2.5x – 5x ultra macro, and the Laowa 100 mm 2:1 APO macro. Be aware that working at very high magnifications can be very challenging. It is worthwhile reading up on this specialist area before investing heavily in such lenses.
If you need long working distance (for example chasing dragonflies), then a longer telephoto range is useful. For example my 100-400 canon zoom offers 0.31 x (~1:3) magnification with a working distance of 600 mm. With my 100 mm macro at the same magnification, my working distance is only about 250 mm. My cousin has had excellent success chasing dragonflies using a Canon 70-300 L lens with extension tubes (see below). With a 37 mm extension tube he gets a magnification around 0.4x with a working distance of around 600 mm (note: with this setup the zoom control effectively becomes focus).

Extension tubes, Bellows, Teleconverters, Focusing Rails, and Reversing rings
These allow you to to make the lens focus closer (and hence give greater magnification). Extension tubes are simply empty (lensless) tubes (generally with electrical connections to pass information between the lens and camera). They fit between the lens and the camera; this moves the lens forward so it will focus closer. Aftermarket models can be relatively inexpensive. They typically come as a set of 3 of different lengths that you can combine to make a range of extension distances. Bellows provide the same function of increasing the separation of the lens and the camera body. They have a rack and pinion mechanism to adjust the extension, and some versions allow some tilt and shift functionality. They are usually much more expensive than extension tubes.
Teleconverters are lenses that you fit between the main lens and the camera body. They effectively increase the magnification of the lens system, so, for example, my Canon 100mm f2.8 macro lens with my Kenko 1.4x teleconverter effectively becomes a 140 mm f4 lens with a maximum magnification of 1.4x (note the Canon 100 macro is not compatible with the Canon Tele-Extenders (yes, just to be annoying Canon call them tele-extenders not teleconverters)). Teleconverters add extra glass elements to the optical path and are not necessarily optimised for the particular lens they are attached to, so there may be some degradation of image quality. However a good TC attached to a high quality lens is likely to give you very good images. I recommend searching the web for reviews of the particular combination you are thinking of trying (or, if possible, borrow from a friend and try it out yourself before committing to purchase).

Focusing rails sit between the camera and the camera support (eg tripod) and give you the ability to focus by moving the camera back and forwards on the rail. Here is a link that goes into more detail https://expertphotography.com/macro-focusing-rail/ and https://www.macrophotobug.com/two-macro-focus-rails-compared/.
Reversing rings allow you to put a lens “back-to-front” on your camera. Using this approach, especially with bellows (ie camera connected to bellows connected to reversing ring connected to reversed lens) you can get quite substantial magnification. However you run a very serious risk of getting dirt into your lens; you will have a very short working distance (typically the distance between the lens mount and the sensor — perhaps 2-3 cm); at high magnifications you will have a very small effective aperture and a tiny depth of field. You will also lose any electronic connections between lens and camera, which may make the setup unworkable, depending on how your camera/lens operate (will the camera take photos with no connection to a lens? will the lens stop down without connection? can you focus the lens or do you need bellows for focusing?)
Close-Up Filters
Close-up filters screw on to the front of your lens. Often they are sold as a set of 3 with different powers that you can use singly or in combination to get the degree of closeness that you want. They work like a pair of reading glasses, allowing you to focus closer. The cheap versions are generally a simple lens, so won’t necessarily give you distortion free, flat-field, sharp images. There are some more sophisticated close-up lenses with multi-element lenses that offer better optical qualities, but at increased cost. https://www.digitalcameraworld.com/buying-guides/best-close-up-filters-for-photography gives some useful overviews.
Camera Supports
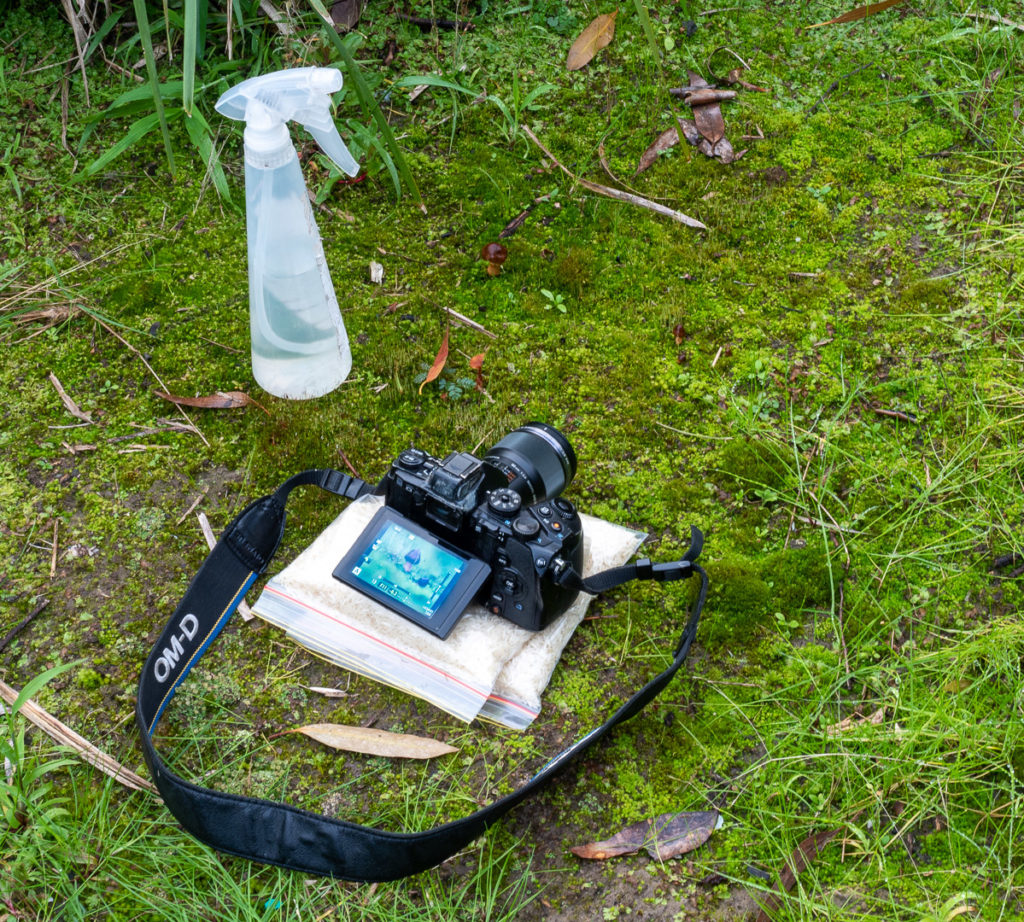
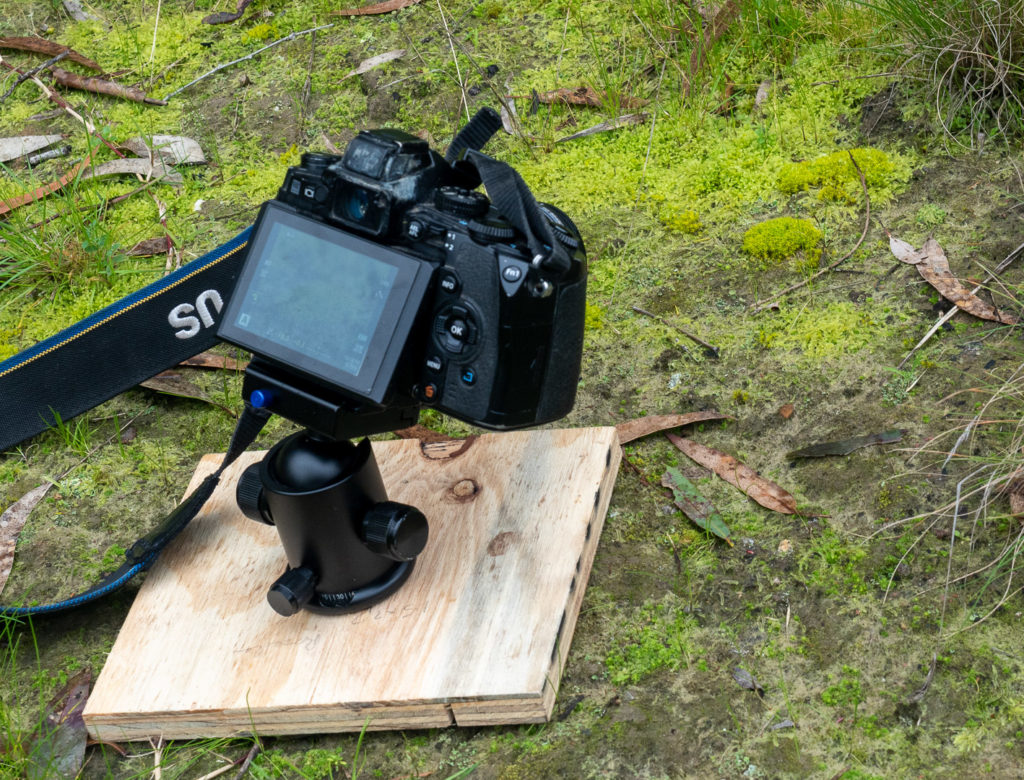
You may well find using camera supports is valuable if your subject is relatively static (but with subjects like dragonflies on the wing, an unrestrained hand-held camera is probably a better option). A sturdy tripod is useful. Since many subjects might be close to the ground, a tripod with a short centre column can be an advantage. Using the camera hanging below the tripod with a reversed column is possible, but really annoying – all the controls and now upside down and hard to get to! A table-top tripod might do the trick. placing the camera on a small “beanbag” – try some rice in a ziplock bag. You can wiggle the camera to the required position and it will stay fairly still. I sometimes use a standard tripod head fixed to a piece of plywood.
Lighting
No matter what you are photographing you need good lighting both for focusing and for exposing (for example if you are using Flash for your exposure you might also want a continuous light to allow you to focus).
The simplest is to use ambient light. Low, golden-hour sunshine might be just what you need to bring out the texture in a bit of bark, or to highlight shells and sand and ripples on a beach. But, in general, direct sunlight gives harsh lighting that can hide subtle details in your subject; using a diffuser to soften the light, or even placing an obstacle between the subject and the sun so you have indirect, shadowed light can give you a softer lighting experience. I often carry a couple of A4 sized pieces of black matt board. I can use the white side as a reflector to direct light onto a subject, or with the black side towards the subject to deepen the shadows on one side. And I can also use the card behind the subject to make a plain background, where the natural background is too messy and distracting.
A problem with ambient light for macro is that it is relatively low light, and since you may be using a small aperture (high f-stop) you may be forced to use high ISO or slow shutter speed. Outside it is seldom so calm that you won’t get subject movement blurring a slow exposure, and animals like beetles or spiders tend to be moving even when they appear to be totally still.
Flash gives you substantial control over the lighting, and with a bright flash you avoid the issues of low ambient light. I recommend using some form of diffuser to soften the light and avoid sharp shadows that can be distracting (see image below). If you have off-camera flash capability then you might be able to set up one or more flashes at angles that best highlight your subject. There are also many options for specialized macro-flash units.
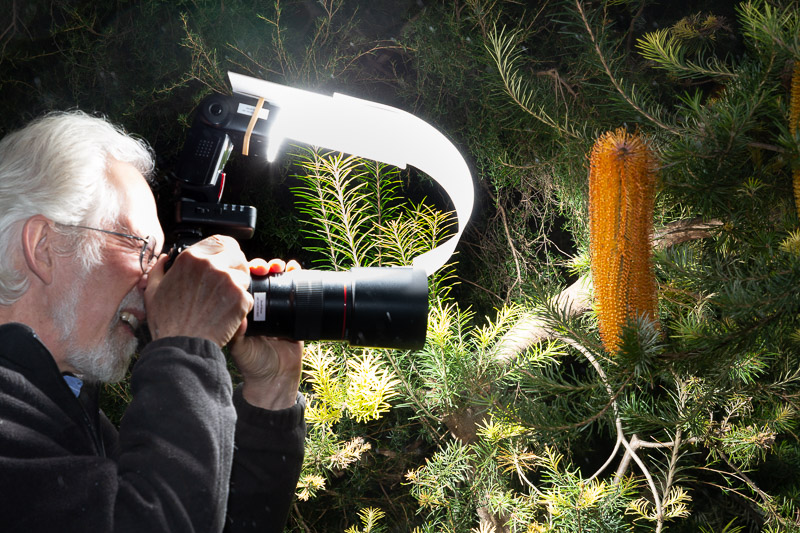
A common option is the ring-flash that attaches to the front of your lens and illuminates your subject from all directions. These tend to give relatively flat lighting, though some allow you to modulate the flash brightness so that the light from one side is darker than the other. This gives better modelling. Ringlights can also give characteristic ring-shaped reflections on your subject. Ringlights often come with some form of continuous lighting to assist with composing and focusing your image.
If you can take your subject into your home studio (see later section) this makes it much easier to configure the lighting to optimise your photography.
Some subjects may be a good option to photograph at night. For example, frogs are generally difficult to find in the day time, but may be much more active at night, especially in the rain.

If you have an “assistant” they may be able to hold light modifiers (eg reflectors or artificial lights – torches or off-camera flash). If you are using flash, it may be hard to visualise the lighting effect, so be prepared to review the images you take, and try again with a range of light modifications (eg try the flash in several positions to see how the changes affect the image). Sometimes I simply use continuous light sources (eg bright torches). You can then see the lighting and adjust as needed before exposure. But note that these will most likely be a lot dimmer than flash, so you will need higher ISO, larger lens aperture and/or slower exposure times.
I have a couple of cheap recahargable LED worklights that have about 5500 K light balance. They are light, compact and easy to pack in a bag. I use them directly, diffused by a diffuser between the light and the subject, or bounced off a reflector/white card.
Focusing
I usually use manual focus when I am taking close-up and macro photographs. It is easy to set the lens to get the magnification you want (or, alternatively, about the right distance between lens and subject), and then focus by moving the lens back and forward to achieve the focus I need. Using autofocus is generally not too effective – at high magnification your effective aperture is reduced, compromising the accuracy of autofocus, particularly if your subject is not very well illuminated (if the subject is dark you may be using flash to get an adequate exposure, but that won’t necessarily help with focusing). If your subject is moving (or you are hand-holding the camera) it is generally a good idea to take a series of images in the hope that one will hit the sweet spot for focus. And if you are using focus stacking, you will need to manually adjust the focus point if your camera does not have a built-in focus stacking algorithm in the menu.
Depth of Field
One of the challenging aspects of macro and close-up photography is shallow depth of field. Depth of field (DoF) is influenced by a host of factors including aperture, focal length, sensor size, distance from the sensor/lens to the subject (closeness of focus, or magnification). Here are a couple of useful resources explaining depth of field in more detail: https://en.wikipedia.org/wiki/Depth_of_field and https://photographylife.com/what-is-depth-of-field. Note that smaller sensors give greater depth of field at a given aperture.
Aperture is the factor you will most likely use to adjust depth of field in practice. Macro lenses usually have an aperture of f2.8 or so, which makes focusing easy (shallow DoF), and usually one stops down to a small aperture (high f-stop) for close-up work to maximise DoF. As always, there are compromises. Light passing the edge of the aperture blades can be diffracted. With a large aperture this is generally not a problem as most of the light passes through the middle of the lens, far enough from the aperture blades to avoid diffraction. But when the aperture is tiny, more of the light passes close to the aperture blades, and the resulting image can be softened by diffraction. You can read more about this at https://photographylife.com/what-is-diffraction-in-photography. I recommend that you take a convenient macro subject (one that won’t move), set your camera on a tripod, and take a series of test images with your lens at different apertures to assess how diffraction affects image sharpness (and DoF) with your equipment.
You may choose to use a tiny aperture to maximise depth of field to ensure all your subject is in focus, but this may mean that details in the background become visibly distracting, where at a wider aperture they may be a soft and non-distracting. If you need to get an image in this situation you might consider a few options.
- Change the background. I often carry a piece of matt board that I can place behind a small subject to hide a cluttered background. Perhaps you can change the orientation of your camera – maybe a new angle will change that busy bushy background for a plain blue sky or some other less distracting background.
- Change the lighting. If the lighting on the subject is a couple of stops brighter than the background then the background will appear far less distracting. Try adding light to the subject (flash, torch, reflectors) or possibly shade the background to make it darker.
- Use focus-stacking (see later) with wide aperture shots to get that nice out-of-focus background, combining several images at different focal points to get all the subject in focus. Or use a slight variation that can work well, take a shot at wide aperture to get the background, and a second shot with a small aperture to get the subject all in focus. Then blend the two to get a sharp subject and an out-of-focus background (this approach needs a bit of post processing work, but can work well, and for some subjects can give better results than focus stacking (especially if the subject might move, or there might be technical problems like focus breathing).
Alternatively, consider using a small aperture (say f16 or f22) to get maximum depth of field, and then use post-processing to selectively blur the background. If the subject has a relatively manageable outline this can work well, but it can be a nightmare to make a workable selection if the subject has a complex outline (lots of intersecting hairs or spines, for example).
Not all subjects need huge DoF. If your subject is relatively flat, a wider aperture will work. You may want to use a relatively shallow DoF to give a sense of depth as the focus drops off over your subject. Or you might want to use out of focus blur to generate a mood (think of images with just the edge of a rose petal on focus, the rest soft and dreamy).
Aperture
Aperture plays a key role in depth of field (above) but also plays a key role in exposure. This article covers some of the aspects of this: https://www.jaymesdempsey.com/aperture-macro-photography/. When you choose a small aperture to maximise DoF you then need to increase exposure time or ISO, or brightness of illumination if you are using artificial lighting. Often, in the field, subject movement is an issue that necessitates short exposure times, so you only have ISO to play with. Fortunately, modern sensors make this less of an issue, as you can get relatively noise-free images even with high ISOs. And with careful post processing image degradation from sensor noise can be minimised further.
Macro in the wild
If you are considering taking “nature” images in the wild, keep aware of the limits on allowable post-processing for this category. It is better to pay special attention to getting the best possible image at the time of exposure. Rules are gradually changing, and techniques like focus stacking may be allowable under some rules, but by and large it is best to get it right at the time of exposure, than be faced with an image that would be really nice with post processing that is not allowed in the nature category.
For some subjects – interesting patterns in rocks, moss, flowers etc, you may not need a large working distance (though you need enough space between the lens and subject to allow lighting). For other subjects – dragonflies, butterflies etc, a longer working distance is desirable, so you don’t scare the subject away as you try to frame and focus. For things like butterflies, early morning is good. The beasties might be cool and unable to take to the air. Frogs are often easier to locate at night, though you may find some species at the water surface during the day.


Sources like iNaturalist https://inaturalist.ala.org.au/ and Plant Net https://identify.plantnet.org/ are valuable to get information on where to look for animals and plants, or to identify ones you find.
Macro home studio ideas
Backdrops
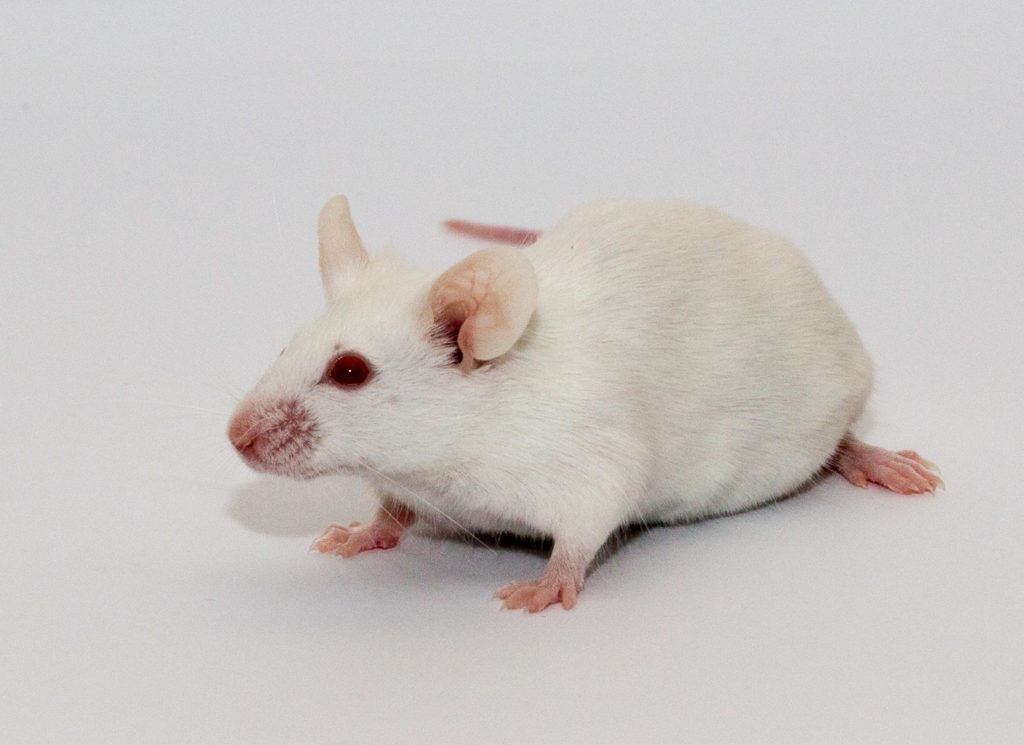
For many subjects you can get more control if you can set up in a home studio where you don’t have the problems of wind moving the subject, and you can create a more customised lighting arrangement for the subject. Making a home studio for macro need not be expensive – you are dealing with small things, so you don’t need expensive backdrops – a sheet of A3 photocopy paper is much cheaper than a 3×5 m backdrop. You can make do with small lights rather than expensive studio lights, because you can put your light source close to your tiny subject. For example in the mouse photos below I had a sheet of A3 photocopy paper underneath and curling up the back to make a seamless background. A couple of diffused flash guns and reflectors and I had a quick and cheap tabletop setup.

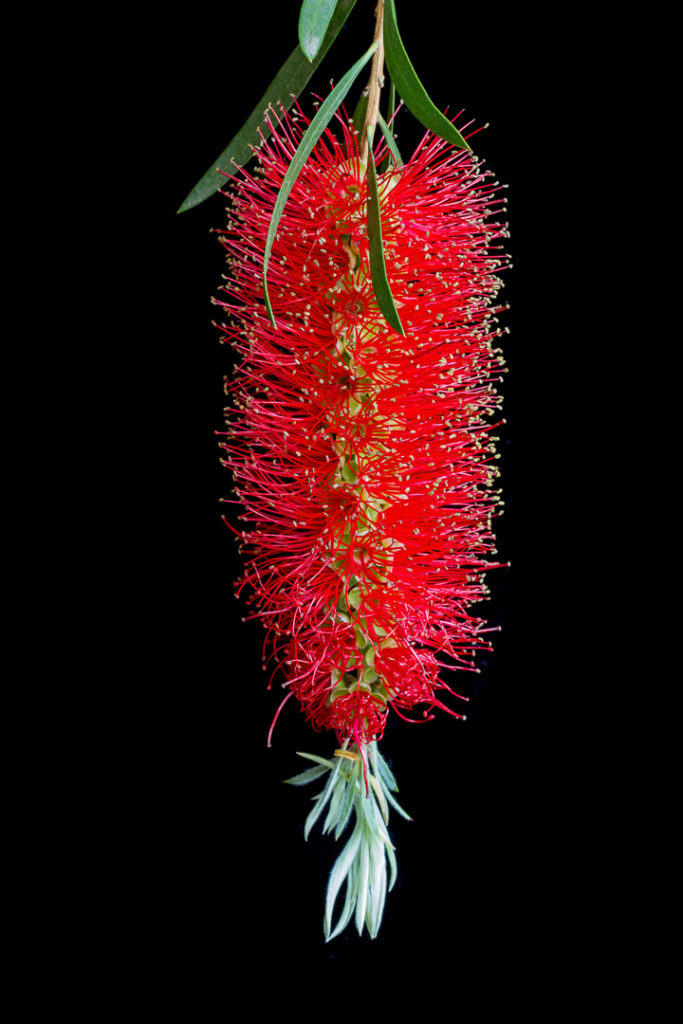
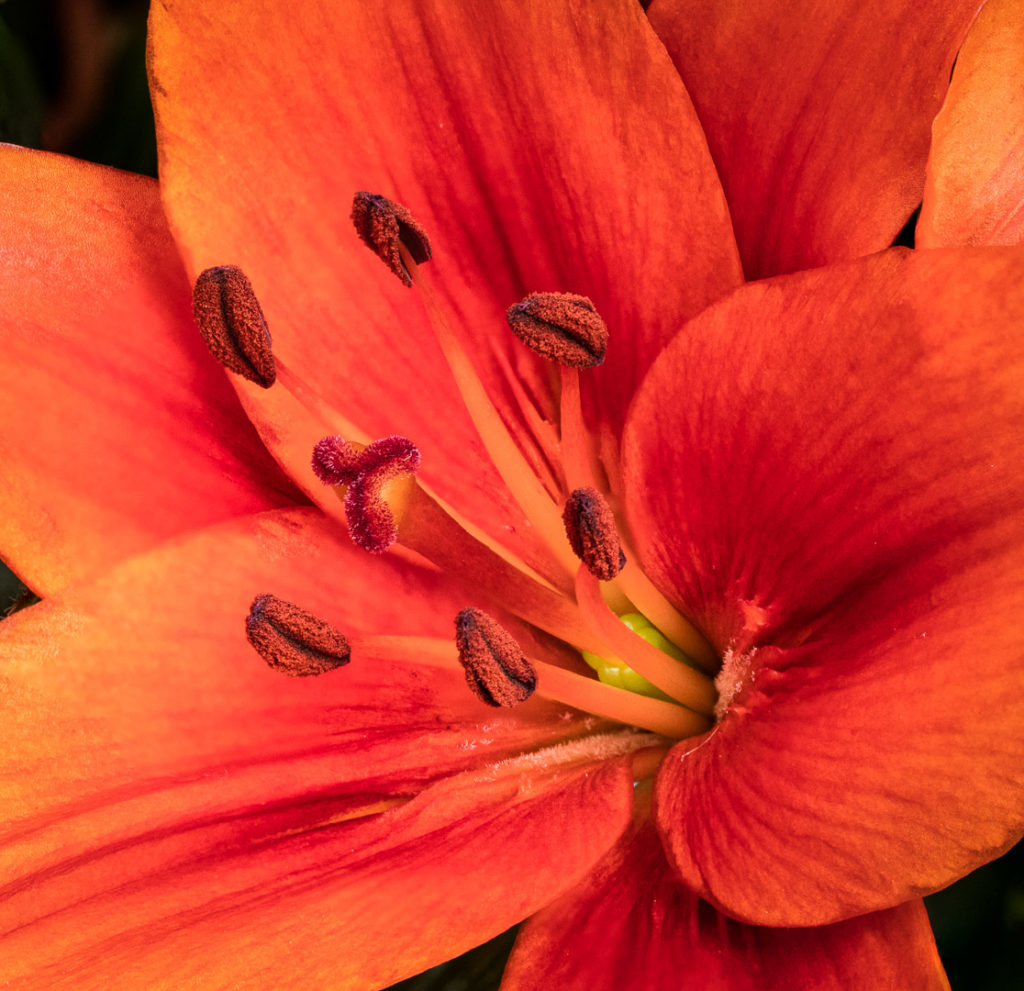
I wanted to get a photo of these bottlebrush flowers but the wind kept moving them. I made life easy by pruning off the flower and took it indoors. I used a cheap clamp attached to a tripod leg to hold the flower (tripod is over the flower and out of frame). I placed a sheet of black matt board behind, and played with the lighting (one light each side, with varying brightness). I ended up with a photo I could not have managed outside, where the flowers were moving, the background was messy and the lighting harder to control. Not a perfect shot, but useful for an illustration.
Supporting your subject
One of the common issues is how to hold your specimen in place whilst you photograph it. Here are some suggestions. You can buy sets of spring clamps at hardware stores. These are useful for holding backdrops as well as holding specimens. Monofilament nylon thread (fine gauge fishing line, or even finer sewing thread you can get from your local sewing supplies retailer) can be used to hang things from supports to give a “levitated” appearance. With very fine thread it likely won’t even show in the image, so you won’t need to erase it in post processing. Armature Wire is extremely flexible and lightweight wire designed for making frames and giving structure for models. It can be cut with wire cutters and can be easily bent with your hands or with the aid of pliers. It is useful as a flexible support, perhaps in combination with clamps and sticky tape. Hot glue guns are very useful to stick things together, and since the glue is heat sensitive, it is easy to unstick things later if you need – just apply a bit of heat.
Trans-illumination
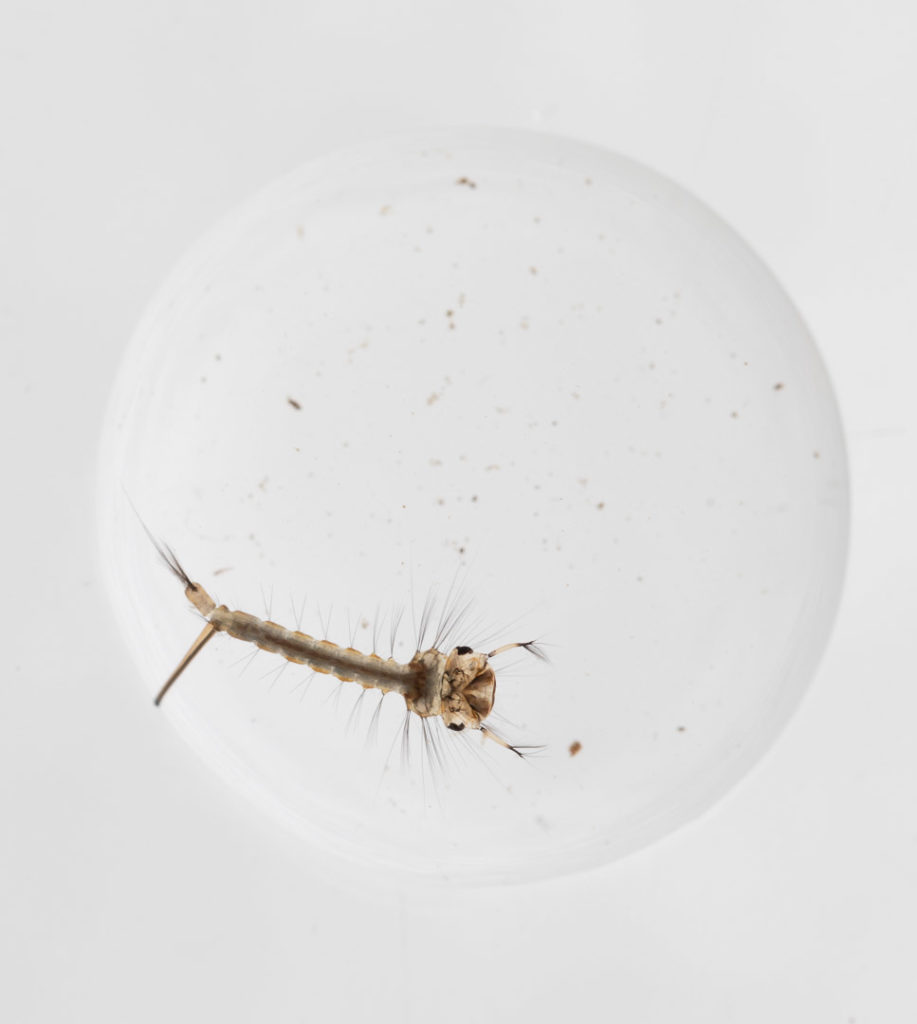
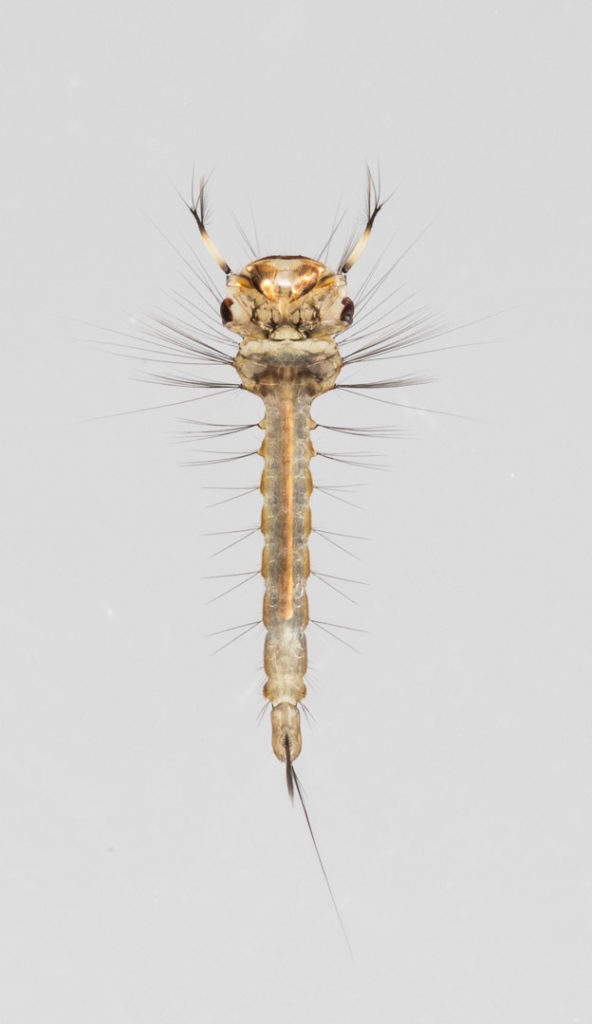
A little while ago I decided to look at the beasties that lived in the water at the edge of the ponds along Gardiners Creek. There were lots if interesting, if tiny, organisms, and the Culex mosquito larvae were fascinating. I set up a transilluminated lighting for the photography, with the specimen in a drop of water in a transparent box lid (from memory it used to hold chocolates – never throw away potentially useful containers) supported above a light table. The camera was supported above this using a tripod. An off-camera flash was used to adjust the lighting. Illustrated are an image with all the light from below, and another shot where I turned off the light table (or maybe I put black matt board over it) and shone the flash horizontally to side light to get side lighting for a different effect.


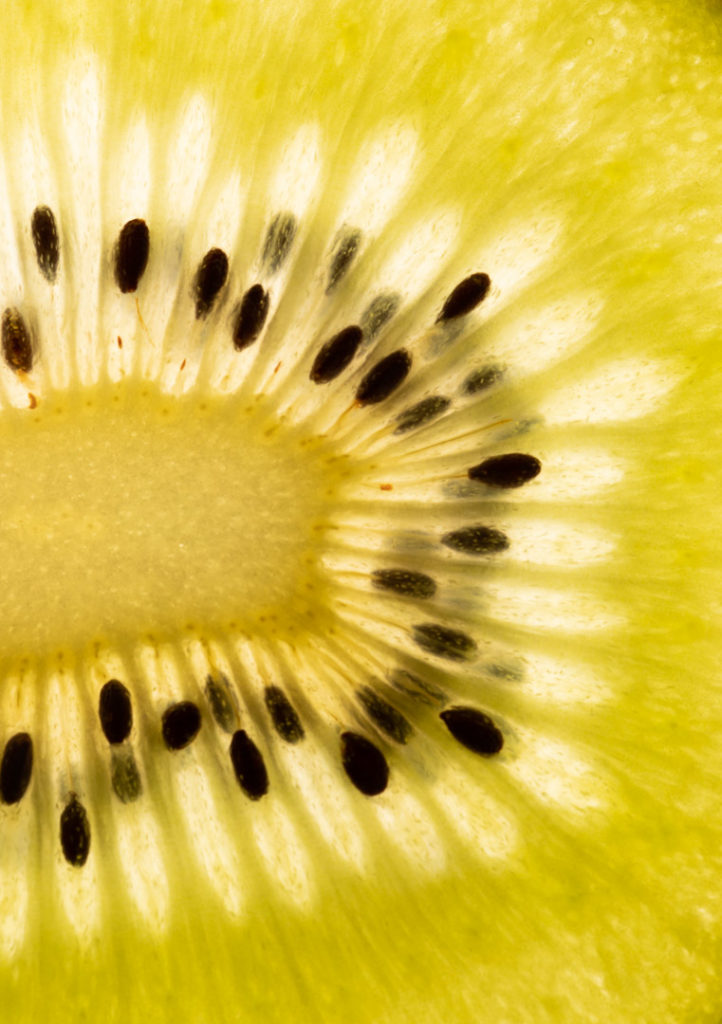
Transillumination can also be fun for everyday things that are translucent. Here is an example using a slice of fruit.
Transillumination is also useful for digitising slides and negatives (see below).
Backlighting
Backlighting can be useful if you want to eliminate shadows on your background. I sometimes use an old slide viewing table, place the specimen on this, and then adjust the lighting from above. The backlighting from the slide viewing table fills in the shadows from top illumination. Note that in this case the back lighting intensity is fixed, so all the adjustment has to be in the top lights. Experiment with different light intensities. you can get some interesting effects since the light from underneath can light up the underneath that normally might be in shadows with just top lighting. And with translucent subjects you can get some very interesting glowing effects.
Here is an example using Cicada shell (exuvia). Compare the light and shadow in the two versions.

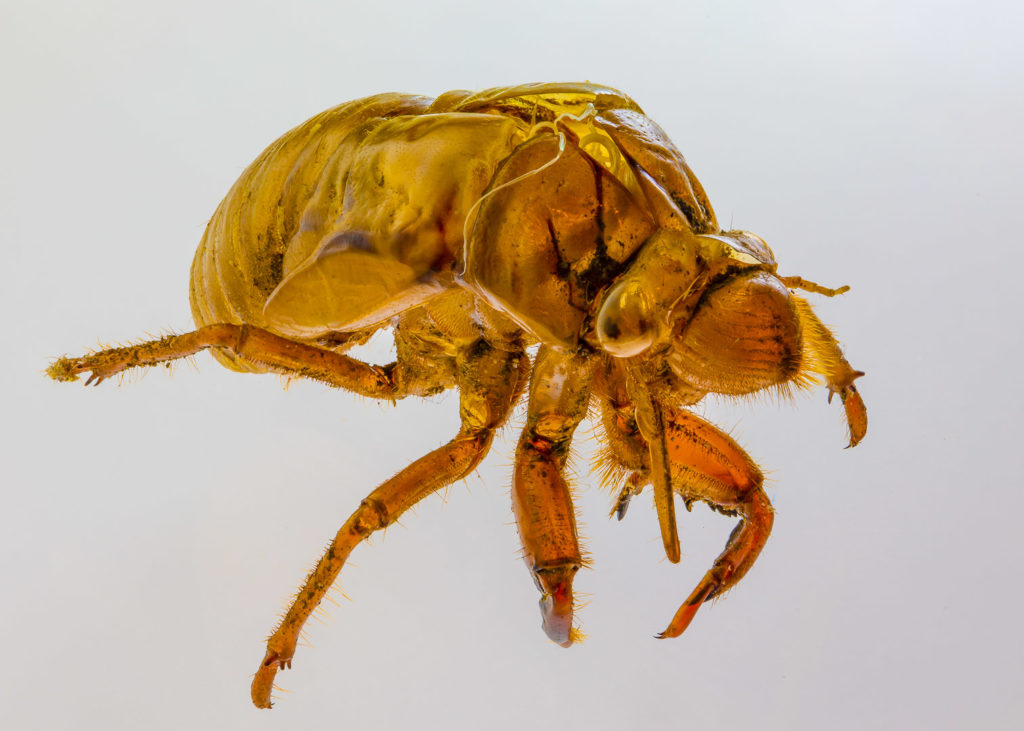
Note: another way to minimise shadows on the backdrop is to separate the subject from the background. For example I could have suspended the cicada exuvia from fine monofilament nylon thread above the background, but then it would have been hard to avoid the specimen moving through air movements whilst I was making a focus stack. There also would not be the fill-light effect that minimises shadows on the underside of the specimen.
Drive your camera from a computer
If you are working in a home studio it is worth considering controlling your camera from your computer. Many cameras will allow you to connect your camera to your computer either wirelessly or via a USB tether. You can then use live-view on a computer screen that is much larger than the screen on your camera. This can facilitate focusing and composition. And if you are planning to focus stack, being able to change the focus without touching the camera minimises the risk of the camera shifting slightly and thereby ruining the stack.
Focus stacking
Since depth of field is relatively small, it is difficult to get macro shots where the whole subject is in crisp focus. One way to achieve this is to combine several images taken at different focal positions, then combine these to merge the sharpest parts of each frame into a composite where the whole subject may be sharp. A number of cameras (notably mirrorless cameras) support this in-camera or will take a focus stack that you can combine later with post processing software. I won’t go into depth here but refer you to Wikipedia https://en.wikipedia.org/wiki/Focus_stacking or you can do a web search to find much more in the many sources that cover this topic. Photoshop has some capability for focus stacking, but other software may do a better job, depending on the subject.
Focus Breathing
At close focusing distances lenses often display an effective change in focal length which can change the apparent magnification as you focus. This is called focus breathing (think of your chest size as you breathe in and out). The phenomenon, and the issues it raises with macro photography and focus stacking is nicely explained here: https://photographylife.com/focus-breathing or if you prefer video, here is one from DPReview https://www.youtube.com/watch?v=43asl1yYw2E so look there for more detail.
Digitising 35 mm slides
A while back one needed an expensive dedicated slide scanner to digitise 35 mm slides (or negatives). The resolution of modern cameras is now sufficient to make an excellent job, and to do it far quicker than scanners that typically took 30 seconds or more to scan each slide. The diagram below illustrates my current set up.
Lighting and camera support
I repurposed an old enlarger stand to serve as a camera support/copy stand. A tripod would work fine too to hold the camera with macro lens set to slightly less than 1:1.
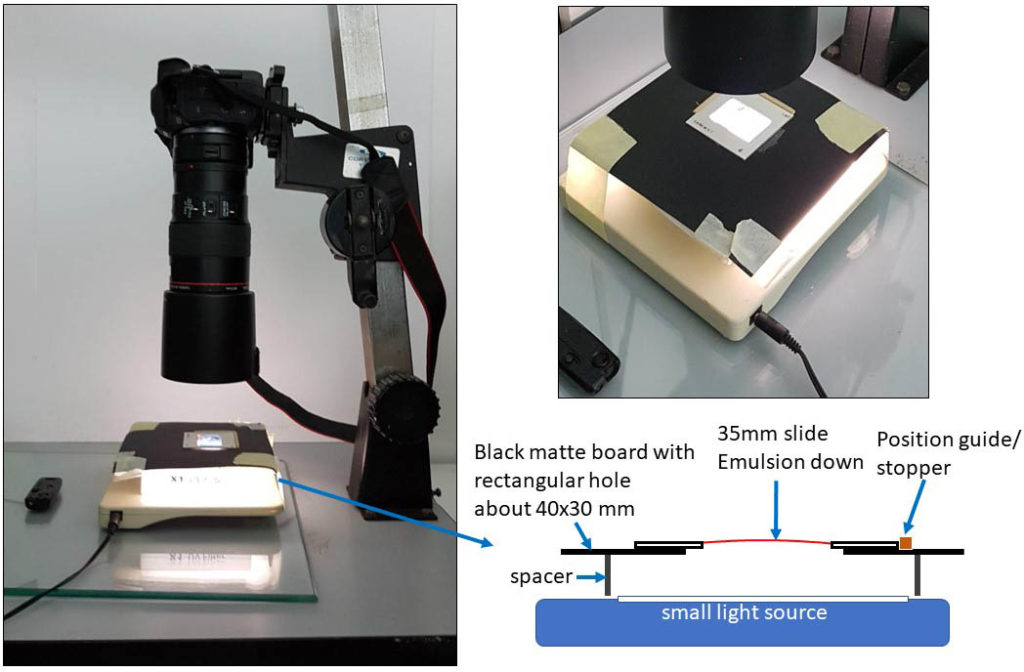
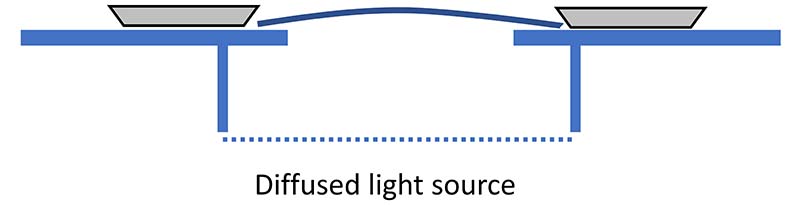
I used a small slide viewer lamp, but any suitable, uniform light would do. Perhaps a tablet or phone screen with a white image displayed. These may annoyingly go into power save mode and turn off… you may need to adjust your power save settings; and make sure you clean the screen thoroughly or you may get moire patterns appearing where smudges interact with the tiny screen pixels. Also check whatever light source you use that it has a broad spectrum so it can reproduce colours well. If you are concerned, you can use an off-camera flash rigged up below your slide, using suitable diffusion (I recommend several layers of diffusion material with separation between them (eg flash->5 cm space->diffuser layer -> 1 cm space -> diffuser layer -> 2 cm space->slide) so you get uniform lighting).
I use a spacer to separate the slide from the light source so any dust/scratches/unevenness will be blurred out when you focus on the slide.
Above the spacer is a bit of black matte board with a hole cut in slightly larger than the 36x24mm slide. I glued a matchstick on two sides to form a stopper so when the slide abutted the stopper it was correctly positioned above the hole in the matte board. I used sticky tape to hold the bottom and top together so nothing moved when I changed slides. If you are wanting to digitise negatives you might try a different arrangement of stoppers since the negatives are usually in strips. Try gluing stoppers to hold the top and bottom so you can slide the negatives between the stoppers to change which negative is set for photographing. unlike slides that are (usually) in rigid mounts, negative strips might tend to bow up, so adapt the stoppers to hold the sides of the negative strip to the platten. If you cut your own matte boards, you might use a bit of bevel cut mattboard to guide the negative strip.
Camera and lens
Basically you need a lens that has minimal distortion at higher magnification – a macro lens is ideal. Turn it to 1:1 then back of a bit, so you can get the whole frame inside the image field with a bit of spare space for minor variations in slide placement. Move the camera up or down relative to the slide to get things in focus. I always use autofocus for each slide since there are always minor variations in how much the film is bowed within its mound, or differences in mount thickness. You can crop off any of the slide frame that is in the image in post processing. Take care to get the camera exactly parallel to the slide. It is easier to line things up nicely at the beginning than to have to adjust the keystone distortion on each image.
Use a RAW format not JPEG. This will give you much better tonal range and avoid artifacts of JPEG compression. I usually set the camera to 100 ISO for minimal sensor noise and aperture to f8 to give sufficient depth of field to accommodate any curvature of the film, whilst ensuring the background light is out of focus (so any dust etc does not show in the slide copy). I use auto exposure since some of my slides are not ideally exposed. Note that if there is any flicker in the light you use it may show as uneven illumination in your copies. Using a longer exposure time can minimise this. You can check by focusing on a slide, removing the slide, and taking a photo with just the light source. The image should be uniform. You may need to set the white balance to accommodate the characteristics of your light source (but if you use RAW files you can set WB in post processing).
You can use a similar set up to duplicate negatives too. You will need to modify the mounting for the film strip so it is held flat and can slide along the guide to get to the next image. If you are digitising negatives you will also need to do a colour inversion and convert to monochrome to remove colour casts (b&w negatives) or invert the colours and apply colour adjustments as neeed (colour negatives).
Further Resources
There are oodles of web pages on this topic, just a few of which I have hyperlinked above. A quick web search will reveal a plethora of resources. Choose a more specific search term if you want to get more detailed info in a particular area. In addition there are lots of books on this area of photography. Here are a couple that I borrowed from the library:
- “Close up and Macro Photography” by Tracy Hallet (2011, Ammonite Press). A small but remarkably complete introduction to this area.
- “Digital Still Life Photography” by Steve Sint (2013, Pixiq). Ok, this is about still life, but most “still life” photography tends to be on the close-up side of things. It has lots of useful hints about lighting, home studios etc.