
Ben Maze demonstrated use of luminosity masks for image processing in his recent workshop (22/07/2026) using the FREE TK luminosity mask plugin. Here are some notes that might assist if you want to explore this Photoshop plugin.
What is a luminosity mask and what can they do for you
You are probably familiar with the use of masks to selectively apply adjustments etc. A luminosity mask is such a mask, but based on the brightness range. Search the internet for lots of information and suggestions for use.
TK luminosity mask plugin (or similar plugins) simplifies the process.
It isn’t the only way. You could, for example, make a duplicate layer which you convert to B&W, then use the Select >> Colour range to generate a selection which is effectively a luminosity mask on that mono layer. Once you have the selection you can use it to make a mask (don’t forget to hide the mono layer) … OR you could make a duplicate layer and use the levels (or curves) tool to pull out the brightness range you want to use for your adjustments, then make a selection with the magic wand tool …. but this all involves a lot of steps.
Acquiring the plugin
Some websites direct you to install it via the Creative Cloud app. I believe this is no longer the case and it has been moved to Adobe Exchange. Here is the link that I got it from https://exchange.adobe.com/apps/cc/83b6b487/tk-luminosity-mask#.
How to use the luminosity masks
Once the plugin is installed you can activate it via the plugins menu:

This brings up the first dialog box where you click the three-bar icon to open the mask generator.

Once you have the mask generator active, you can have a play.
Here is a test image. Note I have duplicated the base layer, and also note the TK menu icon in the top right that you can use to activate the TK dialog more easily than via the plugins menu.

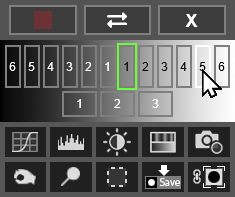
Let’s say I want to brighten the darker areas. I clicked on the 5 setting on the dark side, and you can see the mask preview.

Click on the brightness/contrast icon and a new brightness adjustment layer will appear with the luminosity mask applied. Play with the settings and see what happens.

The website linked above gives some additional info about the plugin – the page has images explaining the use – make sure you flip through the images in that section. The plugin has extensive fly-out tips on the controls (hold down Alt / Opt key and move the mouse over the control you want info on) … eg

Best thing is to play with it and see how it works. There’s also a wealth of stuff online on luminosity masks.
Have fun.