
About Masks
As the name suggests, masks are used to hide things. With a mask applied, you can limit what pixels in a layer are visible and allow you to make local adjustments using an adjustment layer. Masks are a fundamental tool in your post processing workflow.
Masks were covered briefly in the Basic Edits section, so here we will go into more depth. First we should understand alpha channels. You should be familiar with the Red, Green and Blue channels that combine to make the RGB composite layer. These are “opaque layers”. An alpha layer controls the transparency, making pixels see-through where the channel is black, partially transparent for shades of grey, and opaque where the channel is white.
Below is an image of an owl flying with blurred trees in the background. I have added a blue-yellow gradient in the layer below, and added a mask for the bird, and added a feathered black brush over the left side to show how greys allow partial transparency. Note that when the mask was added, a new channel was added (bird Mask). The channel itself is not visible, but its effect on the transparency of the layer is evident. If you click the eye icon to make bird Mask visible, it shows up as a red overlay (quick mask).
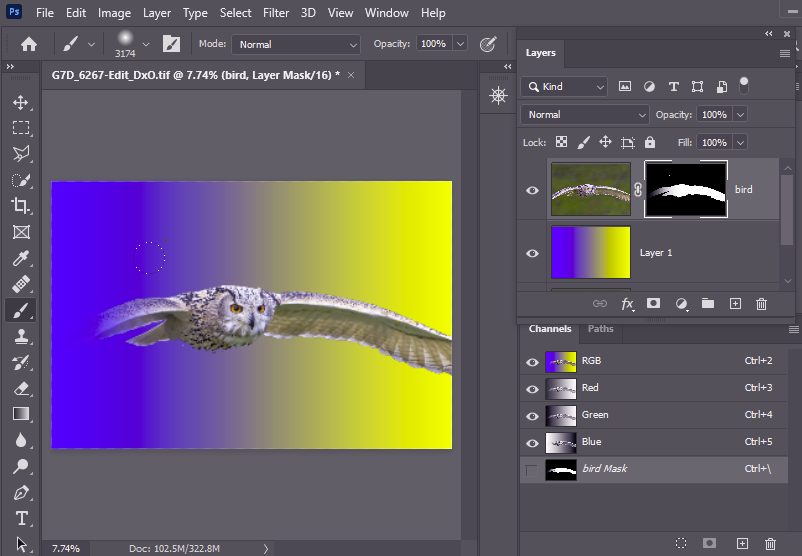
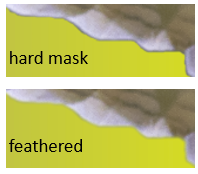
Masks apply equally to adjustment layers, where the adjustment can be removed totally (black) or partially (grey) using an adjustment layer mask. Feathering the mask can smooth the blending so that you don’t get sharp jumps at the edge of your adjustment mask. The same is true of pixel layers. Note in the example above the wing edges over the yellow are a bit abrupt. feathering the mask along that edge improves the blending.
How do you make a mask?
Mask from selection
If you have made a selection then click the layer mask button ![]() at the bottom of the layers panel, the selection will be converted to a mask, and the selection will be deselected. You can refine the mask made this way by painting over it (see below).
at the bottom of the layers panel, the selection will be converted to a mask, and the selection will be deselected. You can refine the mask made this way by painting over it (see below).
If your layer has a mask, you can turn that mask into a selection by holding control whilst left-clicking on the layer mask thumbnail in the layers panel (Mac: Command-click). You can therefore use a mask to store selections that you can later refine by adding or subtracting using selection tools, or by painting (see below).
Painting in a mask
The simplest approach to making a mask is to click the layer mask button ![]() at the bottom of the layers panel. A pixel mask will show to the right of the layer thumbnail. If you had a selection active, the mask will show the selection (white for selected, black for unselected, shades of grey where the selection was partial). If no selection is active, you will get a white mask thumbnail. Select this mask thumbnail and paint on the image window with black/white/gray using a paintbrush. Each time you end a paint sweep, the mask thumbnail will be updated, and the effect of the altered mask will show on the window. Press Q to activate quick mask mode where you can see the mask as a shaded red overlay over your image. Press Q again to turn off quick mask mode. Ctrl-click the mask thumbnail to convert the mask to a selection.
at the bottom of the layers panel. A pixel mask will show to the right of the layer thumbnail. If you had a selection active, the mask will show the selection (white for selected, black for unselected, shades of grey where the selection was partial). If no selection is active, you will get a white mask thumbnail. Select this mask thumbnail and paint on the image window with black/white/gray using a paintbrush. Each time you end a paint sweep, the mask thumbnail will be updated, and the effect of the altered mask will show on the window. Press Q to activate quick mask mode where you can see the mask as a shaded red overlay over your image. Press Q again to turn off quick mask mode. Ctrl-click the mask thumbnail to convert the mask to a selection.
Set the brush to a low flow if you want to slowly build up the opacity with several sweeps of your brush. This can be good for making subtle gradations.
Use a black mask and paint where you want to show; or use a white mask and paint in black to hide parts. Select the mask thumbnail and press Ctrl-I to invert the mask. Use a large brush to block out the main areas for your mask Then switch brush colour (Black to white or vice versa – shortcut key X) and paint any overflow onto adjacent areas using a smaller brush with probably less feather, as required.
Select and Mask
The select and mask tool
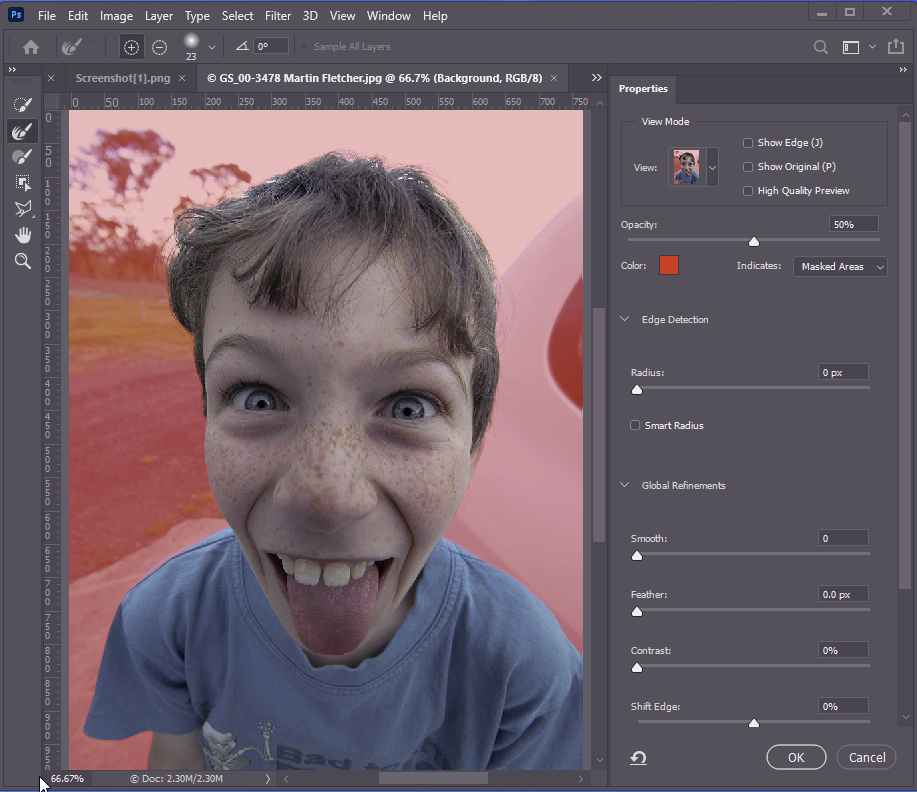
If you have a selection tool active, then Select and Mask will be available on the options bar. Or you can activate it using the Select > Select and mask menu. Select and mask allows you to create refined selections using sophisticated tools.

The Select and mask dialogue is complex (see below) and I will make a separate post on this later, or you can access https://helpx.adobe.com/photoshop/using/select-mask.html for more detail.
Blend If
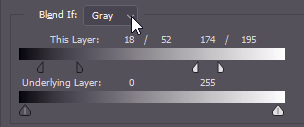
In some cases you can effectively make selections. In the Layer Style dialog (double click a layer thumbnail). Using this, you can, for example, knock out the sky as if it were masked out – Use Blend-if, select blues, and adjust the sliders to make the blues in the sky transparent. This often overlooked tool can sometimes make quick work of what would potentially be tricky selections/masking. You can read more about it at https://digital-photography-school.com/photoshop-tips-blend-if-feature/ — I’ll get round to making a page at some stage.
PAGE IN PROGRESS …. Come back soon.
Using selections
Resources on the Web
PHOTOSHOP
- https://helpx.adobe.com/photoshop/how-to/layer-mask.html
- https://design.tutsplus.com/tutorials/how-to-use-layer-masks-in-photoshop–cms-32646
- https://blog.udemy.com/masking-in-photoshop/
LIGHTROOM
https://lightroomkillertips.com/how-to-use-lightrooms-awesome-range-mask/
https://www.diyphotography.net/how-to-mask-anything-in-lightroom-in-a-few-seconds/