The notes below should help get you started using my “Photo Doodler” program. First there is some background on what got me started on this project, then I give some examples, and then some brief instructions. Programming credits are at the end.
Generative Art
Generative Art or Code Art or Algorithmic Art generates art using autonomous systems such as computer programs, typically using random number generation to produce unique outputs. I’ve written more about generative art HERE. The program I have written redraws an image you provide using algorithms with randomly directed pens that doodle over the image (or draw randomly placed circles) according to adjustable parameters to produce (sometimes) interesting results.
Geoff’s Image Doodler
Some Examples
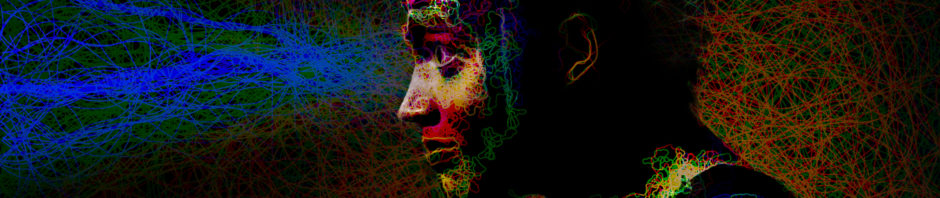
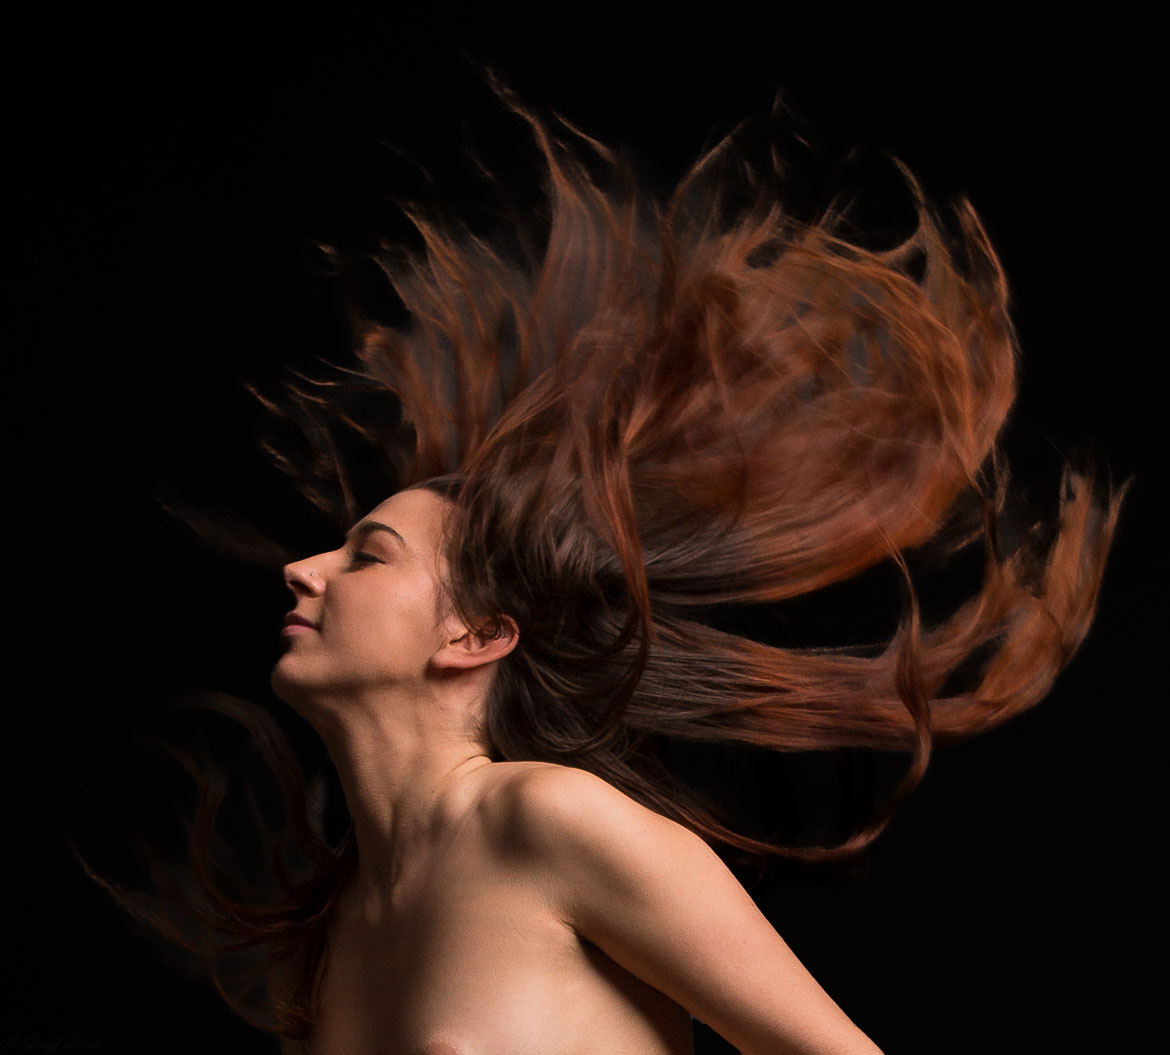
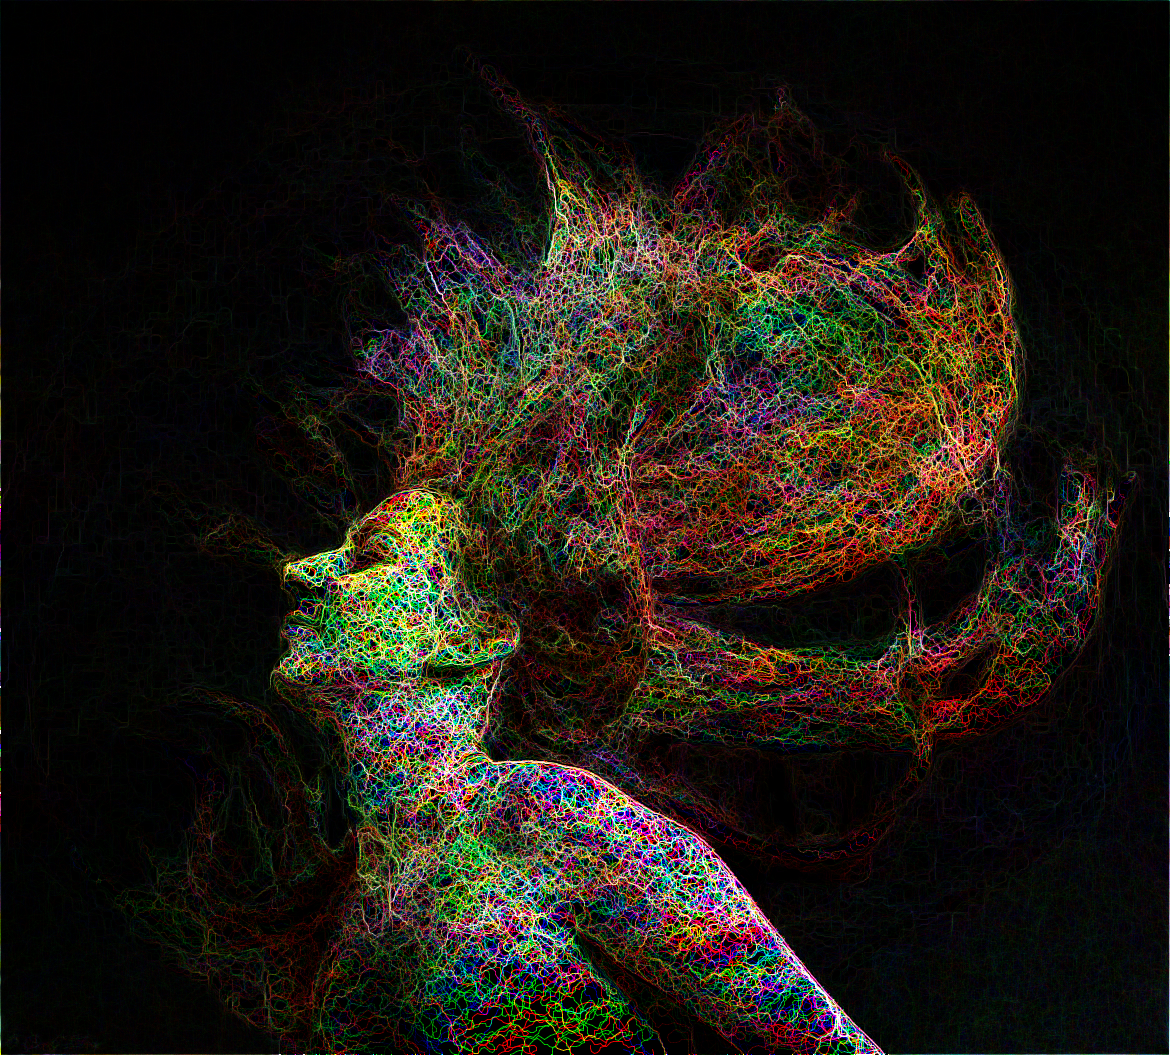
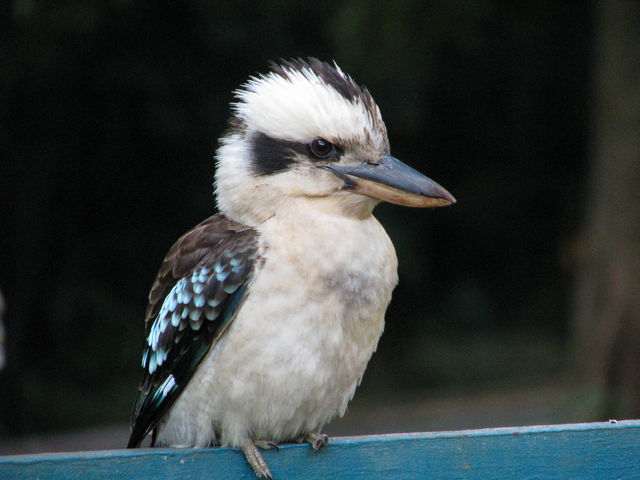
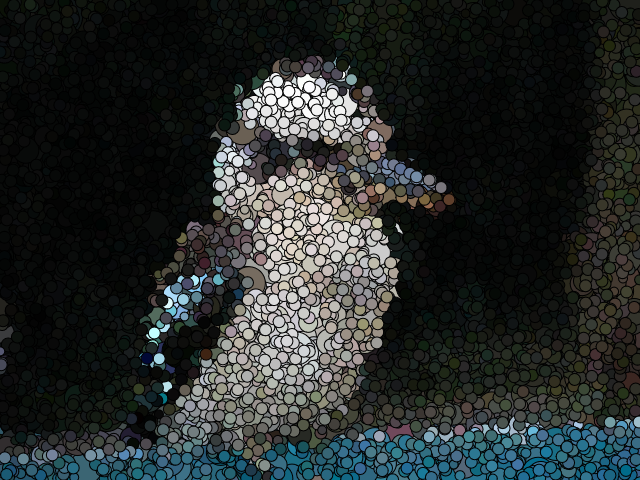
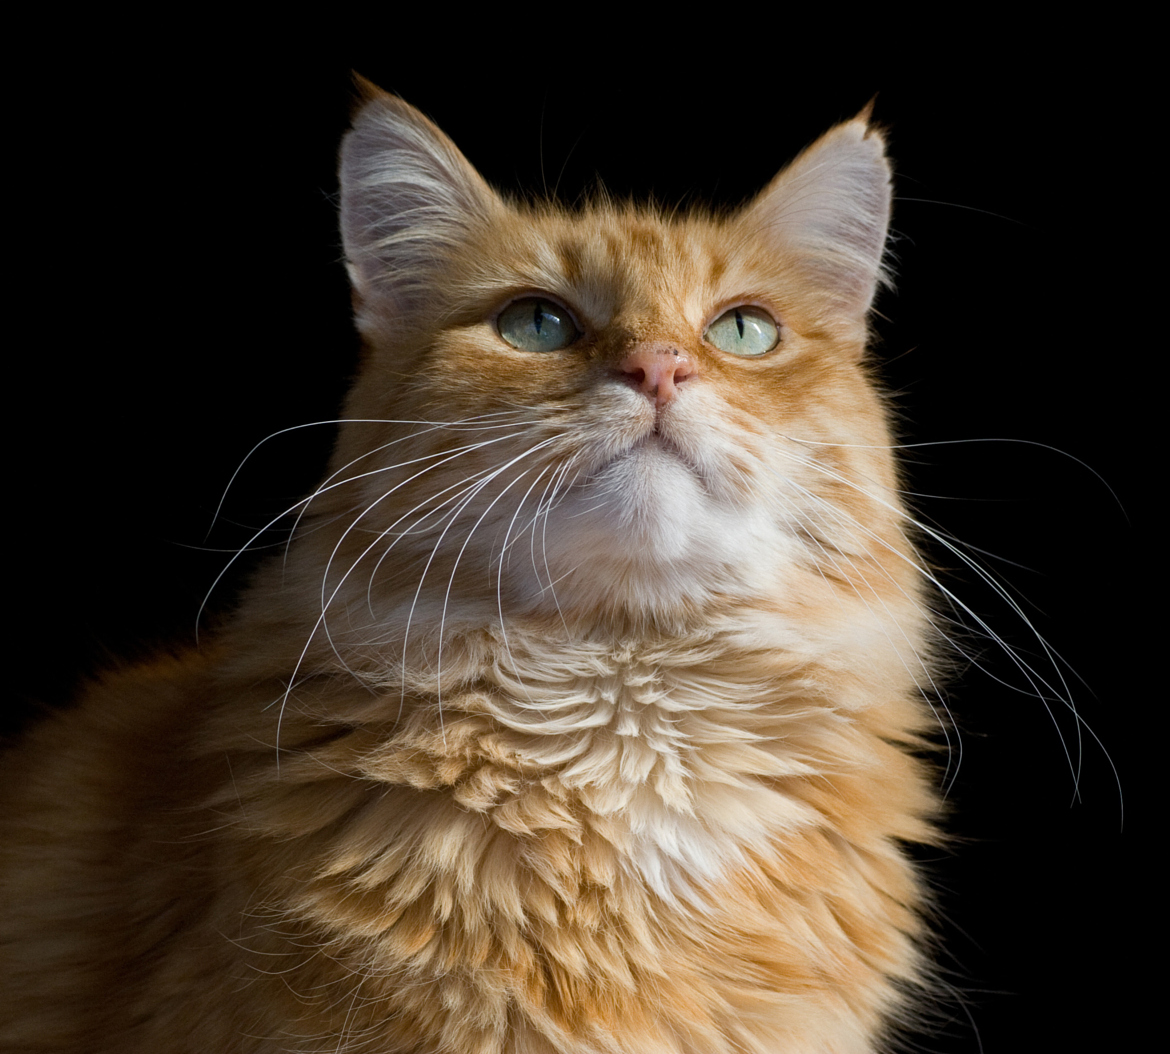
Below are some images I have processed. They should give you some idea of what the program does. These are not presented as world class prize winners, but as samples to illustrate different styles of image that can be produced. These are “image compare” graphics. Drag the blind to the left to see the processed image, drag it right to see the original image.

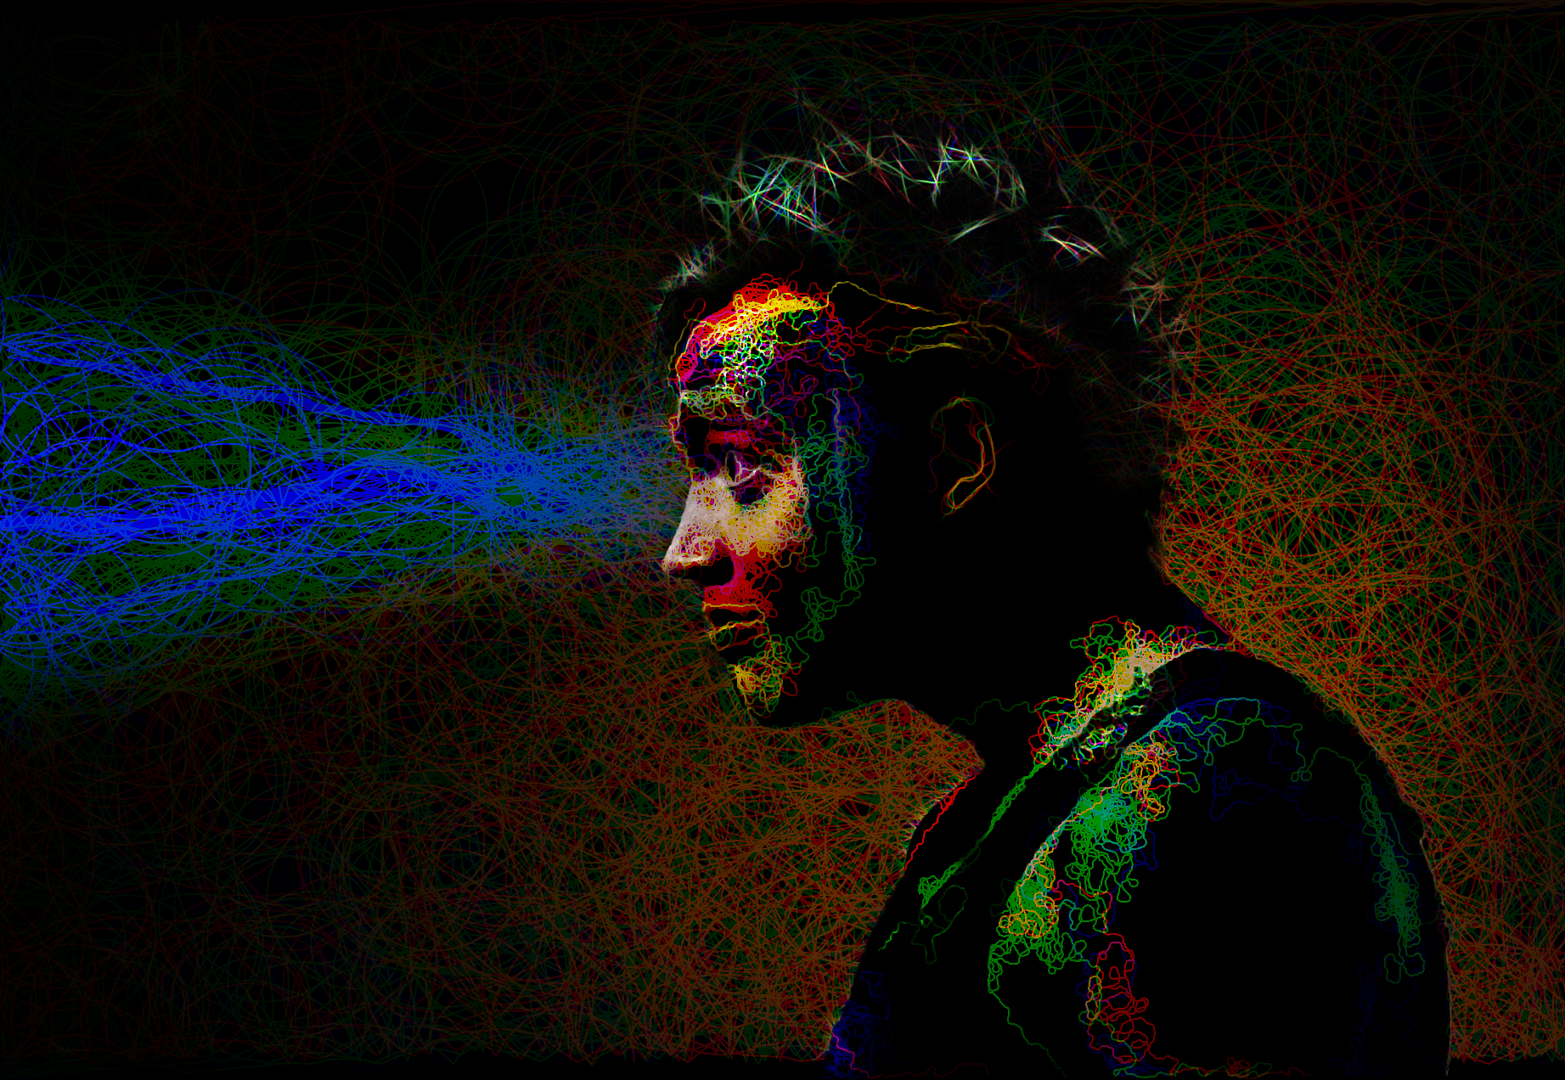

The Algorithms
The program draws lines or circles. The lines wander about the canvas, using the underlying colour of the image. The motion of the pen is governed by random numbers, with some rules. The program chooses several random new locations to move to, depending on the Direction Range parameter and Line Step Length. The program chooses the random destination that closest matches the brightness at the current location. Thus the program tends to wander along lines in the image where brightness is similar. Choosing a large Samples selecting direction parameter reinforces this matching of brightness, whilst a low Samples selecting direction will give more random movement.
How to use the program
You can access the program at this URL https://resources.waverleycameraclub.org/doodle/.
General comments on the program
This program is still undergoing development, so the instructions below may not be identical to what you see running the program. I may have added new controls, for example, and not yet got around to updating the documentation below.
if you encounter any glitches, please let me know, so I can debug and fix (contact link is on the opening screen).

I have tested it under windows 10 using Firefox, Chrome, Opera and Edge; on android with Firefox and Chrome; and on an ancient Macbook Air using Firefox (but the page would not load using Safari). If you have problems, first of all, try using a different browser.
This program allows you to experiment with your images. Not every image will work well with the program. The parameter settings can dramatically affect how the image develops. You can change the parameters at any time. Once you have loaded an image, you can click the Reset drawing button (or R on the keyboard) to clear the screen and continue drawing on a new background. I suggest you load an image, see what happens with default setting. Press P to pause (or resume) if you want to stop and have a close look. Some of the settings allow you to slow down or speed up the drawing. Tweak the settings, see what the effect is. If you find a pattern of drawing that you like try a refresh to clear the previous lines and start with those settings on a blank canvas. Since the code uses random numbers in interaction with the underlying image to direct the patterns, you will get a different pattern every time. Sometimes you may get one part of the image looking good but other parts not so good. You can save that image (press S to save), then restart the drawing, perhaps with different settings… save again. Perhaps you can composite multiple images to show the best bits from a series of trials. Another thing might be to modify the image before loading it – change the colours, perhaps, blur the image perhaps, apply an edge filter (the next version will probably have some options along this line built in).
Program Controls
The program uses javascript to do the processing, so your browser does all the computing. Some browsers may handle the script differently. I developed this using Firefox ver 92.0 on a Windows 10 machine. The script should work much the same on other browsers and with different operating systems, but if you encounter a glitch, let me know.


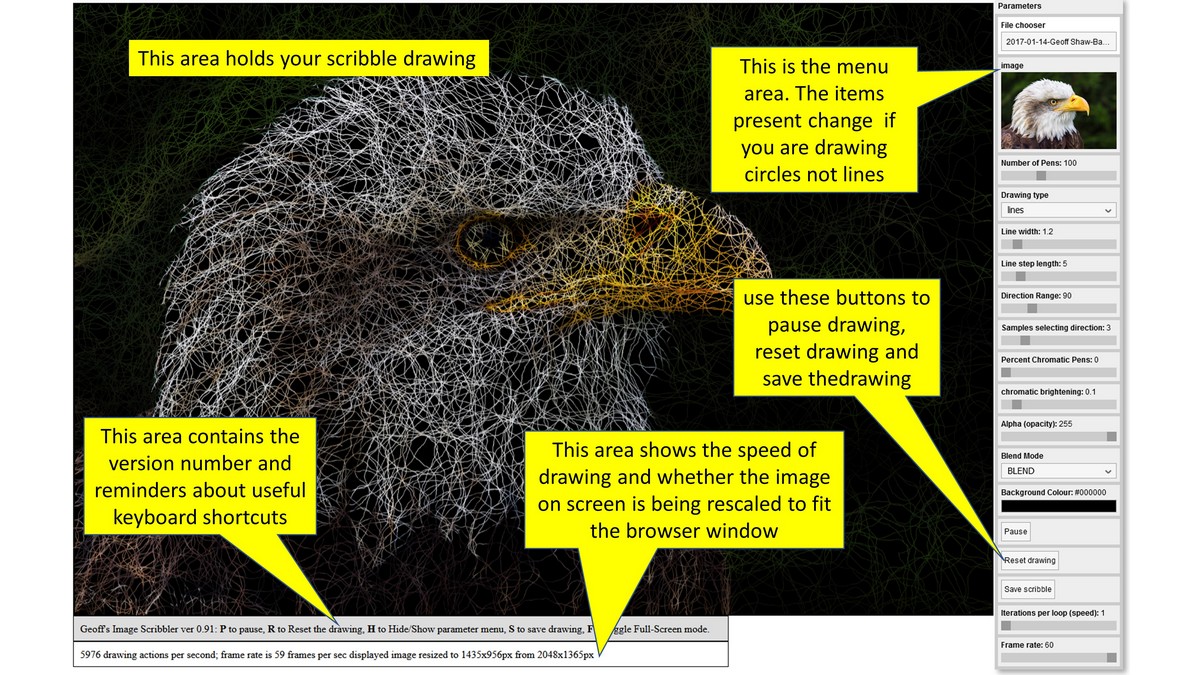
The program starts with the main parameter menu (see image right – there may be some changes as I develop the program) towards the right of your browser window. You can grab the menu title and drag the menu to a different place on your screen if you want.
You can set parameters before loading an image, or load an image and change parameters after. Use the File Chooser menu item to load a file. The menu changes to show the image thumbnail. If you choose drawing-type circles the menu changes to show the circle drawing parameters (screen grab far right).
Feel free to change the parameters to see what effects they have on the drawing. You can pause (or resume) the drawing by pressing P. To save a drawing as a PNG file press S or click the Save drawing button. You can reset the drawing to a blank canvas of the set Background Colour by pressing R or clicking the Reset Drawing button. You can also change the parameters whilst drawing is going on, to alter how the image rendering progresses.
Saving Images
Pressing S or clicking the Save drawing button opens a file save dialog. If you are drawing at the time, the drawing will be paused (you can resume by pressing P after the save). The filename suggested includes the original filename, the date and time YYYY-MM-DD_HH.MM.SS followed by a condensed list of the parameters set for that drawing – this may help if you want to use the same parameters again
- see next para for an example of a file name
- I may get around to adding code to save settings for reuse in a later version
- you are free to change the name to whatever you want in the file save dialog box.
If you set parameters then load a new image, the parameters are not reset. If you reload the page, the parameters on the menu are set to default values.
yourFileName-_2021-11-08_08.53.14_np100circles_lw1.2_sl5_dr90_ns3_
cs90_cbtrue_pc0_ca0.1_al255_bm_BLEND_bg_0,0,0_it1.png
Explanation of the parameters and what they do.
The table below lists the parameters that you can change, and gives a rough explanation of what they do, but since random functions are involved, these are only a rough outline of the sorts of things you may see as the drawing develops. Feel free to change the parameters as the image develops. You can change the drawing to see how the lines move; reset the drawing to restart from a blank background, save a sequence of images as the drawing develops … so have a play.
| Parameter | Instructions |
|---|---|
| File chooser | Should open an Open File dialog, allowing you to load a file to work on (.jpg, .png, .gif file types only). A thumbnail of the image is shown in the Image panel. Drawing starts immediately an image is loaded unless you have put the drawing into Pause mode (in which case click the Resume button or press P to restart drawing. |
| Number of Pens | When drawing lines, this determines how many lines are drawn simultaneously. More pens may increase the speed at which the drawing is rendered. A small number of pens may mean the drawing occurs only in a few small patches. The pens are initialised to random locations and directions whenever an image is loaded or the drawing is Reset. |
| Drawing type | The default is to draw lines, but you can also draw circles (see below) |
| Lines | This mode draws squiggly lines (depending on the settings), controlled by the parameters below and a set of random numbers generated by the program. You can repeatedly draw an image with the same settings with the same start image, and the result will be different every time. Some bits might come out better in some versions than others, so you can always combine several variations using masks etc to make a composite with the best of each of the drawings. |
| Line Width | Line thickness in pixels. |
| Line step length | Determines how far the next points are from the last point in each cycle of drawing. A small number will produce reasonably smooth lines. Choosing a large number will produce more polygonal lines as the program draws straight lines between points. If you choose a large Direction Range with a large step length you will get a hairy looking image. |
| Direction range | With a small direction range the next step will generally be along the line of the past segment so you get fairly straight lines. With increasing values in this setting you will get increasingly twisty lines. |
| Samples selecting direction | This works together with Direction range. A random number determines the location of the next point in the past direction plus or minus a random change in direction (Direction range). This random selection is repeated Samples selecting direction times, and the best match to the brightness of the preceding point is chosen for the next point. If this setting is 1, the move is entirely random. If you choose a large number, there will be many possible directions to select from, so the line will tend to follow brightness contours more closely. |
| Percent chromatic pens | The default draws a line from a point using the colour of the loaded image at that x,y coordinate. If you increase this setting you will get increasing numbers of pens that use just the red, green or blue channel of that colour to set the line colour. |
| chromatic brightening | The single channel “chromatic” pens tend to be a little darker overall than the original colour (they lost the brightness of two of the channels). This setting will increase the brightness of these single colour channel pens. Chromatic brightess of 1 will leave each of the colour pens at full brighness, rather than the brightness of the original spot, which doesn’t make a nice image. |
| Alpha (opacity) | This sets the alpha channel for the line drawn. Alpha of 255 is an opaque pen; 0 will make a transparent pen (not much use). Values in between will give partial transparency which can be interesting. This setting also applies to the background when it is drawn. If you want a transparent background (eg if you want to composite your doodle drawing with other images), set Alpha to zero, reset your drawing (or reload the image) to overwrite the canvas with a fully transparent background, then move the Alpha up to see the lines/circles as they are drawn over this transparent background. Note that your browser will probably show a white background (cannot make your screen transparent), but when you save the doodle drawing, the PNG output file will have a transparent background. Note there are some glitches with alpha – things may not turn out as you expect because the underlying graphics package has an issue with antialiasing that ignores the alpha setting. |
| Blend Mode | This drop down offers a range of blend modes to be used when drawing. These are similar to the ones you find in Photoshop or other layered image processing software. The default BLEND overlies each line over any preceding lines it crosses. Play with it to see what effects you get. |
| Background colour | This opens a colour picker. Depending on the blend mode, you will overwrite the existing drawing (BLEND) or mix with them in other ways. If the colour picker is open, you cannot change any other settings, so close it after setting colour. |
| Pause | This button will pause the drawing. When paused the label changes to Resume, so you can resume drawing again. You can also use P or p on the keyboard. |
| Reset Drawing | This button causes the drawing to be overwritten by the background colour. |
| Iterations per loop (speed) | Depending on the size of your image and the speed of your computer and the speed of your browser’s javascript processing, increasing this setting might increase drawing speed. If it is set too large, your drawing will get progressively more jerky in progress. This control is most of use with the Circle drawing mode. |
| Frame rate | By default, the program will draw 60 frames per second. If you need to slow down the speed of drawing, you can reduce the frame rate down as far as 1 frame a second. In circles drawing mode, each frame draws one circle per “iteration”, so if you increase iterations per loop you will also get faster drawing. In line drawing mode each frame will draw a line segment for each pen (number of pens) and will do this number of iterations per loop times for each frame. The drawing speed is also limited by the speed of your computer. A huge number of calculations occur for each drawing iteration. If you force too many calculations per drawing frame, the frame rate will fall and the program may seem jerky and unresponsive. |
| Circles | This drawing mode draws circles rather than lines. In this case the circles are drawn at random positions across the whole image, selecting colour based on the corresponding colour in the original image (as per line colour in Line mode) |
| Line width | Thickness of the circle border (black) |
| circle size | size of the circle in pixels. Play with this as the drawing is rendered. Maybe start with large circles to cover the background with colour circles, then progressively shrink the circles to get progressively more definition from the original image |
| Draw black circle border | Use this check box to turn the drawing of borders off or on. |
| OTHER CONTROLS | In circle drawing mode the remaining controls work in the same way as in Line drawing mode |
| P on the keyboard | Toggles Pause / Resume for the drawing |
| S on the keyboard | Pauses the drawing and opens a save file dialog so you can save the current drawing. You can resume drawing after the file is saved by pressing P or clicking the Resume button. NOTE: if you set your browser download settings to “Always ask you where to save files” the browser should remember the destination when you save successive drawing. |
| H on the keyboard | Hide. Toggles visibility of the parameter menu. Useful if you have a smaller screen and want to see the whole drawing as it develops without the menu covering part of your drawing (if you have a large screen you can move the menu (click and drag on the top) to place it beyond the drawing canvas. |
| Ctrl-scroll wheel | Browser/OS dependent – this alters the zoom level on the browser window. If your drawing is bigger than your screen, you can zoom out to fit more on the screen. However, the appearance of small features on the drawing may look different depending on the browser’s interpolation of the pixels to fit the zoom chosen. Also the menu will get smaller and harder to use. |
Drawing Speed
The drawing speed is determined by the speed of your computer, the speed of the javascript processor in your browser, and a number of parameters in the drawing settings. If you want to slow down the drawing, the Frame Rate parameter is useful (see above). Normally the program draws at 60 frames per second. If the calculations and drawings take less than 1/60 sec, the program will wait the remaining time before starting the next frame. At low frame rates, the drawing may look a bit jerky. If you increase the Number of pens parameter then there will be more pens drawing in each cycle, so the drawing will run faster. Another way to speed up is to increase the Iterations per loop parameter. This will also speed up the drawing, though if you take it too far, the computer will be unable to complete all the calculations within the set frame-rate so the frame rate will start to fall and the program may start to get a little unresponsive (too busy to respond to you).
Beneath the drawing you will find an information panel with tells you how many drawing actions (line segments or circles) are drawn per second and the actual frame rate achieved.
Image scaling
If you load an image larger than the available space on the browser window, the on-screen drawing that you see will be re-sized to fit in the available window. This on-screen scaled image may show some artefacts due to the re-scaling – line widths may be affected, for example. However, when you save the drawing, you will get an output file the same size as the original input image that avoids these artefacts from the re-scaling for display.
The panel under the drawing gives details on the resizing.
Privacy considerations
This program is coded in javascript. Nothing is saved on the server. I do not explicitly post any cookies or save any images or settings. Your use of the web page will generate routine web access logs, just as any web page does.
Programming Credits
This program, coded in JavaScript by Geoff Shaw. You can contact me via the contact page of this site. My code uses the following free software building blocks:
I used the Processing development environment from the Processing foundation https://processingfoundation.org/ The javascript interface P5js has an LGPL-2.1 license. The P5.js web editor was a useful tool in prototyping and learning to code javascript and Processing.
The menu system is built using quicksettings.js which is released with the MIT license.
Hi Geoff,
this are great program you have created, will you make this as a plugin for PS or GIMP ?
thanks
Ketut Suwitra
Geelong camera club.
Thanks, however I have no plans for the total rewrite of the code that would be needed to make it work as a plugin. You can always export the image from PS/GIMP, process it online, then import the edited image back as a layer in your original image if you want to do further work on the image in PS/GIMP. It gives you the same effect as a plugin, just with a few extra steps to export/save-as, process then import/open.
Cheers
Geoff