
Following David Williams inspiring workshop on 17 Feb 2026, I thought it might me useful to make some notes on some of the many things he mentioned.
Home Studios
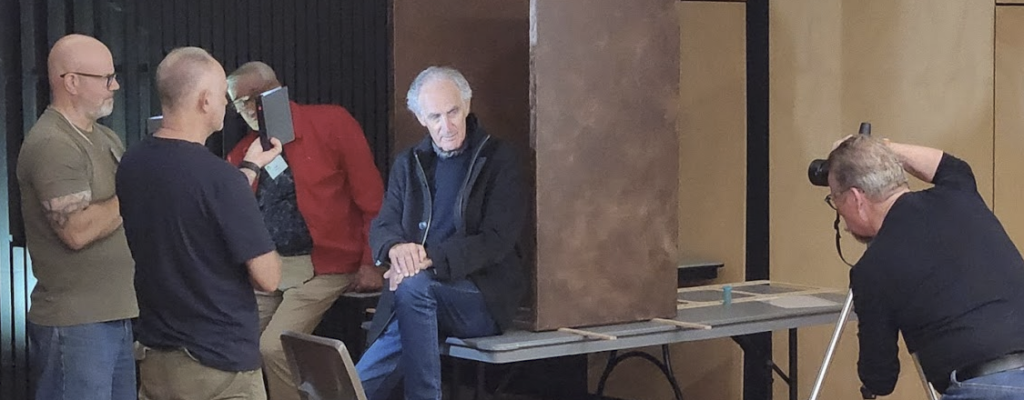
You don’t need lots of space and you don’t need lots of expensive professional flashes to take good portraits. Clever use of backdrops and positioning of the model in relation to these can provide a sense of depth in the photos even in limited spaces. For example, in his demonstration David used two cheap artist’s canvases daubed with paint and with a couple of struts screwed on the bottom so they stand up. the one nearest the camera is slightly lighter in tone than the one behind the model to give a greater sense of depth, even though the second canvas is really quite close to the subject. David used a wide aperture to get shallow depth of field to enhance the sense of depth. A table, a chair, a model … what more could you ask?
Oh yes … you could ask for some lighting.
Lighting
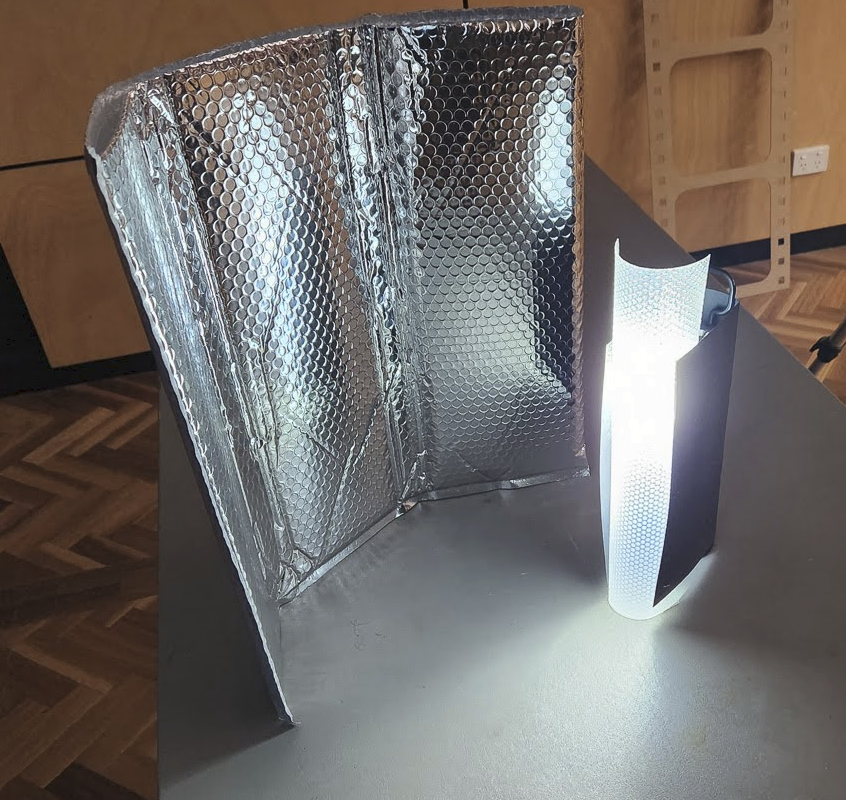
You could use professional strobes etc, but David brought some cheap LED lights he picked up at a local hardware store, and added DIY modifiers to provide a variety of effects.
In the example below he has used some black card to restrict the spread of light from the LED lamp (in a professional lighting setup you might call these “flags”). By adjusting the card you can make a narrower or wider beam so you can get the light where you need it, and only where you need it.


In the next example, David has added some translucent plastic (baking paper or thin white fabric would probably also work well). This makes a much softer lighting effect. Also in the image is some silvered packaging material that David used as a reflector. A silvered car windscreen sunshade would also serve.
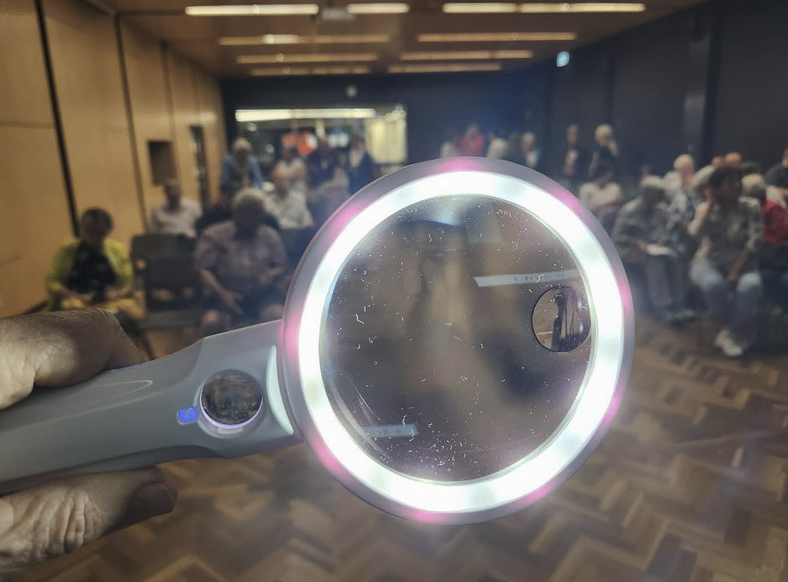
The other example he provided was a cheap magnifying glass with a ring-light, used primarily for the light it can shed on the subject, but the potential is there also to do creative things by photographing through the lens part.
Note that David’s demonstration (see first image) also involved use of multiple lights – main light, fill light, hair highlight lights etc. This involved multiple “assistants” (not all shown in the image) holding the lighting, but you can probably improvise light stands (eg tripods), or you can buy cheap light stands (they don’t need to be ultra strong – the lights used were very lightweight).
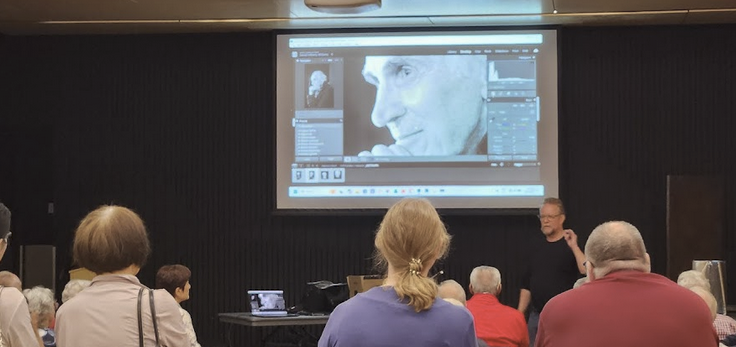
Since these cheap lamps are not extremely bright, you may need to place the lights quite near the subject, Also, the lamps may not all have the same colour temperature etc (though in my experience LED lamps tend to be about 5k colour temperature – approx daylight), so David was taking his photos in monochrome, and he used 1/25 sec, which worked well as the model was static. His photos were pin-sharp. And he used 1000 ISO. Not a problem with the high ISO capability of modern digitals, but even if you get sensor noise, is it a problem? Sometimes grain can add to an image not detract. The end result he got was certainly excellent.
Thanks for that report Geoff.
I also use a small LED light with a clamp from Bunnings with a pair of ordinary bed lamps with LED globes which I can move to get different light and shade on a model. sorry I missed that event.
http://resources.waverleycameraclub.org/wp-content/uploads/2026/03/Alan-Mackinlay-images.jpg