
These are very brief notes in response to a query. I will probably update when I have more time.
When I make a focus bracket series, I usually have some images at the beginning and end that are focused too close, or focused too far. In some cases you may have things in focus at the extremes, but you would prefer these to be out of focus to draw the eye to particular areas of the subject, rather than have all of the subject pin-sharp. It is easy to scan through your focus sequence images to see which ones you want to include.
Because focus brackets can generate very large numbers of RAW files, I generally don’t import these directly into my Lightroom catalog. I process the stack and import that (keeping a backup of the original images in case I need to go back and re-work the stack).
I like faststone image viewer (https://www.faststone.org/ windows only) to skim through the focus stack. Faststone works fine on RAW files. In faststone clicking on the image instantly zooms to 100% on the area you clicked and you can click and drag to scan across the whole image. Very handy for checking for sharpness across the image. There are lots of other programs that give similar functionality.

For stacking I use Helicon Focus https://www.heliconsoft.com/heliconsoft-products/helicon-focus/ which I find excellent. It is very fast. Zerene stacker is another excellent product with similar features. It may give slightly better stacks for some sorts of images, but it is considerably slower. Photoshop has some stacking functionality, but much less capable with complex subjects – it can auto-align and auto-mask, but if you need to tweak the masking it is a nightmare. Helicon and Zerene make post-stacking adjustments easy.
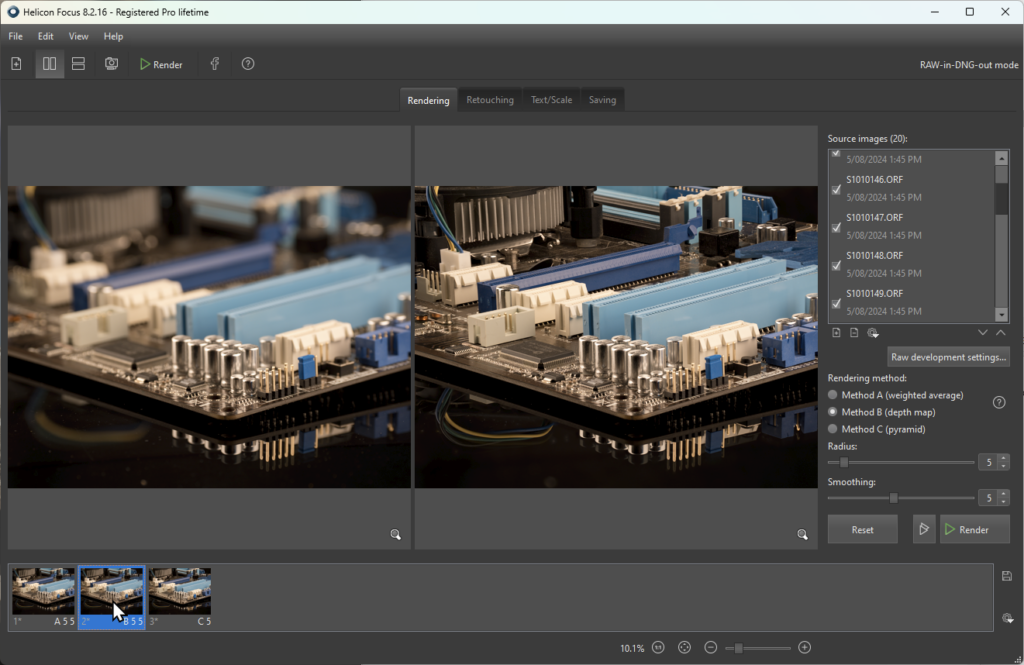
So, generally, I drag the set of raw images I want to stack onto the Helicon window. It quickly digests the raw files and presents a list of source images on the right and a rendered image on the left.
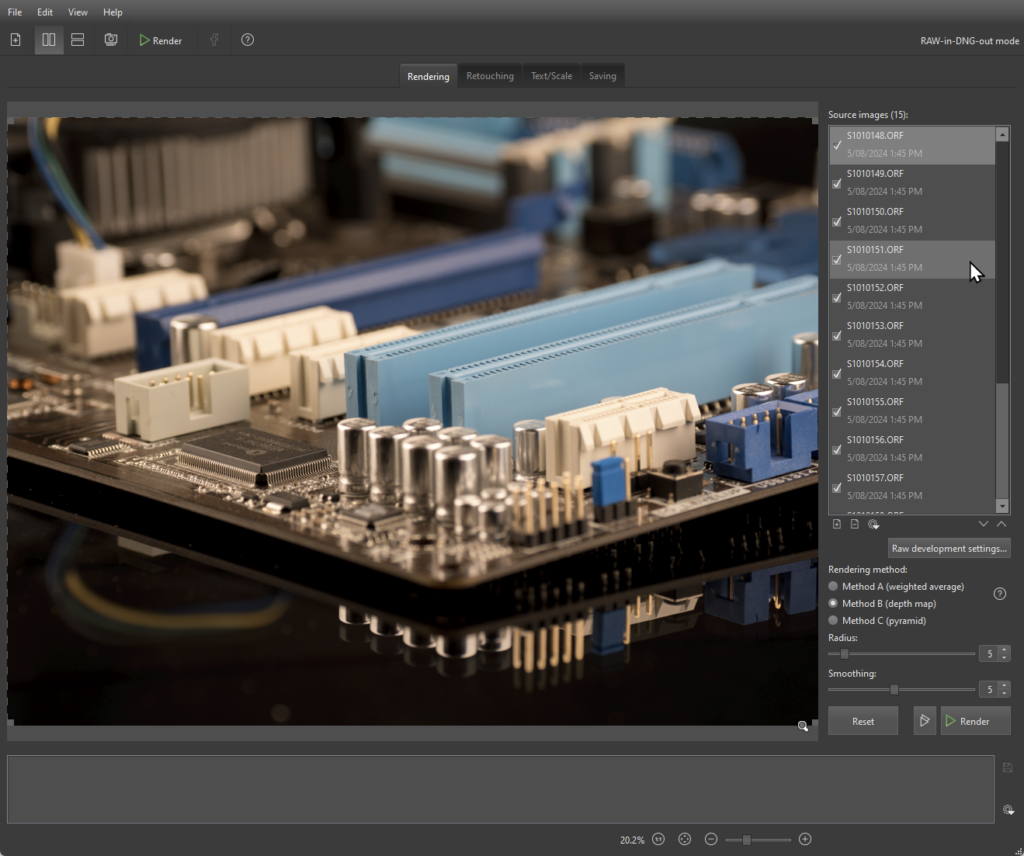
You can click the source image list to view any of the files; you can zoom in to see the detail on each image; you can select/deselect source images to include/exclude from stacking. Once you have decided which images to use, choose a rendering method. Helicon gives useful guides on which method to use for different subjects, or just play, try them all out, adjust the parameters, and click the Render Button. With the 20 images in my test stack rendering takes less than 10 seconds, so you can afford to experiment. This isn’t a press the button and “go away for a cup of tea whilst it works” sort of program. Each rendering will give you an image in the right hand panel that you can browse/zoom etc to see if you are happy. thumbnail at the bottom that you can click to select so you can browse and compare.
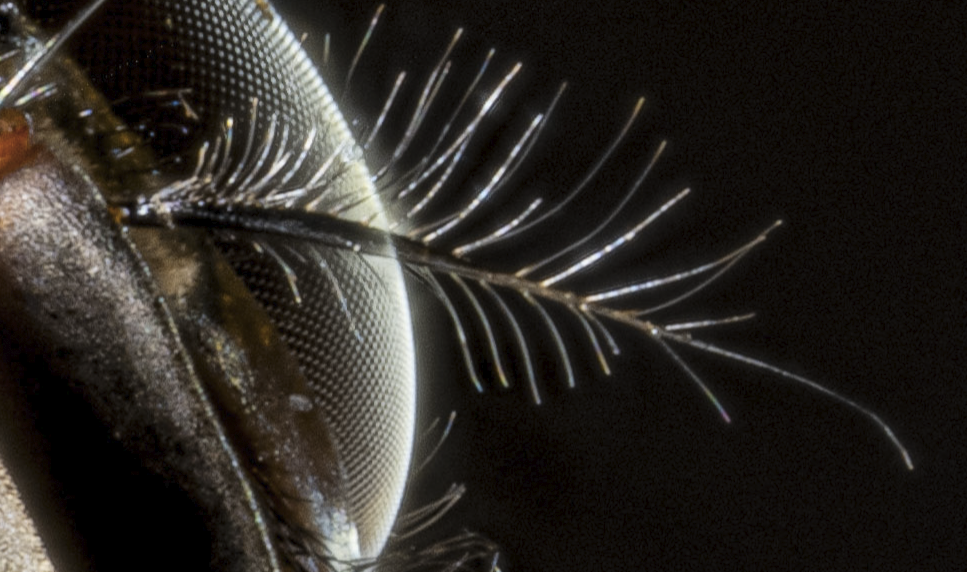
Quite often my stacks need some extra attention, particularly with complex subjects with many overlapping elements (eg hairs, antennae etc). Focusing on the surfaces behind the antenna for example, you will find that the out-of-focus antenna obscures an area. Or out of focus elements might bleed out over the background. You can see that in the image below. A defocused highlight from the edge of the eye of this fly is lightening up the otherwise black background. There are also glitches in the hairs where they cross the edge of the eye.
These sorts of artefact are relatively easy to fix (albeit somewhat fiddly) with the “retouching” tools in Helicon where you can copy from a selected source image (here you would choose a source image where the eye edge is in focus, then paint in the areas where the rendered image shows the out of focus. Or you can clone from different areas etc etc. See the Helicon documentation if you want to find more. Zerene has similar retouching tools.
Anyway, back to workflow, once I have stacked and retouched the image(s) I save to a TIFF and then load that into Lightroom. Just saving the processed image saves a lot of disk space on my main drive. If I think I might want to come back and reprocess, I will save the original RAW files onto a backup drive. I can easily find them then by date or file name.
Helicon Focus has a 30 day free trial. I think Zerene does too. There are a variety of other packages like combine ZP (free) that also stack, and focus stacking is a feature in a variety of other software like Photoshop.
In summary, my workflow is:
- Drag original raw files from camera SD card onto Helicon focus
- Stack (compare different rendering methods/settings)
- Retouch to fix up any glitches
- Save the stacked image to photo drive and load into LR. Add keywords etc as desired.
- Backup the original focus bracket set to backup drive.
- Have a nice cup of tea.