You may find this also referred to as digital asset management. After all, your digital images are an asset. The topic includes much more than just ‘where do I put my file’. Image files have a lot of metadata stored inside the file including camera settings, time the image was taken, GPS location, copyright data (if you have set your camera to save this in the file) and so on. You can add to this with keywords and other metadata that will later assist you to find and manage your images. In addition a digital image management system may include management structures outside of the image file, its metadata, and its physical location in disk. Lightroom, for example, allows you to organise images in virtual locations called collections, to facilitate sorting and collating. This information is stored in Lightroom’s catalog, separate from the files.
File management strategies are best resolved early on. Without good file management you will probably find it hard to locate images later on (but back in the old days, before digital images, finding images (slides) was a real nightmare). I currently have about 200,000 images, so without a consistently managed file workflow, it would be challenging to find images for next month’s camera club competition. Fortunately I have a systematic process that assists me. In the workflow below, I use Lightroom for my file management, but the same general principles apply with any image management program (eg the free Adobe Bridge).
Everyone develops their own methods, but here is an outline of my process. At the end is a list of links to other people’s web pages on this topic.
I use Lightroom for my file management. Whatever software you use, the same general principles apply. Save your files with a consistent file structure. Add keywords to the metadata to facilitate future searching (or at the least, add keywords to the relevant folder names so you can find the folder containing the images).
- Copy files from the card onto my hard drive.
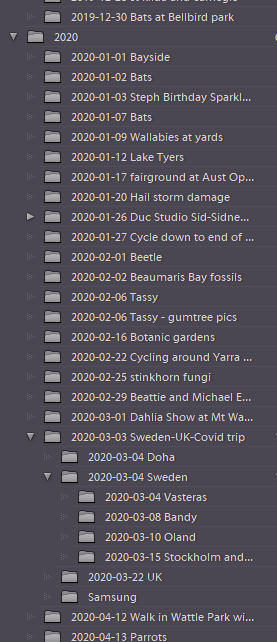
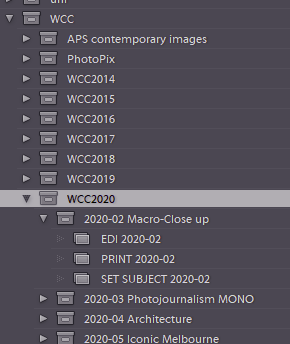
I keep files organised in folders. Top level folders for the year. Sub-folders for the day or the event (see image right). Each folder is named for the date and some keywords to identify the contents. (tip: use ISO date format – yyyy-mm-dd and things will sort well. Sorting of dates in file names gets difficult in other formats – eg 1 Apr 2020 comes before 30 Jan 1990 if file names are sorted alphabetically).
Note: Lightroom can be configured to automatically transfer files from card to hard drive (including making a copy in a backup location at the same time), but I prefer to keep control of this vital step so I know exactly where my images are. - I drag the new folder onto my Lightroom Library window to start the import. I use “Add photos to catalog without moving them”. I have configured my import to add my copyright metadata. Sometimes I add keywords at this stage, if there are keywords that apply to all images, but usually I add keywords later.
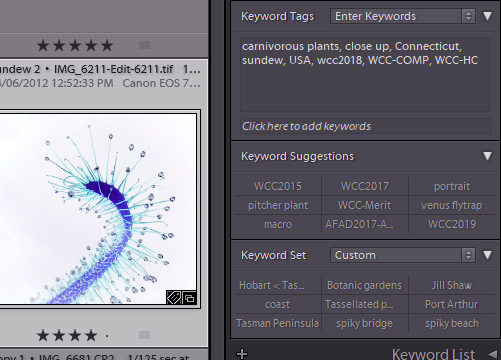
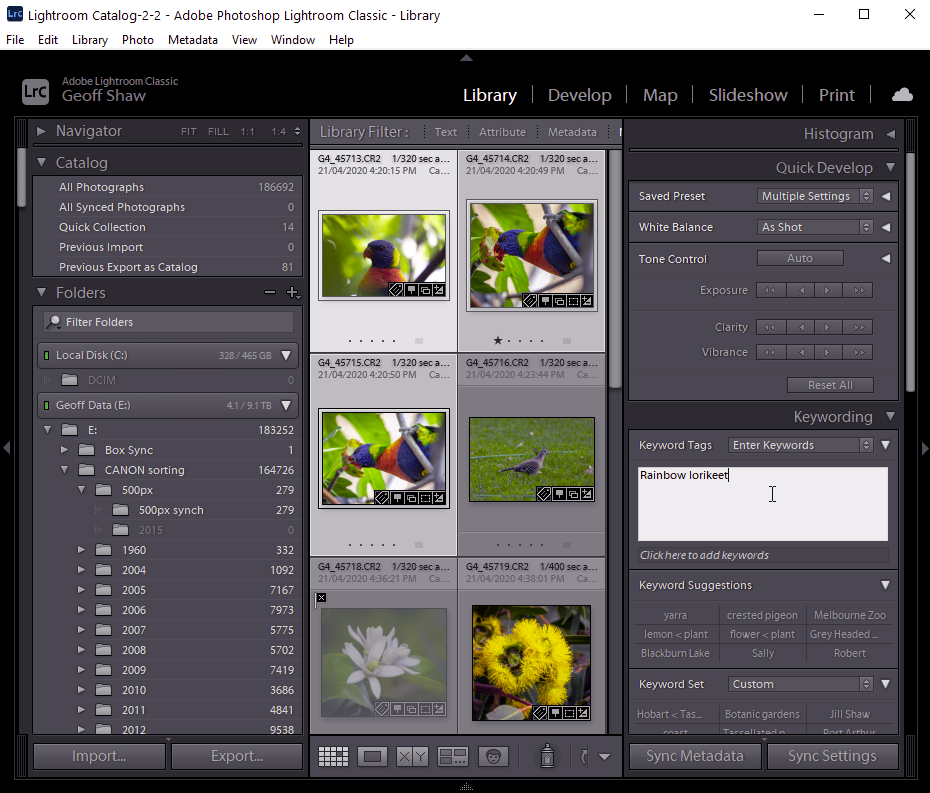
- In the Grid view I select groups of photos and add keywords that I expect will be useful for later searches. For example I might select all images with rainbow lorikeets, and add the keyword Rainbow lorikeet (keywords are very powerful in Lightroom. I have a heirarchical structure, with Animals > birds > parrots > rainbow lorrikeets so if I tag a photo as a rainbow lorikeet I can later find it by searching for parrot, birds or animals. I’ll get round to a page on keywords later.
- When I have used a camera without GPS I usually add location data (in the map module, select groups of images and drag them to a location on the map to add the location metadata to the file. It is best to do this soon after the photography so you don’t forget where you were.

- I do a quick review and give a rating of 1 star to any images I think are worth further processing (sometimes I come back and find gems in the ones I didn’t star the first time round). I may do some basic editing – exposure, contrast etc (or even just hit the AUTO button to get LR to do some automatic adjustments) at this stage before I rate. Images that look poor before a quick edit might look more promising once they have had basic edits done. Unusable photos are marked as rejected, and at the end of the session I use the Photo>>Delete rejected photos menu to review all the rejects (sometimes I accidentally mark OK images for deletion), fix any glitches, and delete the files from the catalog and disk (this saves disk space that would otherwise be used by never-usable images).
- I filter the folder for the Star rated images and do a second rating session (often the next day) to tag some with 2-stars. On some of these I will do more extensive edits either using Lightroom or in Photoshop, with further changes in rating as warranted. Sometimes I leave further editing until I might want to use that particular image — why expend effort in fine edits unless you will be using the image for showing, competition, to illustrate something, for a web page etc..
- I make sure all the images are backed up to backup drives. I use a utility that does this for me without any intervention, but I check from time to time (monthly calendar reminder) that the backups are up to date. I periodically also make a backup of my files and LR catalog onto a USB drive that I keep off-site. I have about 5 TB of images/catalog/previews, so I have not used the backup to the cloud route, but if you have smaller storage requirements, backup to one of the many cloud storage facilities might be a good option for you.
Adobe Bridge is free (at least it is at the time I write this) and has some powerful file management abilities, including editing metadata, adding keywords and ratings, and powerful organisation functions such as collections (see below). You can directly open your images from bridge in your editing program (customisable – you are not limited to photoshop).
Luminar has file management functions … I am not sure about recent versions of Topaz photo studio, DxO etc. I may get around to adding some more specific information on the various applications at a later stage. Check the index/menu/search options in whatever software you use. If your software does not have good file management functions you can always team it up with something like Bridge to give you file management and just use your software for image editing.
are in folders by date. I can organise my
collections in whatever structure makes sense,
putting image links into multiple collections,
all without moving the original files.
Some people start to organise their images by putting them in folders based on subject. However there is a problem with this. Do you file that photo of an elephant in the African holiday folder, or the Animals folder? Should that fantastic portrait of your spouse go in the Portraits folder or the Family folder? Or perhaps the Venice Holiday folder since you took it there? I guess you could make multiple copies of each image, one in each relevant folder, but that would get confusing – which do you edit? That is one reason why adding keywords is so important. Label that elephant image with several keywords – Africa; Holiday; Safari; 2020; Animal; Elephant etc… then you can use a search function to bring up all the elephant photos, be they ones on safari or ones in the zoo.
Want to try out two different versions? make a virtual copy (Lightroom does this; they are present in DxO Optics Pro; It is slated for Luminar “soon”; not sure about Topaz Studio Affinity Photo.). Perhaps crop them differently; perhaps make one monochrome; make multiple virtual copies and try out different processing steps. Compare the results and select the best.
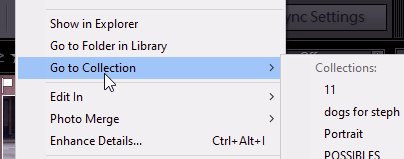
Some software, such as Lightroom allow you to create virtual folders that allow you to organise your photos in whatever structure you want (In Lightroom and Adobe Bridge these are called collections; in Luminar they are called albums). A photo can be in multiple virtual folders, but only one original file is stored on the disk. The entries in the virtual folders are just pointers to that one image. Thus, you might have the Elephant image in a folder on the disk called Africa Holiday; then you can add a link to the image in collections Holidays \ 2020 \ Africa, and also in Animals \ wildlife ; In the Holidays collection add 1999 in which you can make a collection for Venice. Add a link to that lovely portrait of your spouse; add the image also to your Family collection, and your Portrait collection. And now it is WCC competition time. Make a collection for WCC \ 2020\ 11 (11 = November) and drag a link to the elephant and the portrait into the folder along with a dozen other likely candidates. Browse them. Remove the ones you decide against. All you are doing is adding or deleting links to the original image. Want to edit – the edit module will apply any changes to the original file. All the links in all the different collection folders will immediately show the changes, since they are just links to the file that now has edits on it. Want to find which collections a particular image is in? right click on the thumbnail and select Go to Collection to get a clickable list of locations.