
Introduction
From time to time you may find you just don’t have enough pixels in your image. For example you may want to make a huge print from your image (or a smaller print from a cropped part of your image). Just enlarging the image will produce a blocky or pixellated image. Fortunately there are better approaches. The example below relates to Photoshop and Lightroom, but if you are using other software, it is likely you will have access to similar alternatives.
Upscaling/Resampling options

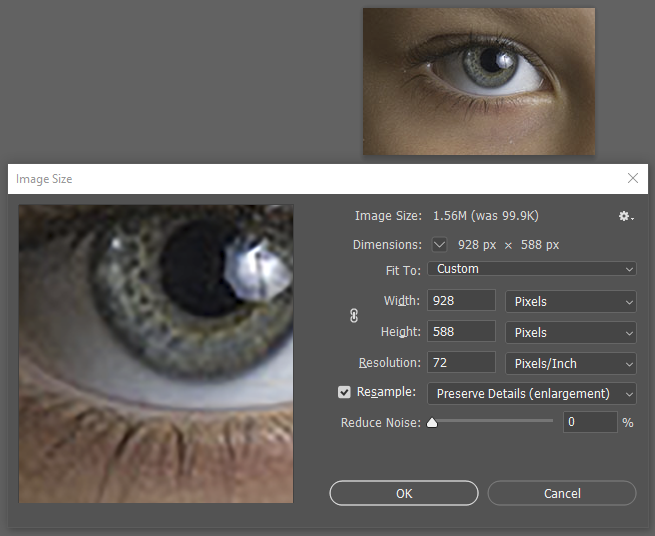
In Photoshop, you up-scale images using the menu Image>>Image Size. In the screen grab below I am changing an image 232 x 147 pixels at 18 pixels per inch up to 72 pixels per inch (928x 588 pixels) – ie a 4-times enlargement in each dimension. Note that the resample box is checked. You can choose to adjust the size by entering new width or height (note the chain link to the left of the width/height boxes – if you click this the height and width will be bracketed by a thin line and this setting keeps the width and height locked so they change in proportion), or you can change the resolution (in my case I changed it from 18 to 72, a 4-times increase). This changes the horizontal and vertical resolution so the aspect ratio remains unchanged.
Note that a 4-times increase in linear dimensions is dramatic! I only chose this to highlight the differences in the results for up-scaling.
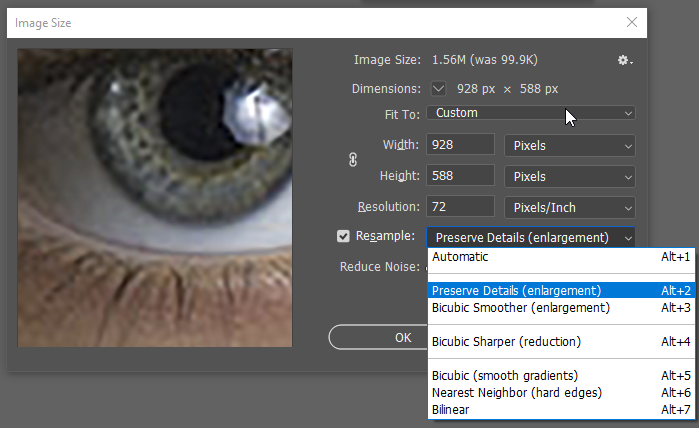
With resampling ticked, you get some options for the algorithm used to up-scale the image. The automatic setting will attempt to choose the best option, but you can also manually select the setting to suit your needs/the characteristics of the image you are processing.
Here are some examples. Note you may need to click the images to get the full size image for best comparison – the HTML page might resize the images to fit your screen so you will be looking at a resized resized image.
Original image downsized to one quarter to make a starting point for up-scaling tests..Note that a 4x up-scaling is fairly dramatic. every 4×4 pixel block has been averaged to a single pixel. ie you convert 16 pixels to one pixel – you throw away 93.75% of the original pixels. Now, how good can the up-scaling be to restore the quality lost?

Upscaled 4x, using nearest neighbour. The simplest method. Each pixel becomes a 4×4 block of the same colour. Note the pixelated appearance, particularly visible around edges.

The image below used bicubic (smooth gradients) interpolation, which takes generates the new pixels using an algorithm using a weighted average of the surrounding pixels. A much better result than the nearest neighbour interpolation.

Below I used the bicubic Smoother (enlargement) setting. very similar to the Bicubic (smooth gradients) but perhaps a little more detail/contrast on the eye lashes.

Below I used the preserve details (enlargement) setting. This brings out more fine texture in the skin and a bit more contrast on the lashes.

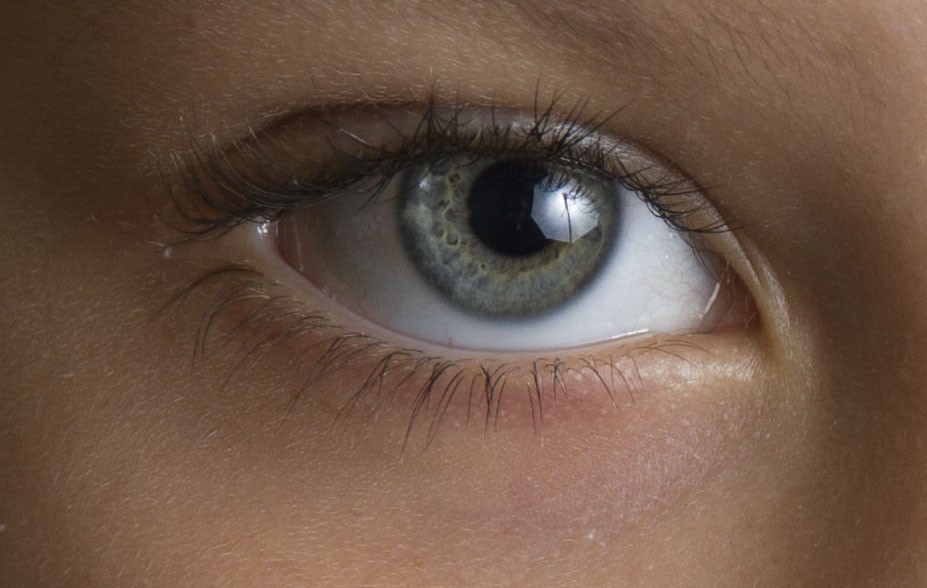
Here is an original image. Note the sharpness of the eye and the smooth texture in the skin. It shows you cannot throw away 94% of the pixel data and expect to magically restore it without loss of quality.
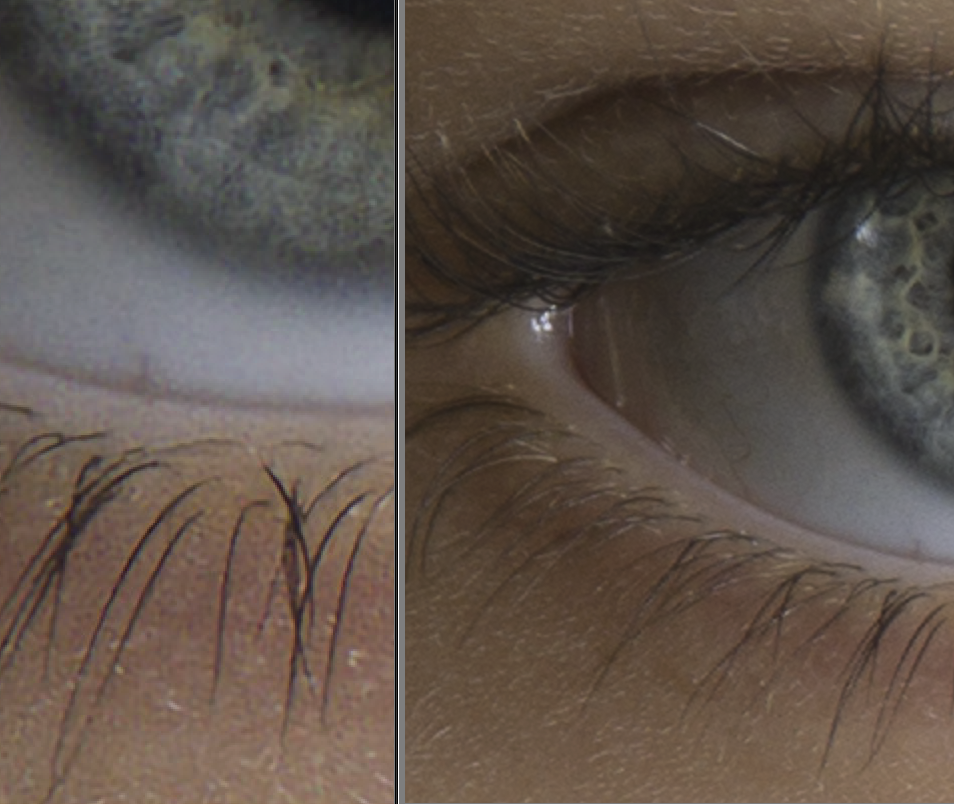
There is one more option to consider. In Adobe Camera Raw based programs (eg Lightroom and Photoshop) you can also get an additional up-scaling algorithm “Enhance” which uses Artificial Intelligence algorithms to enlarge a RAW image by a factor of 2. You can actually use this algorithm on non-RAW images by opening them in the Adobe Camera Raw (ACR) application, but I suspect the results will be worse without the extra information buried in the RAW file. See https://helpx.adobe.com/camera-raw/using/enhance.html for more details. In the image below is a screen clip of part of a compare images panel in LR. The left side is the enhanced version (2x) of the image on the right. It looks to do a fairly good job. Note this is not a good comparison with the resizing examples above, as this is enlarging the original image and only using a 2x enlargement.
UPDATE (2022):
Topaz Labs make an AI based program, Gigapixel AI, that can do an excellent job resizing images. It works as a plugin to Photoshop too. But take care to check the output – sometimes it introduces some glaring artefacts.
Further resources
https://www.howtogeek.com/718002/how-to-use-photoshop-and-lightrooms-super-resolution-feature/
https://www.adobe.com/au/creativecloud/photography/discover/increase-resolution.html